7 Settings
7.1 Access map features by Role
| Functionality | SuperAdmin | Admin | Operator | Reader |
|---|---|---|---|---|
| Settings |  Yes Yes |
Yes |
 No No |
No |
| Configuration | Yes |
Yes |
No |
No |
| General: Access to change the general settings of the site | Yes |
Yes |
No |
No |
| Import: Access to Import Fixtures from a CSV or Excel file (in the Main Group) | Yes |
Yes |
No |
No |
| Alerts: Access to configure Alerts for Gateways | Yes |
Yes |
No |
No |
| - Access to configure alerts for Fixtures | Yes |
Yes |
No |
No |
| Users: Access to create or edit Users | Yes |
Yes |
No |
No |
| - Access to Associate Gateways to a User | Yes |
Yes |
No |
No |
| - Access to modify the Role of a User | Yes |
Yes |
No |
No |
| - Access to Associate Modules to a User | Yes |
No |
No |
No |
| Map: Access to modify the Map used in the Dashboard | Yes |
Yes |
No |
No |
| Logo: Access to modify the Logo | Yes |
Yes |
No |
No |
| Icons: Can create, edit and delete to an Icon set | Yes |
Yes |
No |
No |
| Actions: Access to send specialized commands to fixtures | Yes |
No |
No |
No |
| Services: Access to the Configuration of Services of the Web Application | Yes |
No |
No |
No |
| Functionality: Access control factor intensity (dimming) | Yes |
No |
No |
No |
| Email: Access to configure the parameters of the Email server used to send Alerts | Yes |
Yes |
No |
No |
| User profile: Access to modify the user personal information | Yes |
Yes |
Yes |
Yes |
| Modules | Yes |
Yes |
No |
No |
| Access to the Modules Enabled/Associated | Yes |
Yes (password entry required) |
No |
No |
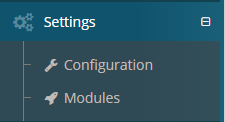
7.2 Configuration
7.2.1 General
Allows to modify the basic characteristics of the site.
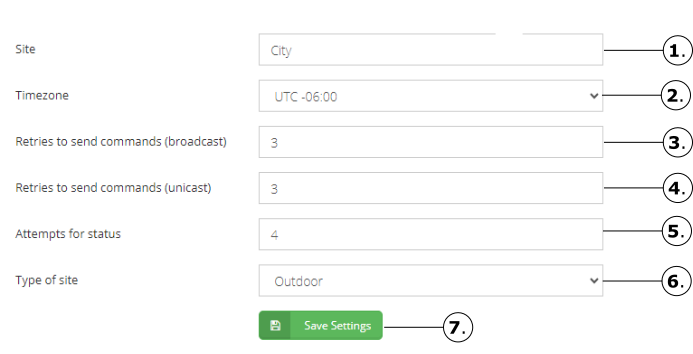
The name of the site is the name that all users will always see in the header of the site.
Time zone of the geographical region of the site; this configuration allows automated tasks related to the site to performed according to time zone set.
Number of retries to send a command in broadcast.
Number of retries to send a command in unicast.
Number of attempts sending a command before changing a lamp as failed (red icon).
Change a site from Indoor(Inside) to Outdoor (Outside) mode.
Clicking the Save Settings button, a commit pop-up window will be displayed before saving the changes.

A notification message will be shown once the operation is completed.

7.2.2 Import
This option allows to upload several fixtures or groups at once on the site. This option requires a Microsoft Excel file.
7.2.2.1 Import Fixtures
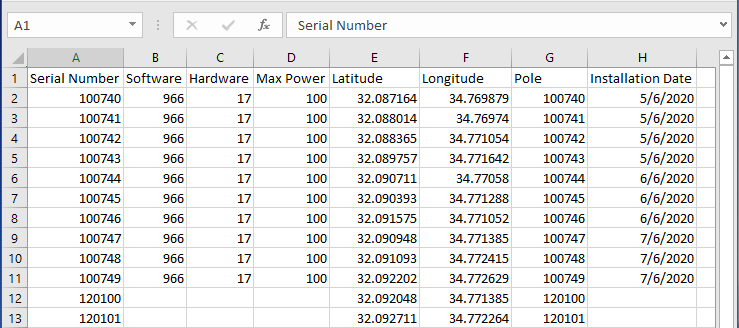
The Excel file must contain the following fields: *Serial number, Software (Firmware), Hardware, Max Power, *Latitude, *Longitude, *Number or name of the pole, and installation date. The fields have to be in the mentioned order.

The description of each of the above-mentioned fields is described below:
*Serial number: Enter the serial number of the fixture for each new fixture. The field is of numerical type; therefore, it does not accept letters or special symbols.
Software (Firmware): Enter the firmware version that has the fixture installed. If do not know the version, then the value can be empty. The field is of numerical type; therefore, it does not accept special letters or symbols.
Hardware: Enter the hardware version of the fixture. If do not know the version, the value may be empty. The field is of numerical type; therefore, it does not accept special letters or symbols.
Max Power: Enter the maximum wattage in watts of each fixture. If do not know the wattage the value may be empty. The field is of numerical type; therefore, it does not accept special letters or symbols.
*Latitude: Enter the latitude (geographical coordinate) where the fixture is physically installed (location). The field is decimal type and allows positive and negative values, does not accept letters or special symbols.
*Longitude: Enter the longitude (geographical coordinate) where the fixture is physically installed (location). The field is decimal type and allows positive and negative values, does not accept letters or special symbols.
*Pole: Enter the name or pole number where the fixture is installed. This field accepts letters, numbers or special symbols - (Hyphen) and _ (Underscore).
Installation Date: Enter the installation date for each physically installed fixture. If do not know the installation date, the value may be empty. The field must comply with the following format D/M/YYYY where D = day, M = month and YYYY = year in 4-digit format. This field does not accept special letters or symbols except /.
The fields containing an asterisk (*) are required fields.
Preview the contents of the Excel file with the name “Import.xlsx”
This option allows several fixtures to be loaded at once on the site, to import the fixtures follow these steps:
Click on the Fixtures tab
Select the Main Group
Select the Gateway to establish communication with the fixtures
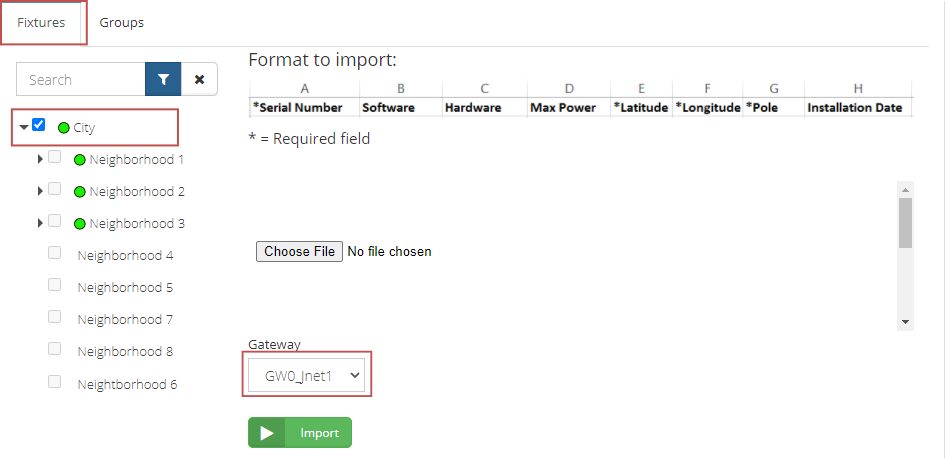
- To load the contents of the file, click on the Choose File button, after selecting a file, the contents of the file will be displayed, separated by a line each fixture and separated by ‘,’ the corresponding fields of the fixture.
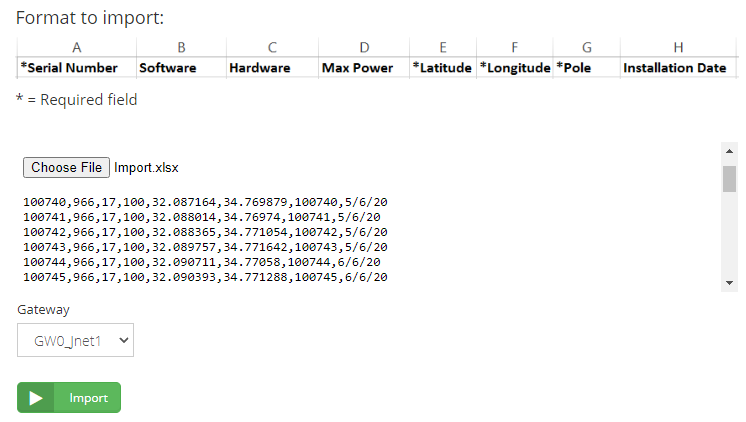
- Clicking the Import button will start the process.

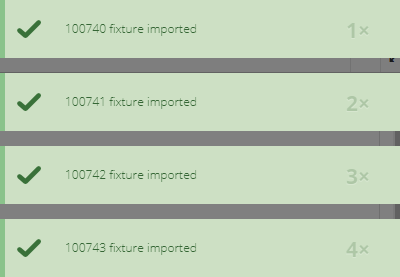
A confirmation pop-up window will be displayed before the fixtures are created in the selected Group.

If the import of the fixtures is confirmed, then a progress bar will be displayed while the process is done.

An informative message will appear at the top of the screen indicating the successful uploading for each fixture.
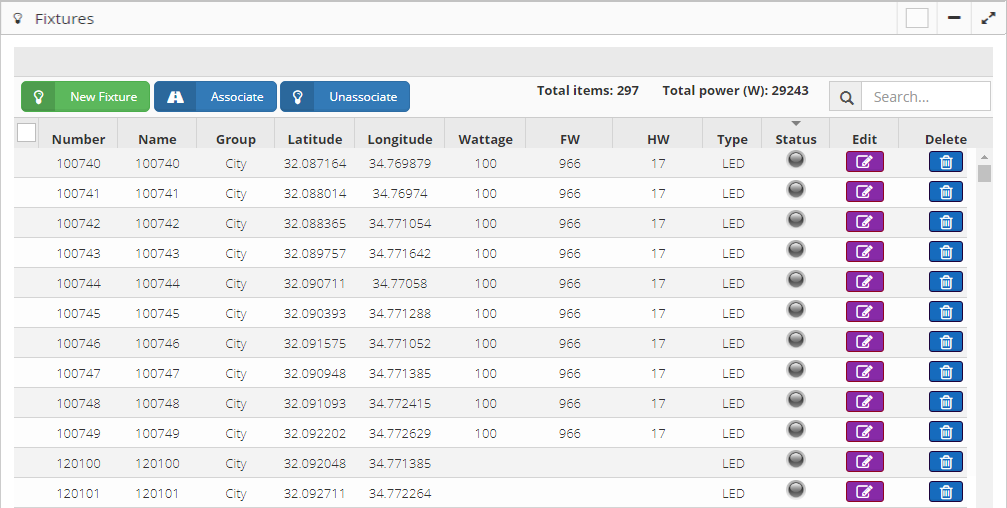
The new imported fixtures on the site can be viewed.
7.2.2.2 Import Groups
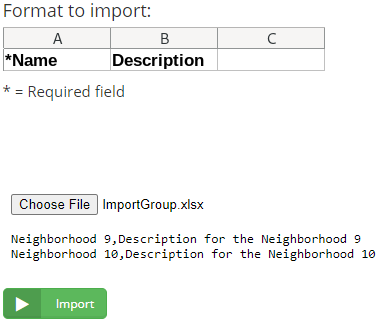
The Excel file must contain the following fields: *Name and Description. The fields have to be in the mentioned order.

The description of each of the above-mentioned fields is described below:
*Name: Enter the name for the group is create. This field accepts letters, numbers or special symbols - (Hyphen) and _ (Underscore).
Description: Enter the description for the group is create. This field accepts letters, numbers or special symbols - (Hyphen) and _ (Underscore).
The fields containing an asterisk (*) are required fields.
Preview the contents of the Excel file with the name “ImportGroup.xlsx”

This option allows several groups to be loaded at once on the site, to import the groups follow these steps:
Click on the Groups tab
Select the Main Group
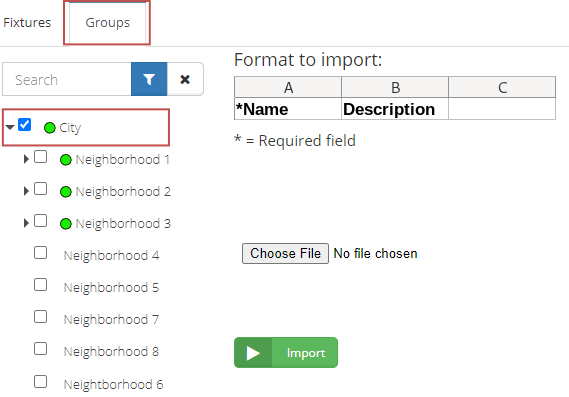
- To load the contents of the file, click on the Choose File button, after selecting a file, the contents of the file will be displayed, separated by a line each group and separated by ‘,’ the corresponding fields of the group.
- Clicking the Import button will start the process.
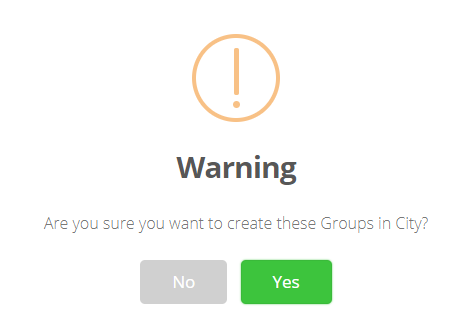
A confirmation pop-up window will be displayed before the Group are created in the selected Group.
An informative message will appear at the top of the screen indicating the successful uploading of the groups.

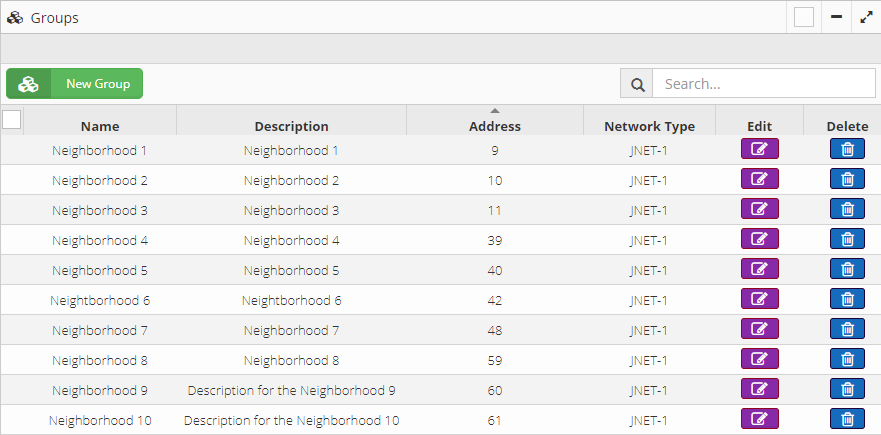
The new imported groups on the site can be viewed.
7.2.3 Alerts
This option allows to configure Gateway, fixture or consumption alerts.
7.2.3.1 Gateway
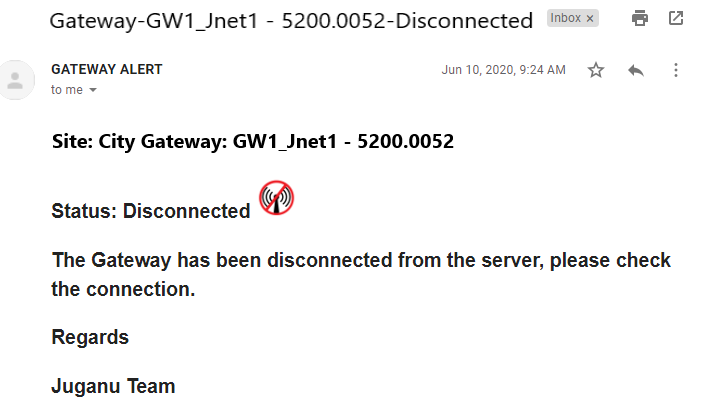
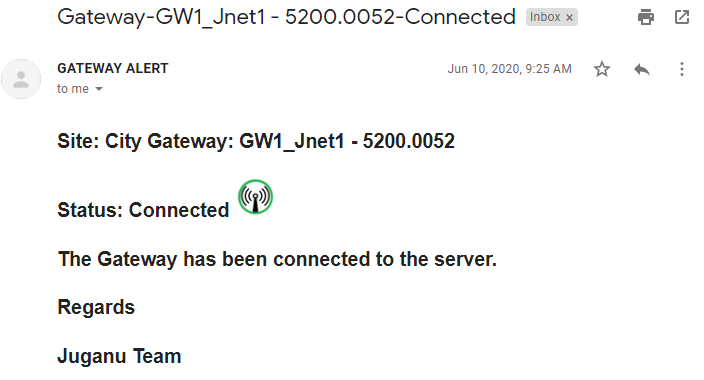
An alert email will be sent when a Gateway has been disconnected or connected to the system.
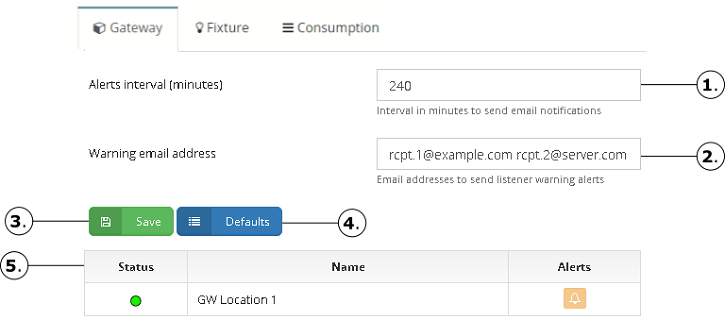
Interval in minutes to send repetitive email alerts when a Gateway is disconnected.
Email addresses to send the alerts. Email addresses should be separated by blanks.
Clicking the button will save the changes made.
Reverts the settings to the default values.
The table showing the list of Gateways stored on the Site. The description of the columns is described below:
Displays the status of the Gateway according to the following icon colors:
Gray: Indicates that the Gateway has been recently created or the Gateway has been disabled from the system.
Green: Indicates that the Gateway is connected (online).
Red: Indicates that the Gateway is disconnected (offline).
Displays the Gateway name.
Button allows to disable the email alerts of the selected Gateway.
NOTE: The alerts can be disabled only when the Gateway is offline.
7.2.3.1.1 Example of email alerting that the Gateway is disconnected:
7.2.3.1.2 Example of email alerting that the Gateway is connected:
7.2.3.2 Fixture
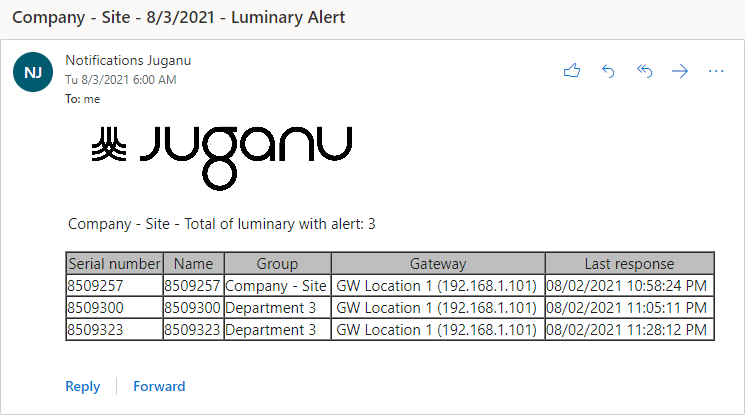
An alert email will be sent with a detailed summary of the failed fixtures.
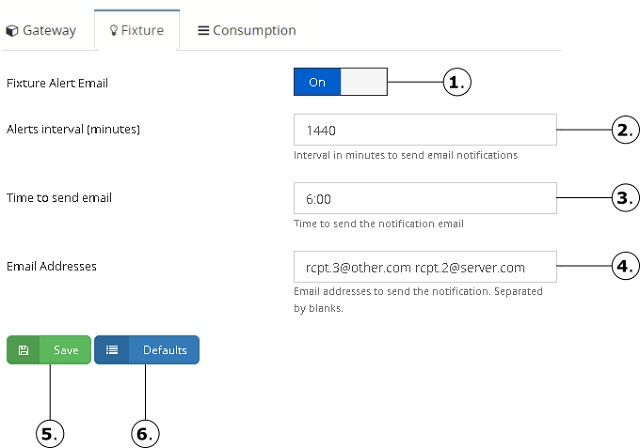
Enables or disables the fixture alert functionality for the site.
Interval in minutes to send email alerts.
Time to send the email notification.
Email addresses to send the alert. Email addresses should be separated by blanks.
Clicking the button will save the changes made.
Reverts the settings to the default values.
7.2.3.2.1 Example of mail Luminary Alert:
7.2.3.3 Consumption
An alert email will be sent with a detailed summary of consumption.
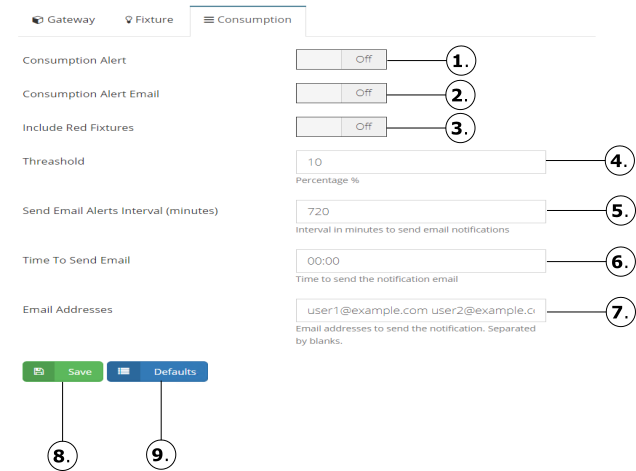
Enables or disables the Consumption alert functionality for the site.
Enable or disable send email alert.
Enable or disable send include red fixtures on email alert.
Establish the threshold to send consumption alert.
Interval in minutes to send email alerts.
Time to send the email notification.
Email addresses to send the alert. Email addresses should be separated by blanks.
Clicking the button will save the changes made.
Reverts the settings to the default values.
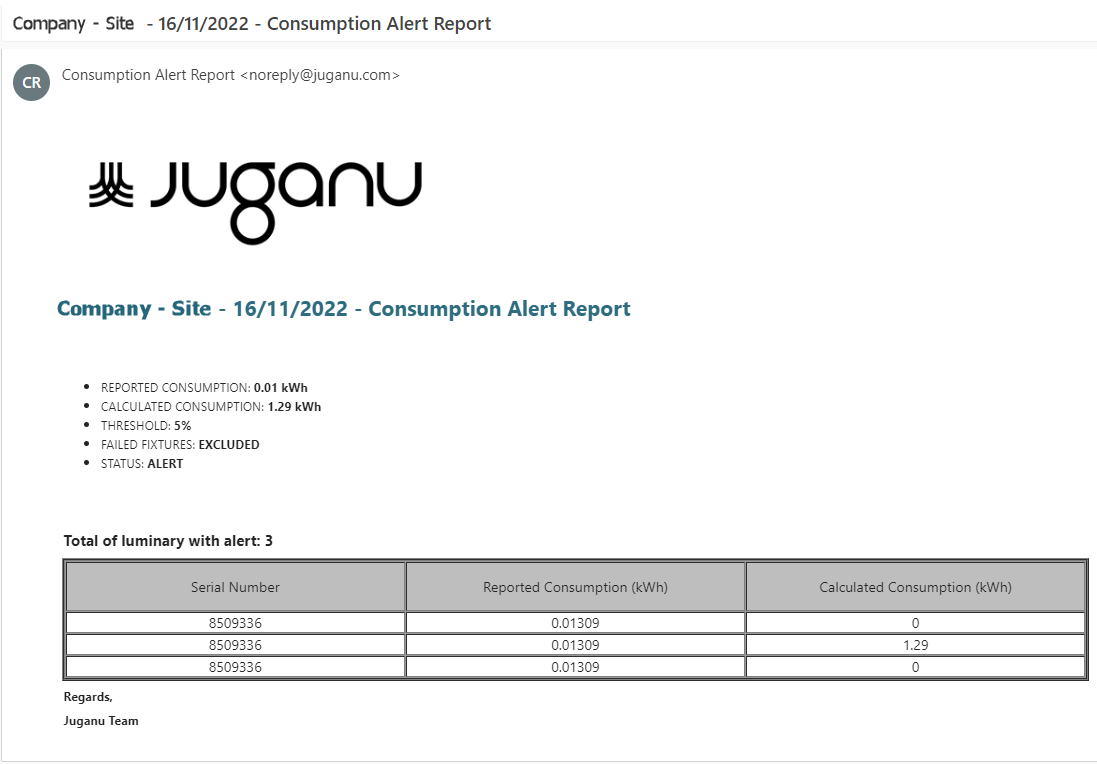
7.2.3.3.1 Example of mail Consumption Alert:
7.2.4 Users
To access and manage the site, the list of assigned users with different roles and permissions is displayed. The access to changes in the site will depend on the roles and permissions assigned. Changes or actions made by users during their session on the site are stored in an event log.
In this configuration, roles and access permissions are managed according to the criteria defined for each user who will use the site.
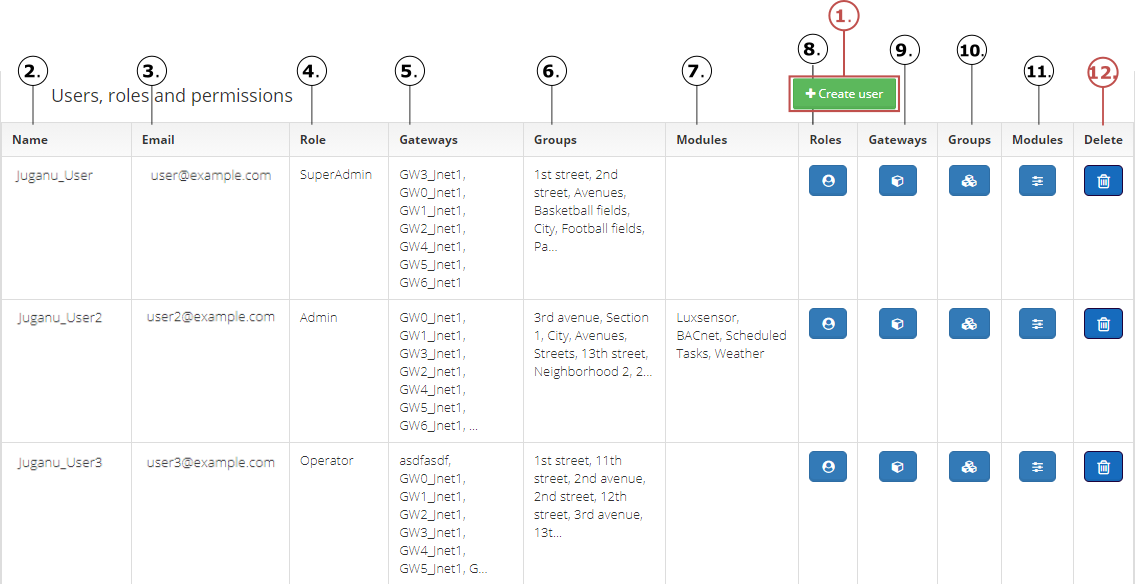
Clicking on the button will show a pop-up window for creating a new user (for this option, only a user with the required permissions can do it). See Add user
Column showing the user name (ID) for each user shown in the table.
Column showing the associated email for each user displayed in the table.
Column showing the assigned role for each user shown in the table.
Column showing the list of assigned Gateways (separated by commas) for each user shown in the table.
Column showing the list of assigned Groups (separated by commas) for each user shown in the table.
Column showing the list of assigned modules (separated by commas) for each user shown in the table.
Clicking the button will display a pop-up window for editing the role for the selected user. See Edit role
Clicking on the button will display a pop-up window that will show the Gateways that the selected user can Manage. See Edit Gateways
Clicking on the button will display a pop-up window that will show the Groups that the selected user can Manage. See Edit Groups
Clicking on the button will show a pop-up window that will show the modules so that the selected user has permission to access it. See Edit modules
Clicking on the button will show a pop-up window that will allow to confirm deleting the user (for this option, only a user with the required permissions can do it).

7.2.4.1 Add user
Clicking on the button will display a pop-up window titled New user that will show the fields to enter for the correct creation of the user.

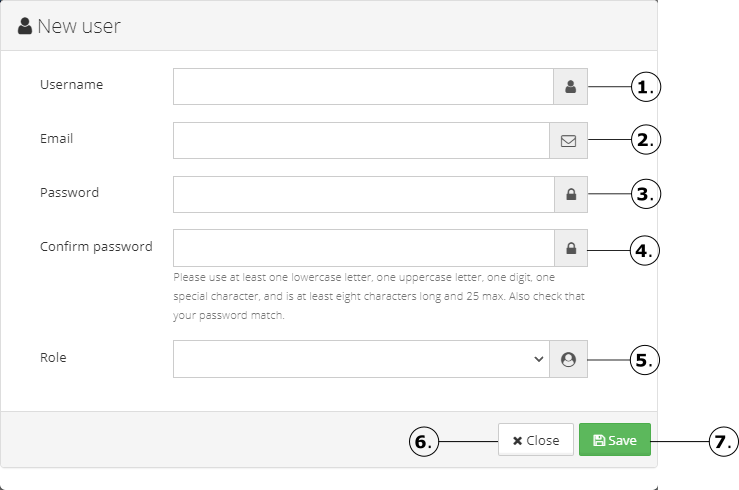
Enter the username; this is the name that will appear in the event log of the actions performed by the user when the session is active.
Enter the email associated with the user, the email will be used to login to the site, therefore it cannot be used more than once.
Enter the password, the password will be required to login to the site.
Enter the password confirmation, entered in point 3.
NOTE
- The password must match in the fields where the new password is requested. The password must have at least one lowercase letter, one uppercase letter, one digit, one special character, and at least 8 characters long and 25 max. The only special characters allowed are: . ! @ # $ % *.
Selection list where the type of role that will be assigned to the user is selected, with different permissions to administer on the site.
Click this button to close the pop-up window and cancel the creation of a new user.
Click this button to create the new user, for the process to be successful enter all fields requested.

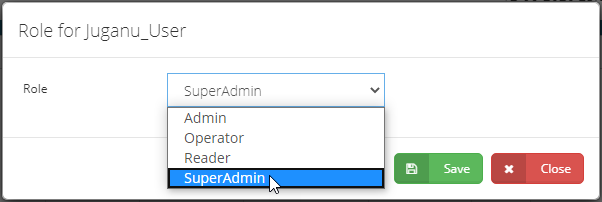
7.2.4.2 Edit role
Clicking on the button a pop-up window will appear for the role edition from the selected user. The list of available roles will be displayed in the Role field, so select the required role for this user.

NOTE
The items shown in the list of roles to be associated depends on the type of role associated with the registered user. A user with the Admin role cannot associate the SuperAdmin role because the role is a hierarchy superior to its role.

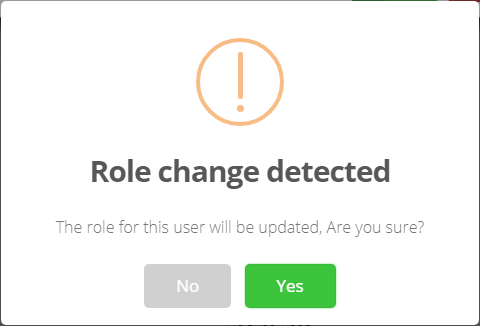
A confirmation pop-up will appear, if the update of the role is confirmed then a notification that the update was performed correctly will be displayed.

NOTE
The change will take effect the next time the user logs in. If a user changes its own role, then the user must logout and login again.
7.2.4.3 Edit Gateways
Clicking this button a pop-up window will appear for the edition of the Gateways associated with the selected user.

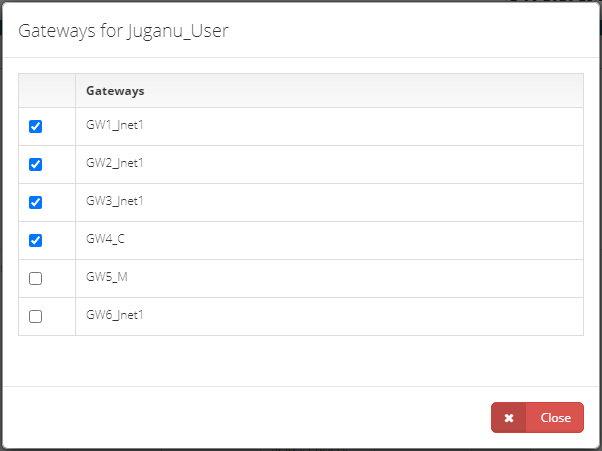
The Gateways list stored on the site will be displayed in the Gateways table. Select the Gateways for the user to manage (checkbox enabled). Enable the checkbox to grant association of a Gateway or disable the checkbox to revoke the association of a Gateway for the selected user, then a message will appear notifying that the association or disassociation of a Gateway has been carried out correctly.


7.2.4.4 Edit Groups
Clicking this button a pop-up window will appear for the edition of the Groups associated with the selected user.

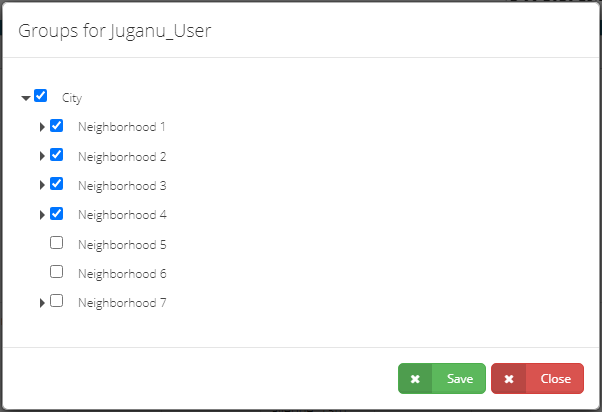
The Groups list stored on the site will be displayed in the Groups table. Select the Group for the user to manage (checkbox enabled). Enable the checkbox to grant association of a Group or disable the checkbox to revoke the association of a Group for the selected user. Click the Save button then a message will appear notifying that the association or disassociation of a Group has been carried out correctly.


7.2.4.5 Edit modules
Clicking this button a pop-up window will appear for the edition of the Modules assigned with the selected user.

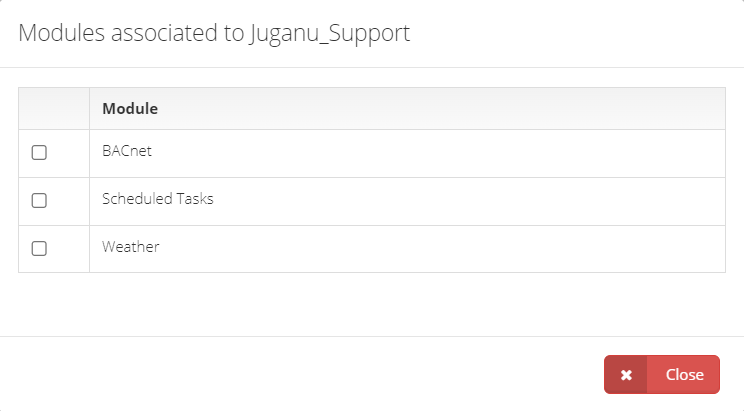
The Module table will show the list of Modules available on the site. Select the Modules for the user to manage (checkbox enabled). Enable the checkbox to grant or disable the checkbox to revoke the assignment of the respective Module for the selected user, then a message will appear notifying that the assignment or designation of the Module has been carried out correctly.


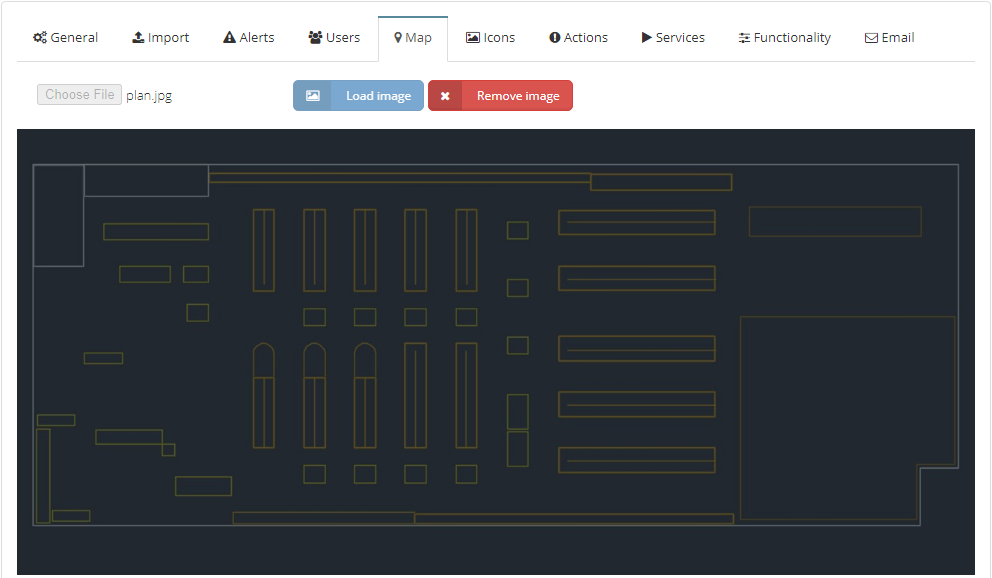
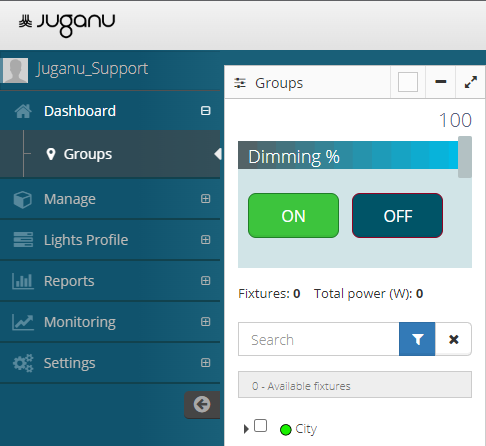
7.2.5 Map
The map section allows uploading an image that will be used in the Dashboard > Groups section, the image will overlay on the map region.
7.2.5.1 Load image
Click the Choose File button to select the image to upload. Then click the Load Image button to store the new image that will be overlaid. This button Load Image will be available until an image is selected.

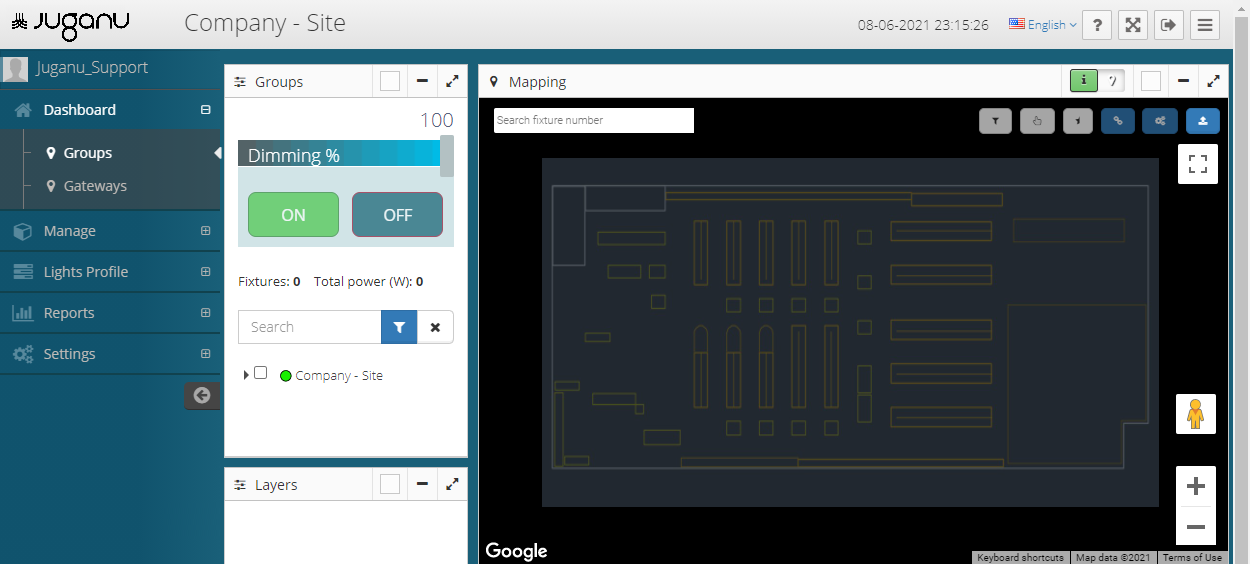
Once the image has been uploaded, a message will appear notifying that the image has been saved correctly, and a preview of the new stored image will also be displayed.

The users accessing the Dashboard > Groups section will be able to view the image as a map overlay.
7.2.5.2 Remove image
When the overlay image is not required or need to change the image in the section Dashboard > Groups, then click the button Remove image. The button will be enabled when there is an overlaid image stored on the site.

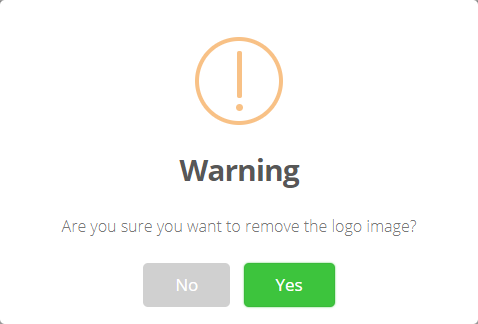
A pop-up window will appear requesting confirmation to remove the image.

If the image removing is confirmed, then the overlaid image will be removed and a message will appear notifying that the image was removed correctly. The Panel will revert to its default behavior after the image is deleted.

7.2.6 Logo
The logo section allows loading an image that will be used in the Dashboard > Top Panel section, the image will overlay on the Juganu logo.
7.2.6.1 Load image
Click the Choose File button to select the image to upload. Then click the Load Image button to store the new image that will be overlaid. This button Load Image will be available until an image is selected.

Once the image has been uploaded, a message will appear notifying that the image has been saved correctly, and a preview of the new stored image will also be displayed.

The users accessing the Dashboard > Top Panel section will be able to view the image as a Juganu logo overlay.

7.2.6.2 Remove image
When the overlay image is not required or need to change the image in the section Dashboard > Top Panel, then click the button Remove image. The button will be enabled when there is a overlaid image stored on the site.
A pop-up window will appear requesting confirmation to remove the image.
If removing the image is confirmed, then the overlaid image will be removed and a message will appear notifying that the image was removed correctly.

7.2.7 Icons
In the next section, the set of icons used to display the fixtures stored on the site can be managed. The set of icons consists of 3 different types of icons that identify the states that the fixtures can have (ON, OFF and Error).

Clicking the button, a pop-up window will appear for creating a new icon set. See Add icon set
Column showing the name of the icon set (ID) for each collection shown in the table.
Column showing the description for each icon set shown in the table.
Column showing the icon that will indicate the ON status of a fixture for each icon collection shown in the table.
Column showing the icon that will indicate the OFF status of a fixture for each icon collection shown in the table.
Column showing the icon that will indicate the Error status of a fixture for each icon collection shown in the table.
Clicking the button, a pop-up window will appear for editing the icon set located in the same row where the button was clicked. See Edit icon set
Clicking the button, a confirmation window will appear for the removal of the icon set. Allows deleting the selected row. See Delete icon set
7.2.7.1 Add icon set
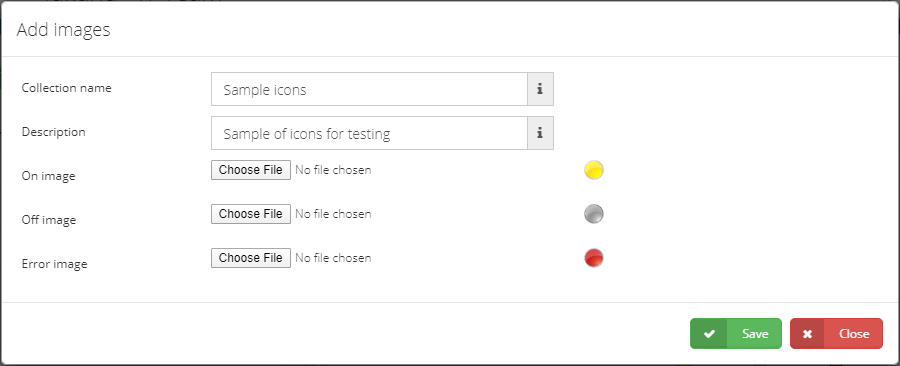
Clicking on this button, a pop-up window will appear that will show the fields to enter for the correct creation of the icon set.

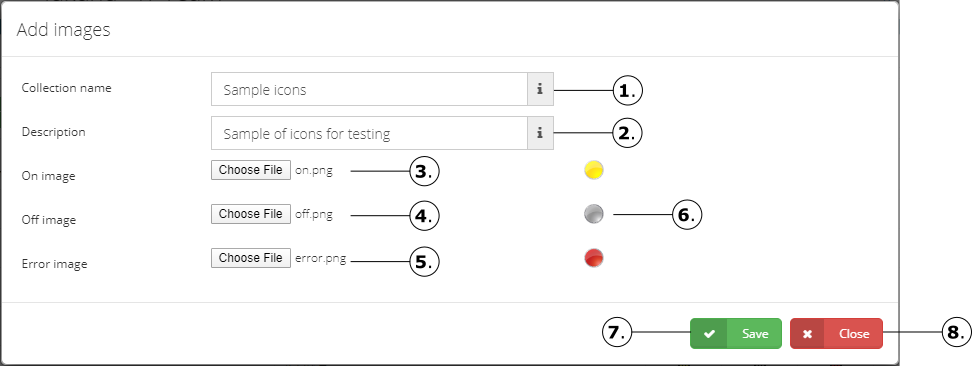
Enter the icon collection name, this name will appear when changing the icon type (See Mapping Panel), or when filter by icon type (See Filtering fixtures by Icon).
Enter the description for the icon collection.
Click the button Choose File to select the image to be used to identify the state ON.
Click the button Choose File to select the image to be used to identify the state OFF.
Click the button Choose File to select the image to be used to identify the state ERROR.
Icon preview of images loaded in points 3, 4 and 5.
Click this button to create the new icon set, for the process to be successful all requested fields have to be entered.
Click this button to close the pop-up window and cancel the creation of a new icon set.
Clicking the Save button after completing all entries, the collection will be created and a message will appear notifying that the icon set has been created

7.2.7.2 Edit icon set
Clicking on this button, a pop-up window will appear for editing the collection of the selected icon collection.

Clicking the Save button after completing the update of the required fields, a message will appear notifying that the icon set has been saved correctly. If any of the three images in the collection is updated then the change will apply immediately to any lamp using the collection.
7.2.7.3 Delete icon set
When the icon collection is no longer required, then click the button, a confirmation window will appear for the removal of the icon set. Allows deleting the selected row.


If the removal of the icon collection is confirmed, then the collection will be deleted, a message will appear notifying that the collection was deleted correctly.

7.2.8 Actions
This section allows sending actions (operation codes) to a selected Group. When sending the operation code (Op. Code) it is necessary to manually enter the values for the execution.
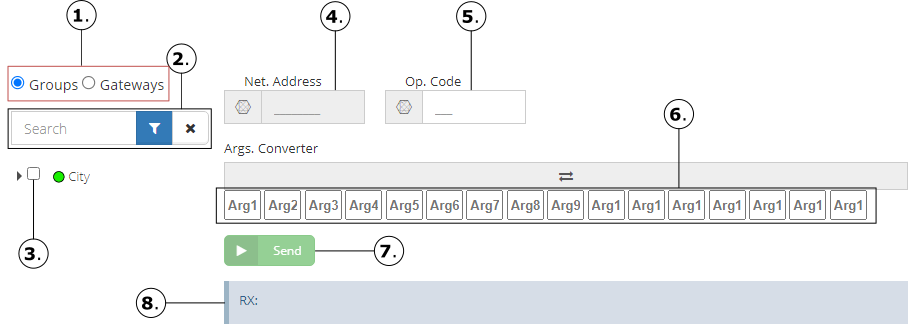
Radio Options, select the option Group.
Enter the name of a Group to be searched.
Allows selecting the Group to be controlled.
The network address of the Group will be automatically established for sending the action; this field does not allow the entry of any value because it is disabled.
Enter the operation code (Op. Code) to be sent.
The input of the value of each argument (Argument 1 to Argument 16) will depend on the operation code entered in Field Op. Code.
Click this button to send the operating code. See Send Action
The response received after sending the operation code will be displayed in this area.
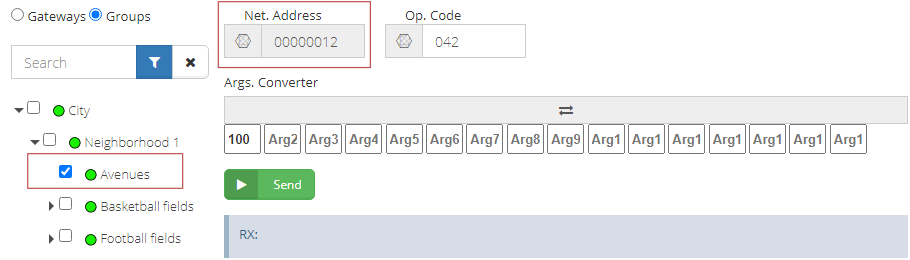
When selecting a Group, the value of the Network Address field will be automatically filled with the network address of the selected item. Below is an example of sending an action (opcodes) to a selected Group.
7.2.8.1 Send Action
Click the button to execute the operation code sent to the entered network address number for the selected Gateway or Group. A confirmation window will appear for sending the operating code.

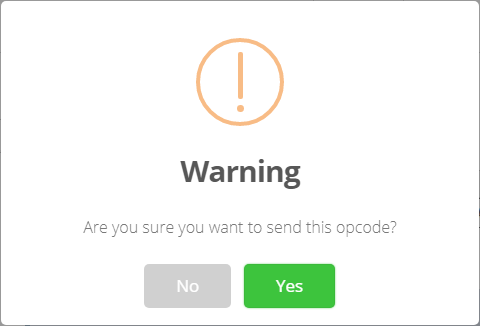
If the opcode is confirmed to be sent, the operating code will be sent. The result of the performed action will be displayed in the field titled RX showing the response or the status of the request once it is finished.

7.2.9 Services
The Services tab manages the different services available to keep the site in operation.
7.2.9.1 Listener
The purpose of this service is to listen and process commands sent through the web application and other services. The communication to the fixtures are between the Listener service and the Gateway. The sending and response of the commands are managed in this service. For the correct operation of the service, it’s not recommended to change the values of the fields, use the configuration established by Juganu.
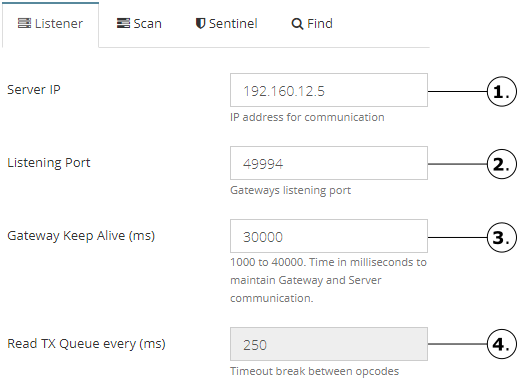
IP address for the communication of this service.
Port to establish communication between service and Gateway.
Timeout (1000 to 40000 milliseconds) to maintain communication between Gateway and service.
Timeout break (milliseconds) between reading the operation codes (opcodes) that are queued to be processed. Default setting, not available for modification (disabled).
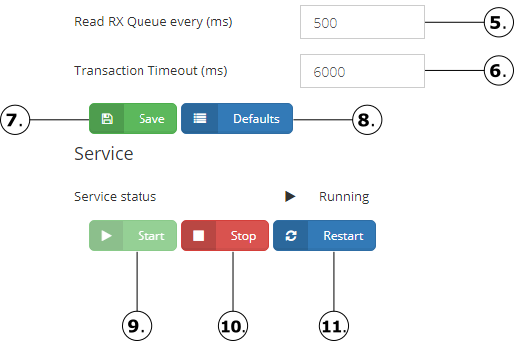
Timeout break in milliseconds, to read the response, checking the result of the operating code that has been sent.
Maximum timeout in milliseconds, to complete the sending and responding of the operation code to process.
Clicking on this button a confirmation window will appear asking to save the changes. If the changes are confirmed to be saved then a notification message is displayed informing that the changes were stored correctly.
Reverts the form to its default values.
Starts the service (if it is not already running).
Stops the service (if it is currently running).
Restarts the service.
7.2.9.2 Scan Jnet0
The functionality for this service is to read and report the status of each fixture on JNET-0 sites. The duration of the service will depend on the number of fixtures stored in each Gateway.
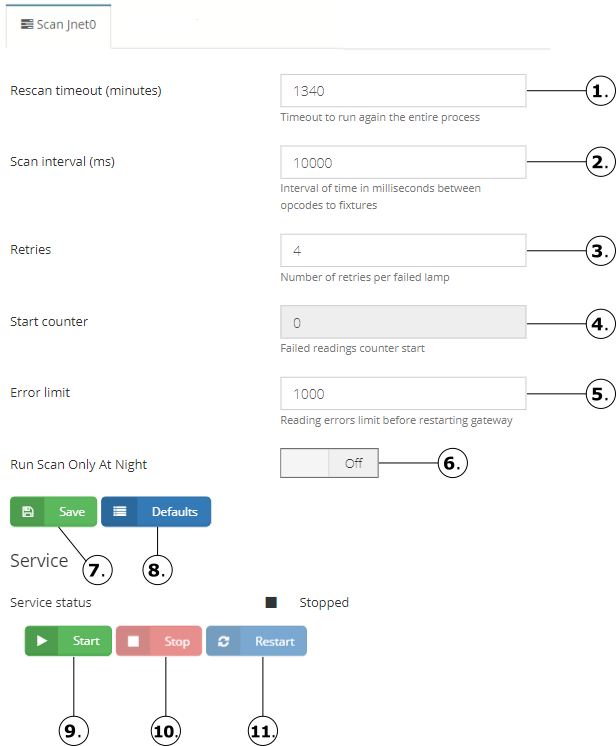
Time in minutes of pause between scans.
Time in milliseconds between opcodes sent by scan process.
Number of retries sending commands.
Initial value for the reading error counter.
Error limit for readings.
If enabled, limits the scan to night operation only.
Saves the settings.
Reverts the form to its default values.
Starts the service (if it is not already running).
Stops the service (if it is currently running).
Restarts the service.
7.2.9.3 Sentinel
Service that continuously monitors the differents processes configured and assigned, observing which commands should be processed at the moment required by the user or at the asigned automatic time, and also to which Group or Groups the command is allowed to be executed.
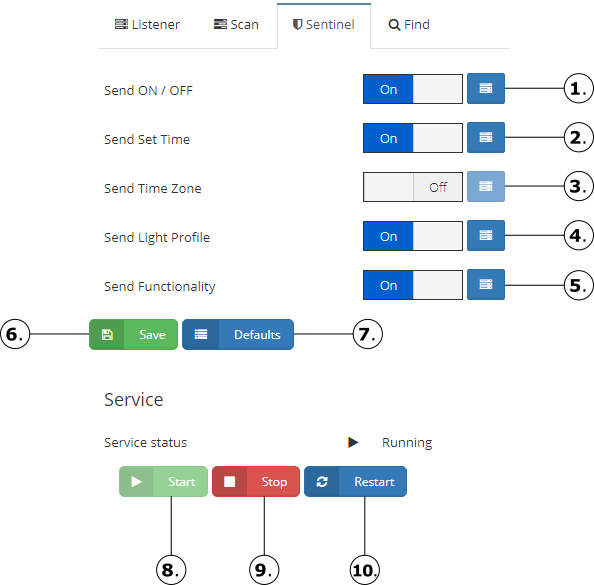
Toggles sending ON/OFF command for selected Group or Groups. See Send ON/OFF
Toggles sending Set Time command for selected Group or Groups. See Send Set Time
Toggles sending the Timezone command for selected Group or Groups. See Send Time Zone
Toggles sending Light Profile selected Group or Groups. See Send Light Profile
Toggles sending the Functionality command to the selected Group or Groups. See Send Functionality
Saves the settings.
Reverts the form to its default values.
Starts the service (if it is not already running).
Stops the service (if it is currently running).
Restarts the service.
7.2.9.3.1 Send ON/OFF
When sending the ON/OFF commands, they are sent according to the events defined in the Light Plan or the Light Plans associated with each Group. Therefore, the sending of the turn ON and turn OFF will be made to all the fixtures of the Selected Group, it is necessary to activate specific Groups for said sending of the command. To allow it to send ON/OFF, toggle the button ON:
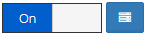
Once the Send ON/OFF switch is turned ON, the button for the Groups selection will be available.

This button will display a pop-up window for the selection of Groups.
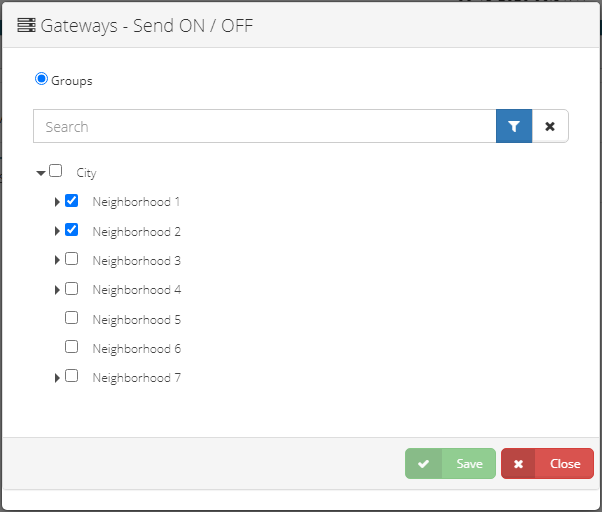
When the check box is activated, the command will be sent only to the group or groups that were selected, while Groups without the check box activated will not receive the command. Once the Group selection is ready, click the Save button, it will confirm whether the changes were saved by displaying a confirmation message.

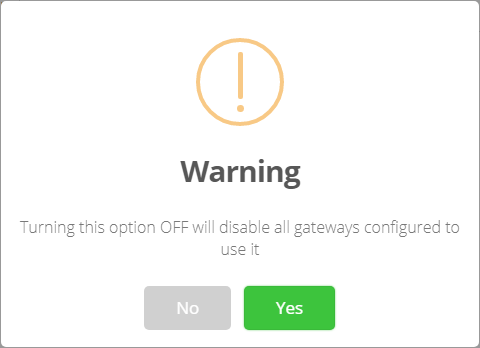
NOTE
If command sending is deactivated, the alternative button will change to deactivated (OFF), a confirmation message will be generated before eliminating the sending of all the selected Groups for that command.
7.2.9.3.2 Send Set Time
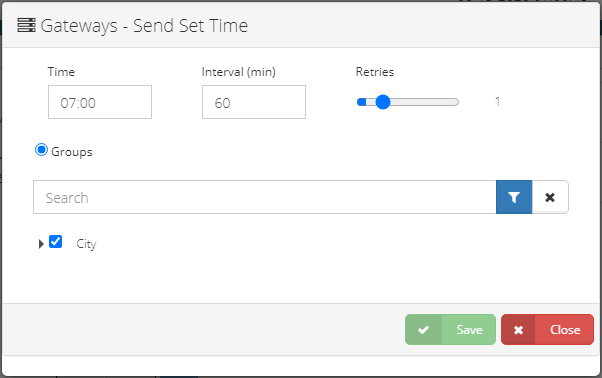
The Set Time command periodically sends (in an interval in minutes) a number of times (retries) the current time, according to the time zone established in the system configuration, to all fixtures of the Selected Group. It is necessary to activate specific Groups for said sending of the command. To allow the sending of the Set Time command, the alternative button is activated (ON):
Once the Send Set Time switch is turned ON, the button for the Groups selection will be available.
This button will display a pop-up window for the selection of Groups.
When the check box is activated, the command will be sent only to the group or groups that were selected, while Groups without the check box activated will not receive the command. Once the Group selection is ready, click the Save button. It will confirm whether the changes were saved by displaying a confirmation message.
NOTE
If command sending is deactivated, the alternative button will change to deactivated (OFF), a confirmation message will be generated before eliminating the sending of all the selected Groups for that command.
7.2.9.3.3 Send Time Zone
The time zone command periodically sends (in an interval in minutes) a number of times (retries) the time zone established in the system configuration, to all fixtures of the Selected Group. It is necessary to activate specific Groups for said sending of the command. For allows to send of the Time zone command, the alternative button is activated (ON):
Once the Send Time zone switch is turned ON, the button for the Groups selection will be available.
This button will display a pop-up window for the selection of Groups.
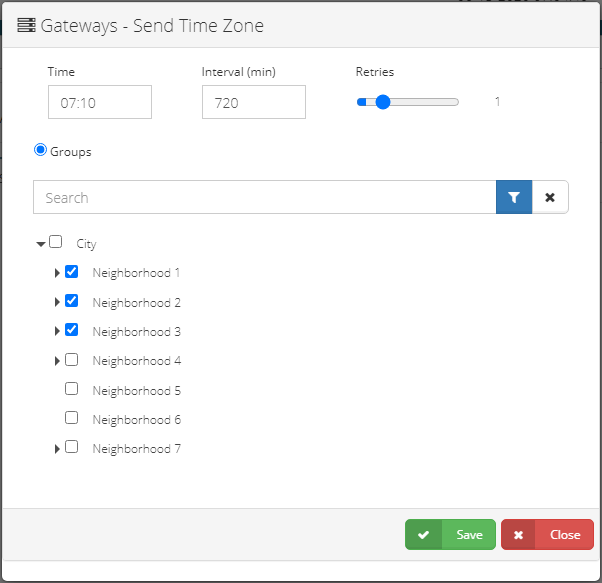
When the check box is activated, the command will be sent only to the group or groups that were selected, while Groups without the check box activated do not will receive the command. Once the Group selection is ready. Clicking the Save button will confirm whether save your changes by displaying a confirmation message.
NOTE
If the sending of command deactivated, the alternative button changed to deactivated (OFF), a confirmation message will be generated before eliminating the sending of all the selected Groups for that command.
7.2.9.3.4 Send Light Profile
The Light Profile command periodically sends (in an interval in minutes) under a number of times (retries) all the events defined in the Light Profile or the associated Lights Profiles, to all fixtures of the Selected Group. It is necessary to activate specific Groups for the said command to be sent. To allow the lighting profile command to be sent, the alternative button is activated (ON):
Once the Send Light Profile switch is turned ON, the button for the Groups selection will be available.
This button will display a pop-up window for the selection of Groups

When the check box is activated, the command will be sent only to the group or groups that were selected, while Groups without the check box activated will not receive the command. Once the Group selection is ready, click the Save button. It will confirm whether the changes were saved by displaying a confirmation message.
NOTE
If command sending is deactivated, the alternative button will change to deactivated (OFF), a confirmation message will be generated before eliminating the sending of all the selected Groups for that command.
7.2.9.3.5 Send Functionality
The functionality command periodically sends (in an interval in minutes) a number of times (retries) the default behavior of the fixtures in the system configuration, to all fixtures in the Selected Group. It is necessary to activate specific Groups for said sending of the command. For allows to send of the functionality command, the alternative button is activated (ON):
Once the Send Functionality switch is turned ON, the button for the Groups selection will be available.
This button will display a pop-up window for the selection of Groups.
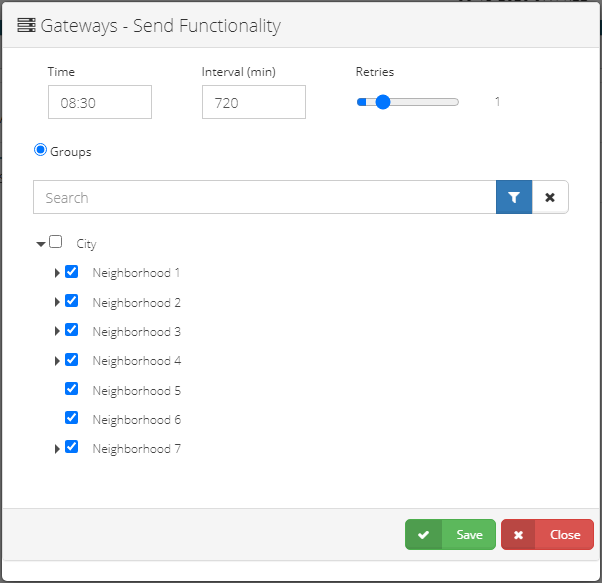
When the check box is activated, the command will be sent only to the group or groups that were selected, while Groups without the check box activated do not will receive the command. Once the Group selection is ready. Clicking the Save button will confirm whether save your changes by displaying a confirmation message.
NOTE
- If the sending of command deactivated, the alternative button changed to deactivated (OFF), a confirmation message will be generated before eliminating the sending of all the selected Groups for that command.
7.2.9.4 Find
Service that performs the search of all the fixtures that have been installed physically. The fixtures found that do not exist in the web application, are stored according to the Gateway selected in the Main Group (City).
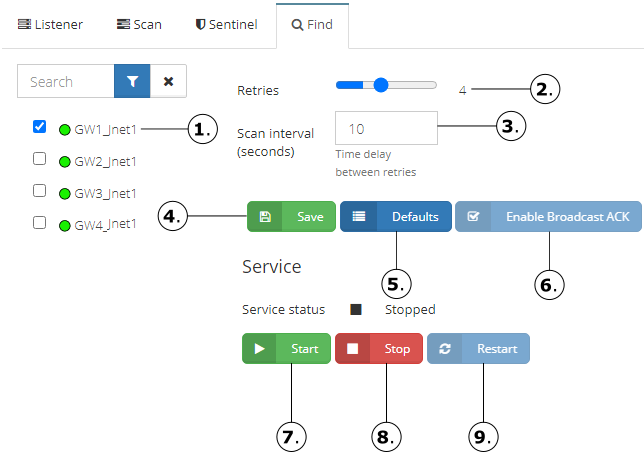
Gateway selector tree views control.
Number of retries set for the selected Gateway.
Time in seconds between retries.
Saves the settings.
Reverts the form to its default values.
Enables the ACK Broadcast Flag for the selected Gateway.
Starts the service (if it is not already running).
Stops the service (if it is currently running).
Restarts the service.
7.2.10 Functionality
The Functionality tab allows to change the behavior of different sections and configurations of the site.
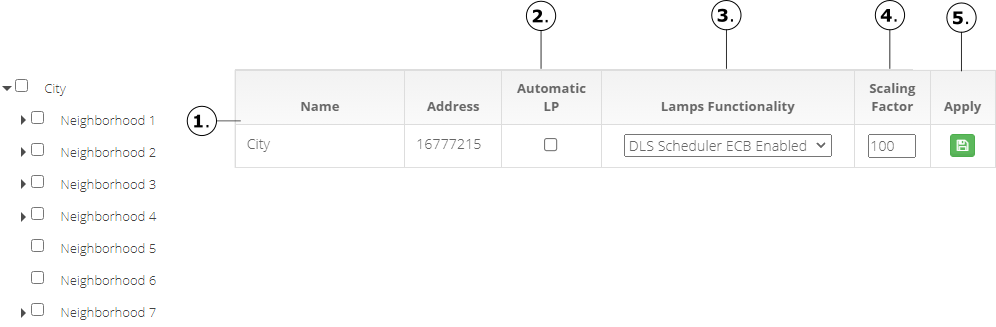
7.2.10.1 Group Functionality
This functionality adjust the DLS Light Plan settings (weekly) for a specific Group or Groups - See Load DLS, as well as the scale factor when sending ON commands in%. For example, if the scale factor is 80, when sending ON commands to the fixtures at 100%, it will actually be 80% of the fixtures capacity.
Text box allows typing the name of a Group that to search.
Tree view of the Groups available for the current site. ** Click ** on the Group you want to manage to set the DLS
By default, the DLS configuration table will be displayed to apply to the City Group (Main Group), if you select then you can configure the DLS in any subgroup of the selected Group.
Apply the changes and saves the all current settings.
NOTE
If the setting of all rows doesn’t want to be saved, click on the button at the end of each row (Apply column)

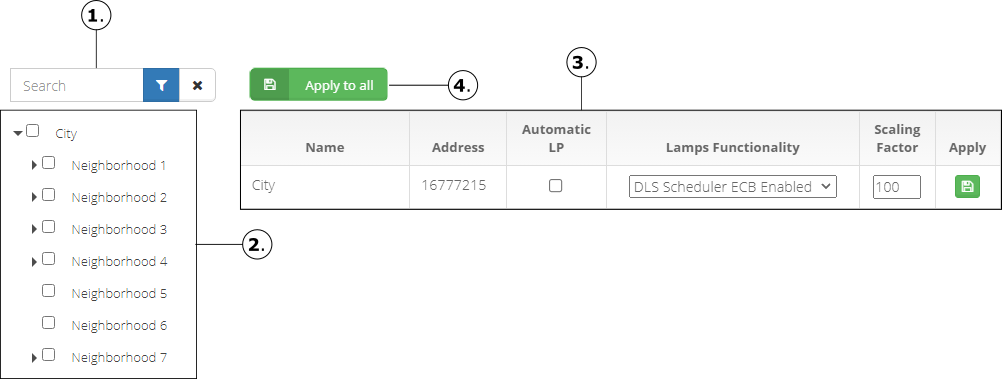
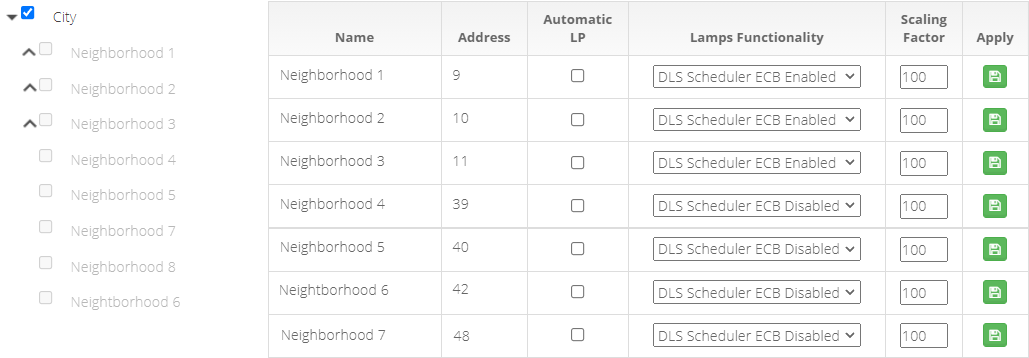
7.2.10.2 Set Functionality
List of existing groups for the site in session, according to the selected Group, if no Group is selected, the list will only have the main Group.
Sets the group to Automatic LP management.
Sets the default behavior for lamps within the Group. Available options are:
- DLS Scheduler ECB Enabled
- DLS Scheduler ECB Disabled
- WPS Scheduler ECB Enabled
- WPS/DLS Scheduler ECB Enabled
The Scaling Factor will automatically apply to any power command for the Group, according to the set value.
Button allows to apply setting per row.
NOTE:
- Example of City Group selection (Main Group), for the configuration of DLS to the subgroups of the selected group.
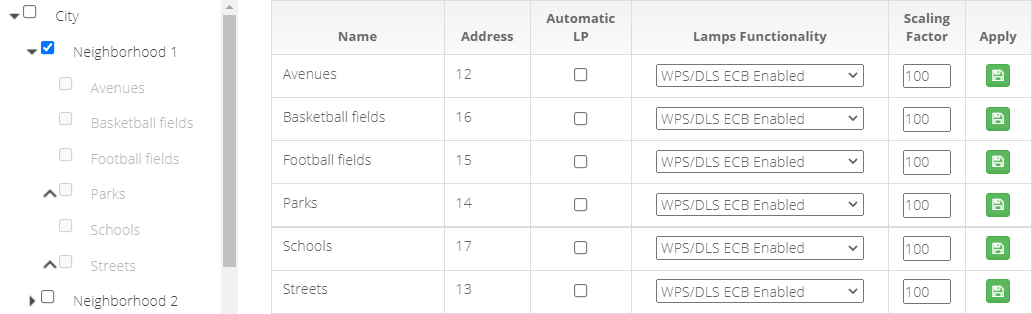
- Example of Neighborhood 1 Group selection, for the configuration of DLS to the subgroups of the selected group.
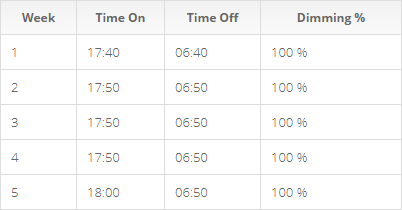
7.2.10.3 Load DLS
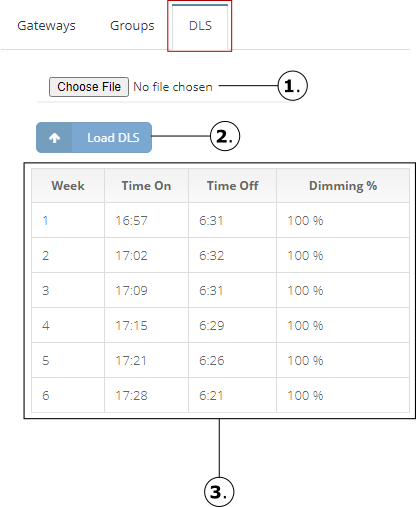
- Click the Choose File button to select the Light Plan want to load. The file type must have the extension .csv (file separated by commas).

- Sample file: DLS_Plan.csv

- Then click the Load DLS button to store the new Light Plan that will be updating the before plan. This button Load DLS will be available until a file has been selected.
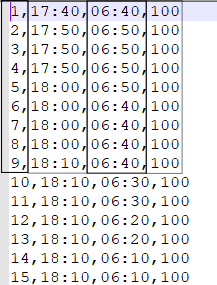
- Table showing the current content of the DLS Light Plan.
NOTE: For the correct functioning of the DLS, the comma separated file must contain the 52 weeks or 53 weeks as they correspond to the current year.
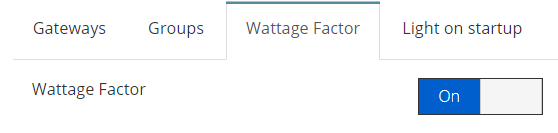
7.2.10.4 Wattage Factor
Switch button that allow change the wattage factor on fixtures, this option is to add a numeric constant to get the correct consumption according fixture configuration.
7.2.10.5 Light on startup
This functionality allows to setup the fixtures with an specific dimming in case of startup.
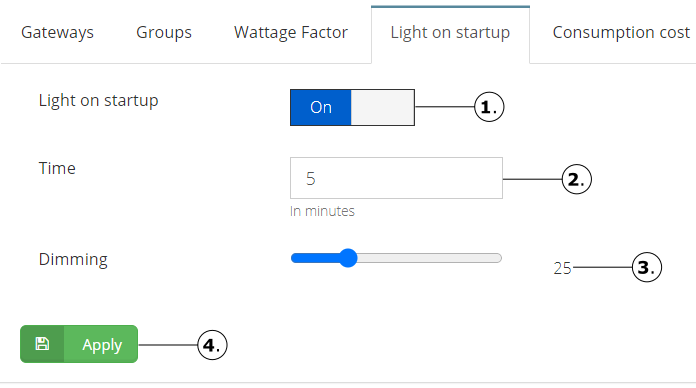
Switch to turn on functionality.
Set specific time that the fixture will be on at specific dimming.
Set specific dimming for startup.
Save and apply change to fixtures.
7.2.10.6 Dimming Bar
This functionality allows to change the behavior of the dimming bar in the different sections of the site.
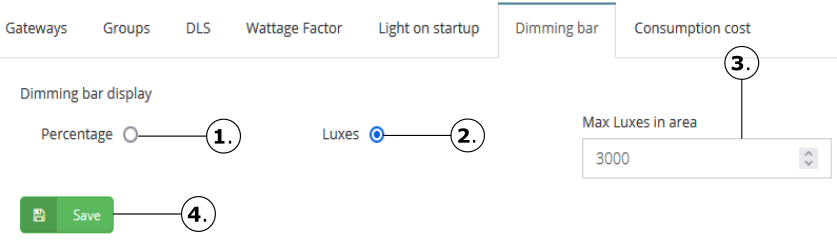
- Select to enable percentage dimming bar.
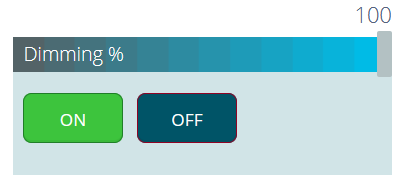
- example on dashboard dimming bar.
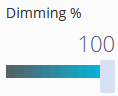
- example on lights profile dimming bar.
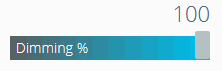
- example on group dimming bar.
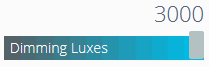
Select to enable Luxes dimming bar.
set max of luxes allowed for dimming bar.
- example on dashboard dimming bar
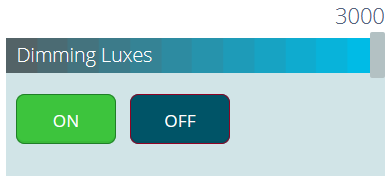
- example on lights profile dimming bar.
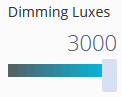
- example on group dimming bar.
- Save and apply change for dimming bar.
7.2.10.7 Consumption Cost
This functionality allows to enable and configure a currency for consumption report. See Report consumption cost
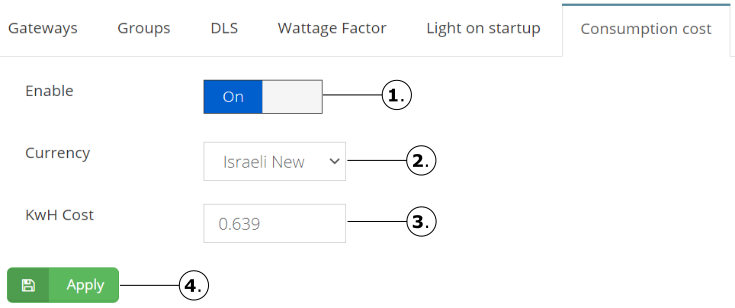
Switch to enable functionality.
Set specific currency.
Set cost for Kwh.
Save and apply change for consution report.
7.2.11 Email
The Email Tab allows configuring the email server and credentials used to send the different alerts and notifications.

SMTP email server.
Port of connection.
Forces the connection over a secure port.
List of recipients for async issue notifications.
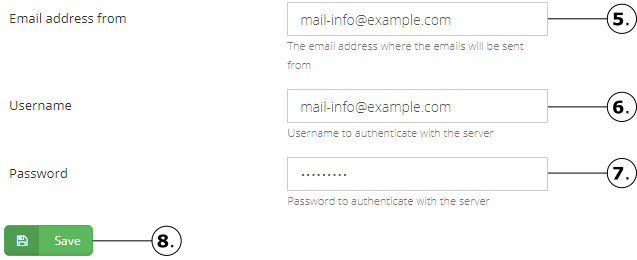
Email address from which the notification will be sent.
Email server username.
Email server password.
Saves the current settings.
7.2.12 User Profile
Allow updating the user personal information and customization of the site that been login.
7.2.12.1 Information
Allow updating the user personal information.
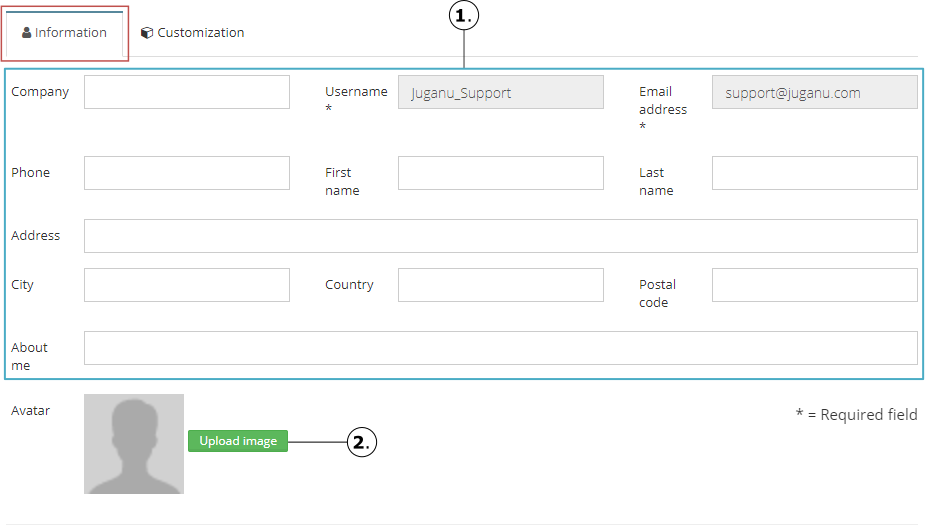
Section to add or modify the personal information of the user that is logged in.
Button that allows adding image or photo of the user that is logged in. The image will be displayed on the left panel of the site.
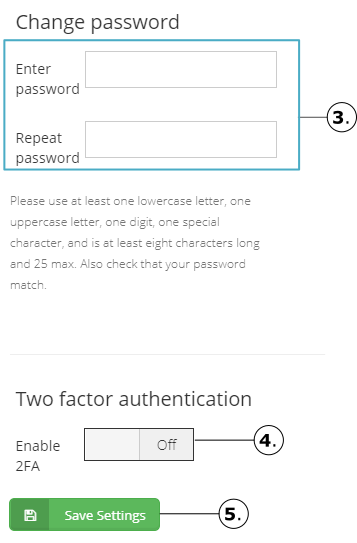
- Section that allows changing the password of the user that is logged in. The password requests a confirmation in the textbox Repeat password.
NOTE
- The password must match in the fields where the new password is requested. The password must have at least one lowercase letter, one uppercase letter, one digit, one special character, and at least 8 characters long and 25 max. The only special characters allowed are: . ! @ # $ % *.
Button allows activating or deactivating the two-factor authentication for the login.
Button allows saving the changes made in the Information tab.
7.2.12.2 Customization
Allow theme customization of the site. It is only applied to the user that has selected the theme.
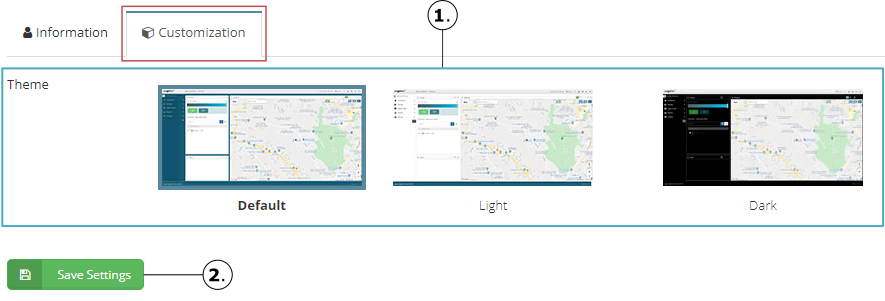
- Section allows selecting 3 different themes:
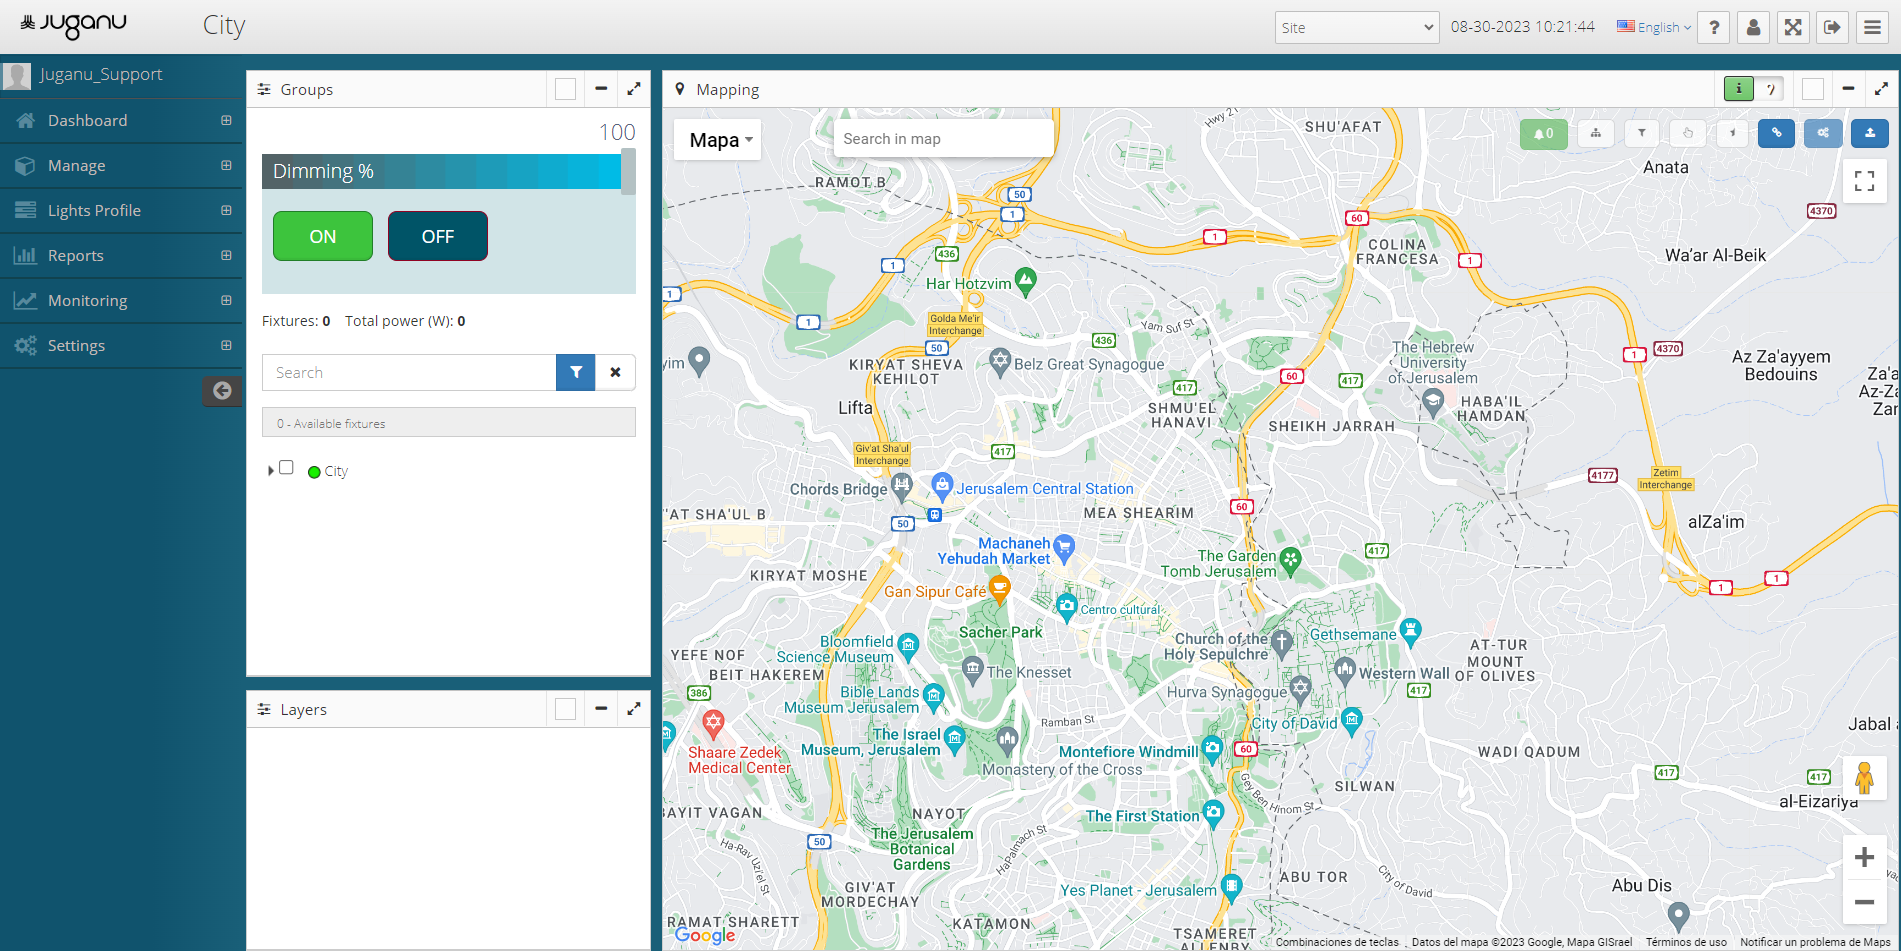
- Default
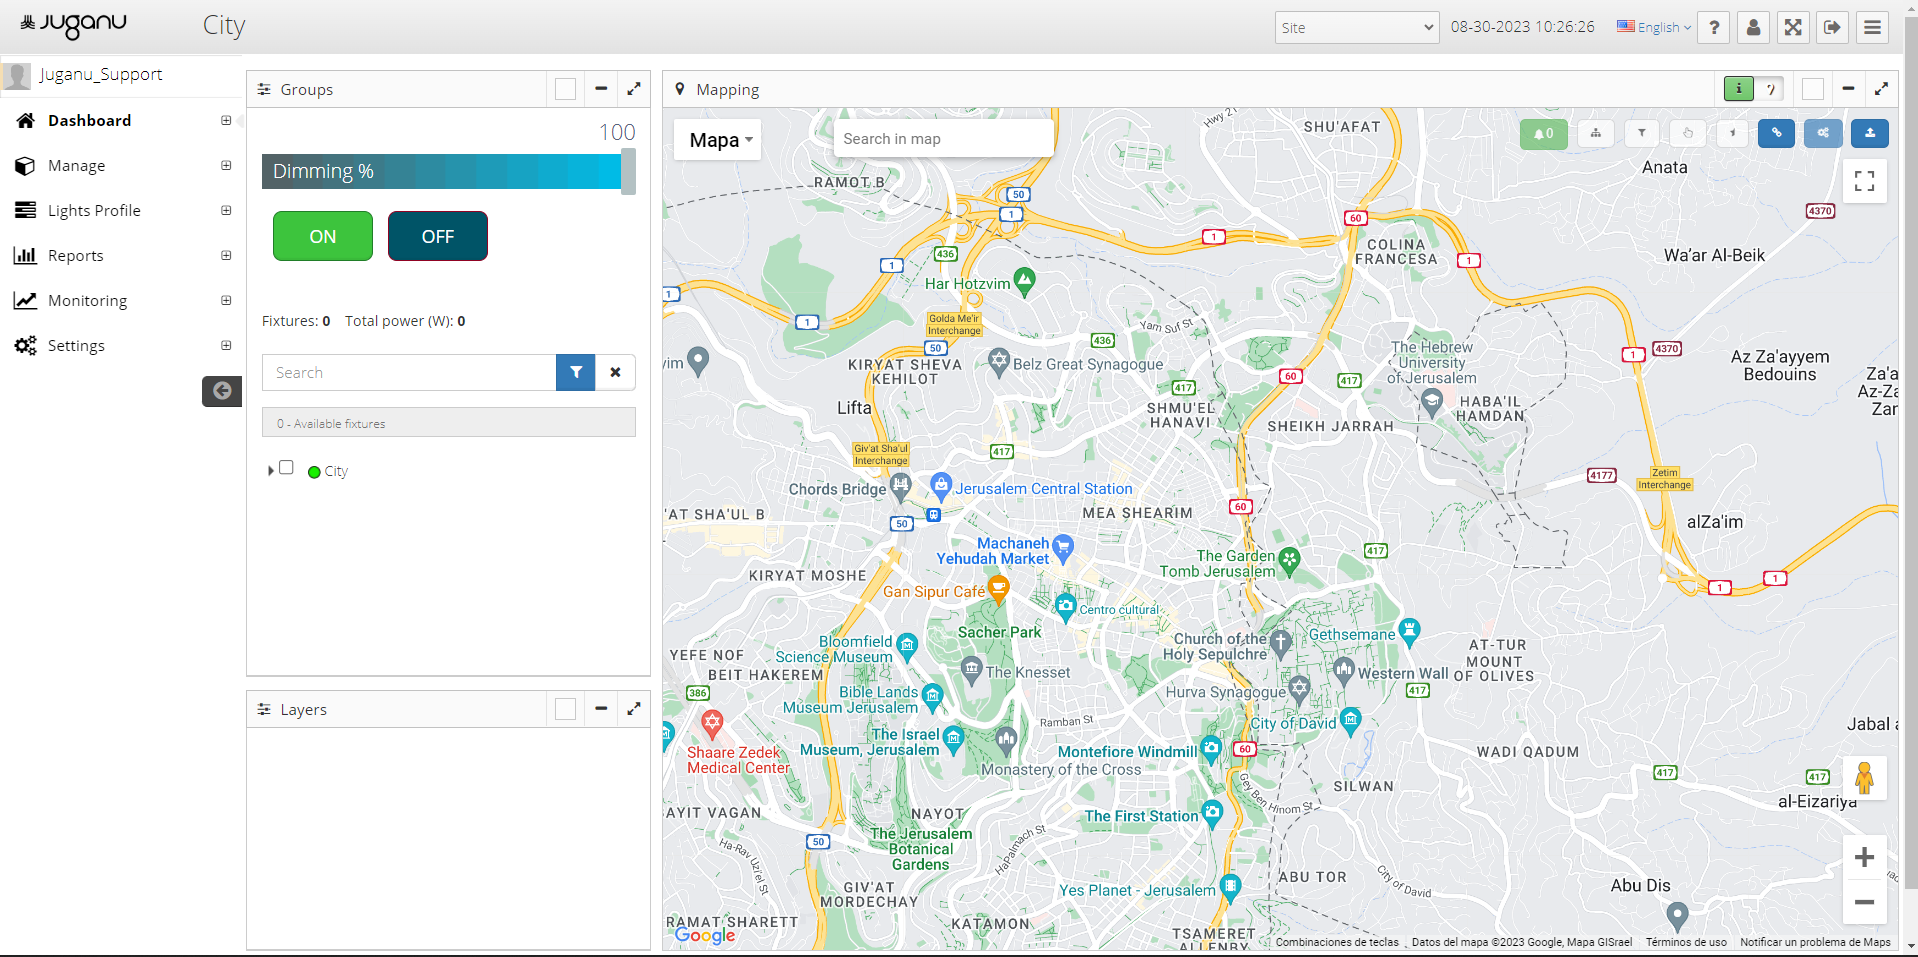
- Light
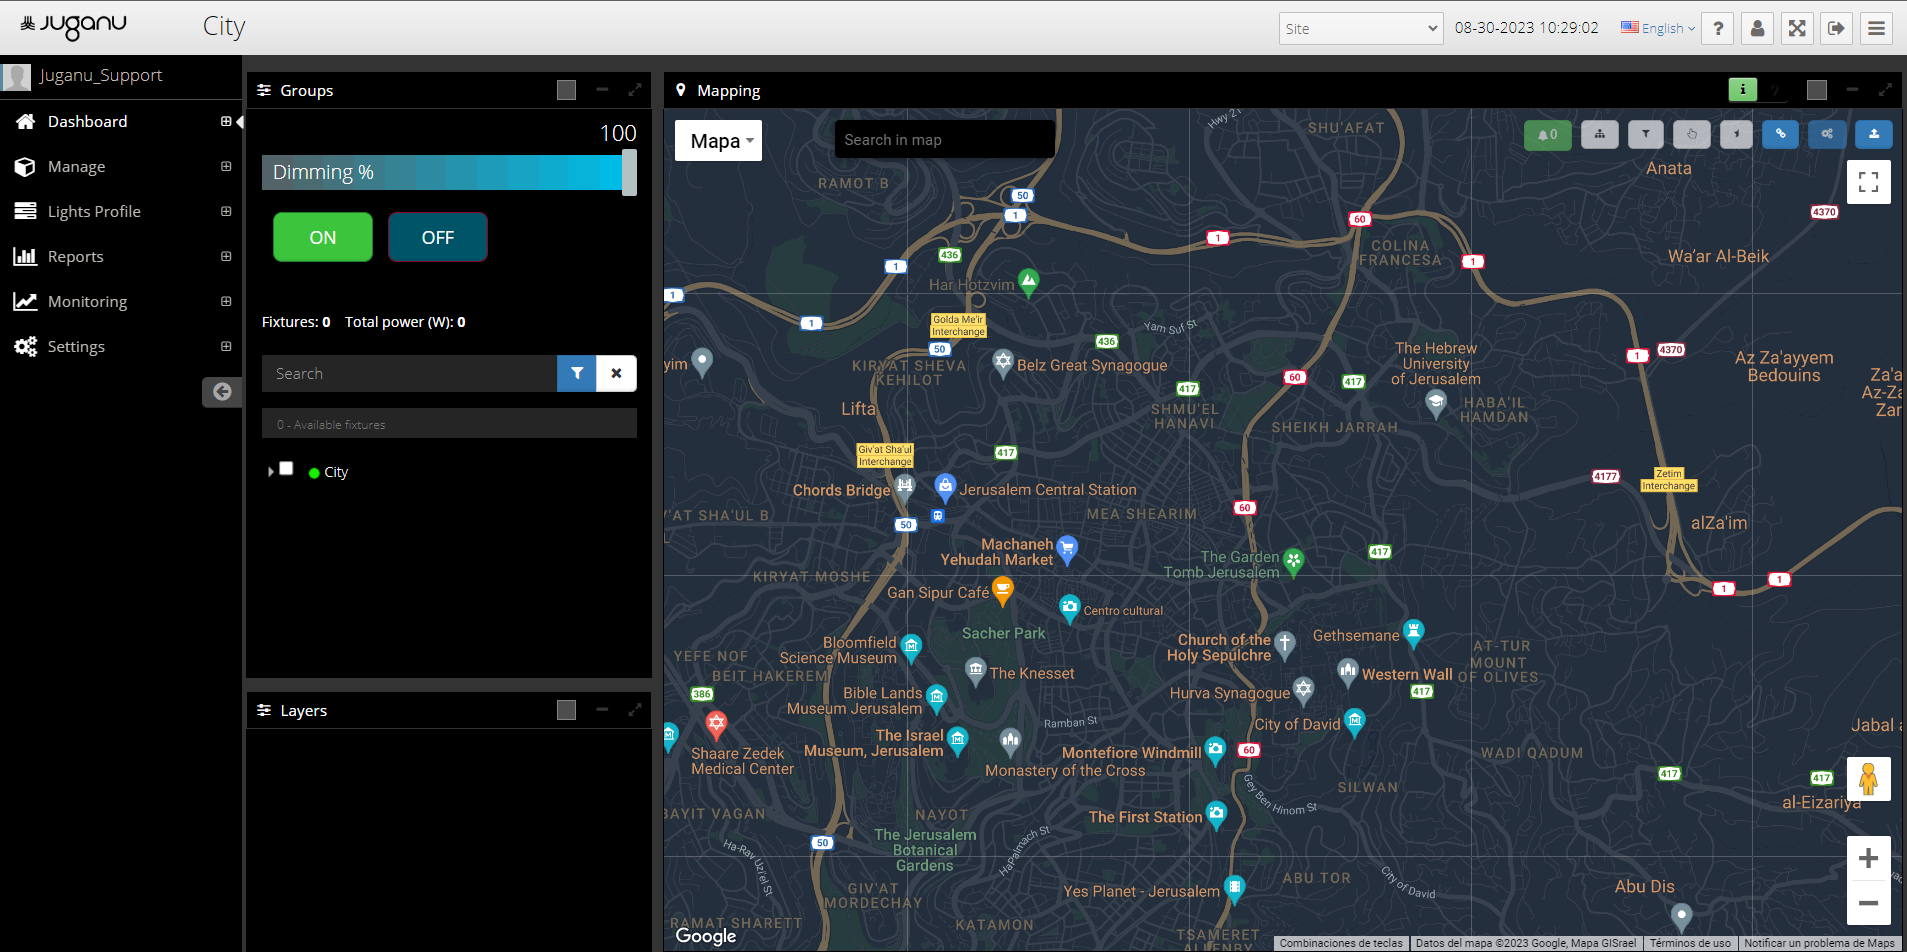
- Dark
- Button allows saving the changes made in the customization tab.
7.3 Modules
7.3.1 Scheduled Tasks
The Scheduled Tasks module allows the creation of automated tasks with opcodes at specific times or intervals.
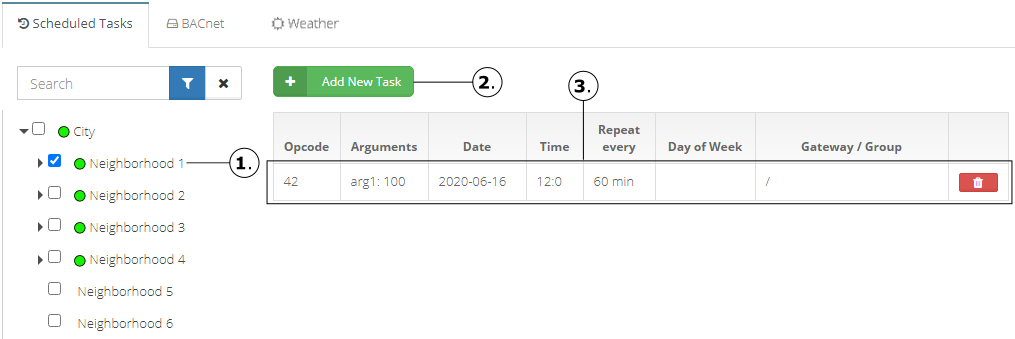
Gateway or Group selection control.
Adds a new task.
List of existing tasks for the Gateway or Group selected.
7.3.1.1 Add new task
Clicking on the Add new task Button will open the task creation window:

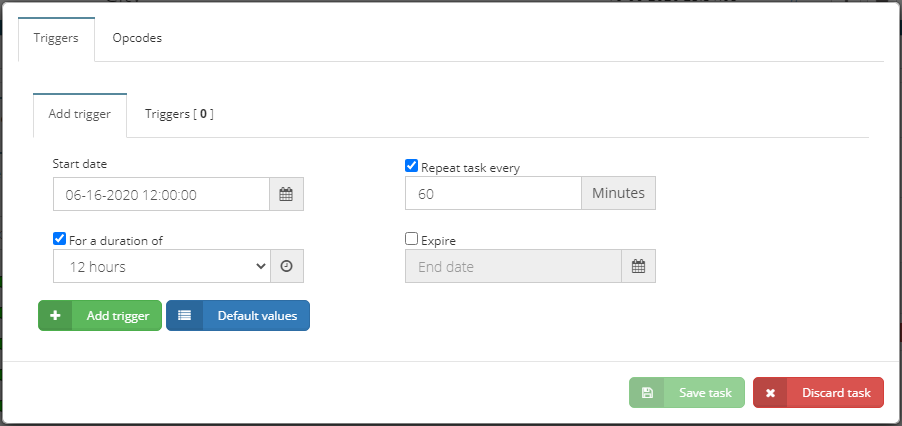
A task must have at least one trigger and one opcode to be created. The trigger consists of a start date, an optional interval setting, the duration of the task and an optional expiration date. When these values are met, the Add trigger Button will add the trigger to the list of triggers for the current task:

A task is not limited to a single trigger. Several triggers can be enabled if necessary.
When one or more triggers are added, the next step is to define the opcode to be issued when a trigger condition is met. A target Gateway or Group is also necessary.
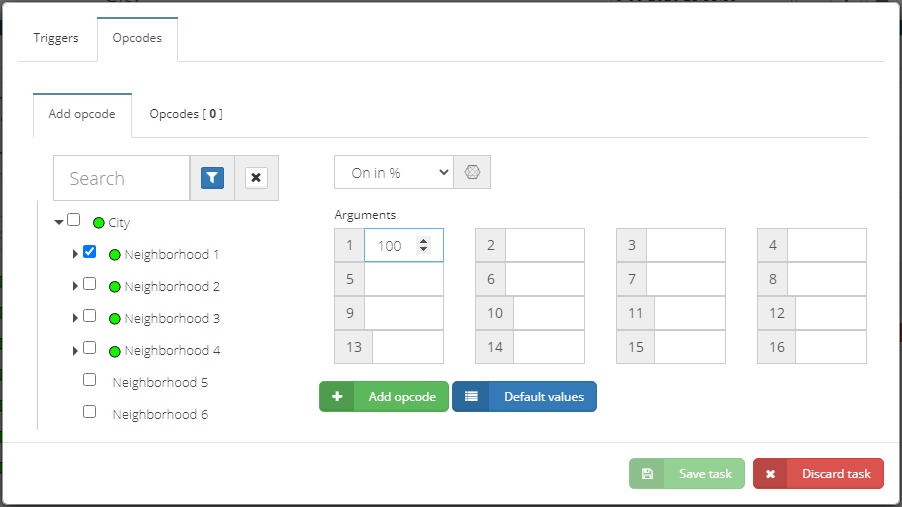
Having at least one trigger and one opcode defined will enable the Save task button.

Selecting a Gateway or Group will load the tasks associated with them.

NOTE
The list of existing scheduled tasks will not be loaded by default. A Gateway or Group has to be selected before the list of associated tasks can be displayed.
7.3.1.2 Deleting task
Clicking on the Delete button next to a task will prompt for confirmation before the task is deleted.

If confirmed the task will be deleted, and a confirmation message will appear.

7.3.2 BACnet
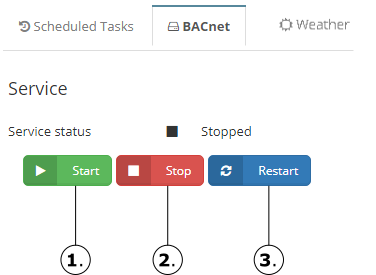
Starts the service (if it is not already running).
Stops the service (if it is currently running).
Restarts the service.
7.3.3 Weather
The module allow to set specific dimming according to the lecture of the weather dashboard.
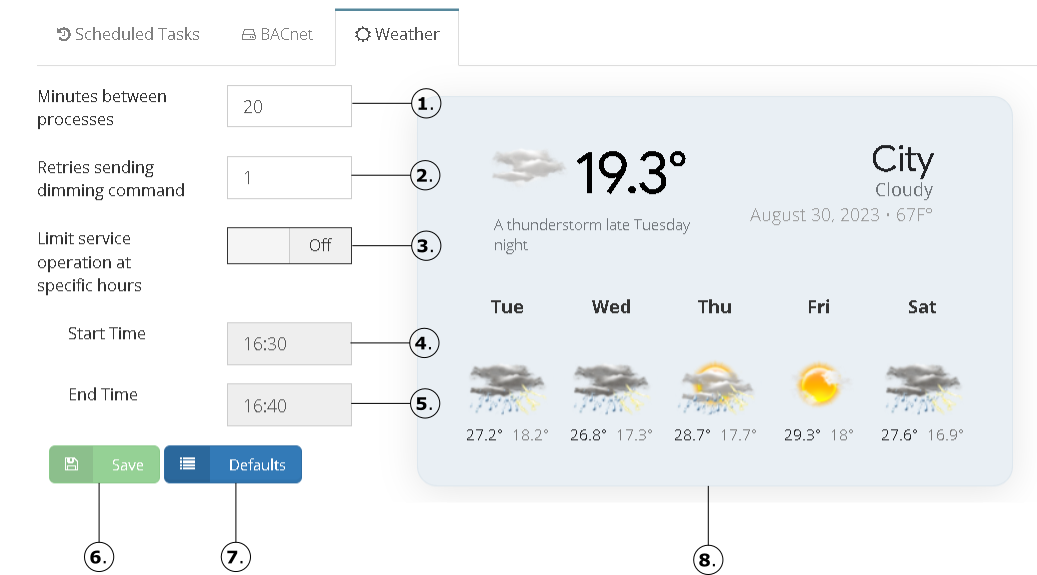
Value to set how often process will execute the lecture of weather dashboard and send the configured dimming.
Value to set the how many times the weather process should sent configured dimming.
Switch allows turning ON or OFF a time range in which it is desired that the weather service will not send the dimming.
Indicates the hour and minutes at which the weather service should stop sending specific dimming.
Indicates the hour and minutes at which the weather service should restart sending specific dimming.
The button allows saving all changes made to the weather service configuration.
The button allows setting the default values to the weather service configuration.
shows weather information.
7.3.3.1 Service and group configuration
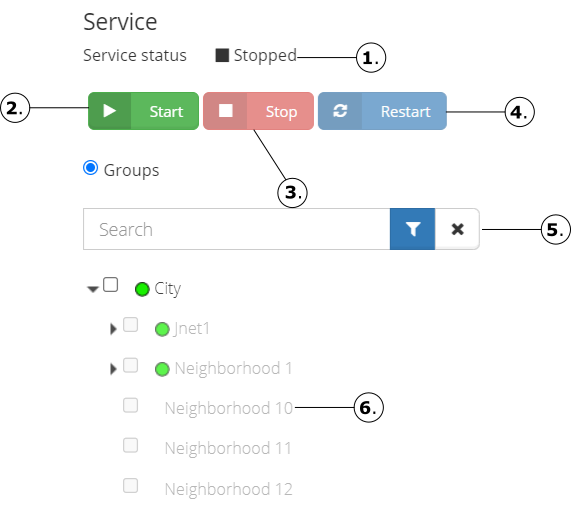
Shows the current status of the weather service.
The button allows starting the weather service.
The button allows stopping the weather service.
The button allows restarting the weather service.
Allow to filter an specific group.
Check allows selecting the Group to which the corresponding dimming is being set, only one Group can be selected at a time.
7.3.3.2 configuration dimming panel
This panel allows to configure the specific dimming according to the symbol and description getting of the weather dashboard lecture.
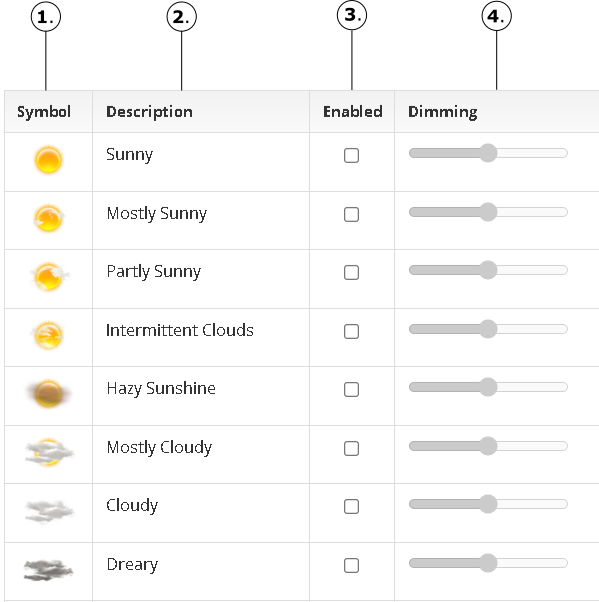
Shows the current symbol according to the description.
Shows the description of the weather.
Checkbox to enable specific dimming according to weather description.
Indicates the specific dimming that will be sent according to weather description.
JUGANU LMS (Lighting Management System).
Version 5.9.4, July 2024.

Juganu Brighter Solutions © 2024