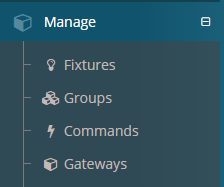
3 Manage
3.1 Access map features by Role
| Functionality | SuperAdmin | Admin | Operator | Reader |
|---|---|---|---|---|
| Manage |  Yes Yes |
Yes |
Yes |
 No No |
| Fixtures | Yes |
Yes |
Yes |
No |
| Create, edit and delete Fixtures | Yes |
Yes |
Yes |
No |
| Associate or Disassociate Fixtures to Groups | Yes |
Yes |
No |
No |
| Groups | Yes |
Yes |
Yes |
No |
| Create, edit and delete Groups | Yes |
Yes |
Yes |
No |
| Commands | Yes |
Yes |
Yes |
No |
| Total access to Commands | Yes |
Yes |
Yes |
No |
| Gateways | Yes |
Yes |
Yes |
No |
| Create, edit and delete Gateways | Yes |
Yes |
No |
No |
| Status and history display of Gateways connections | Yes |
Yes |
Yes |
No |
| Send ON or OFF | Yes |
Yes |
Yes |
No |
3.2 Fixtures
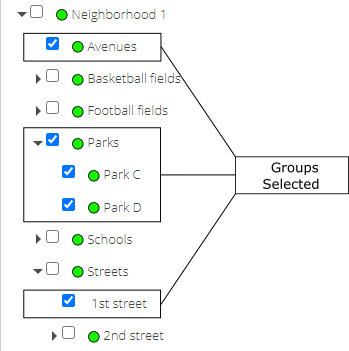
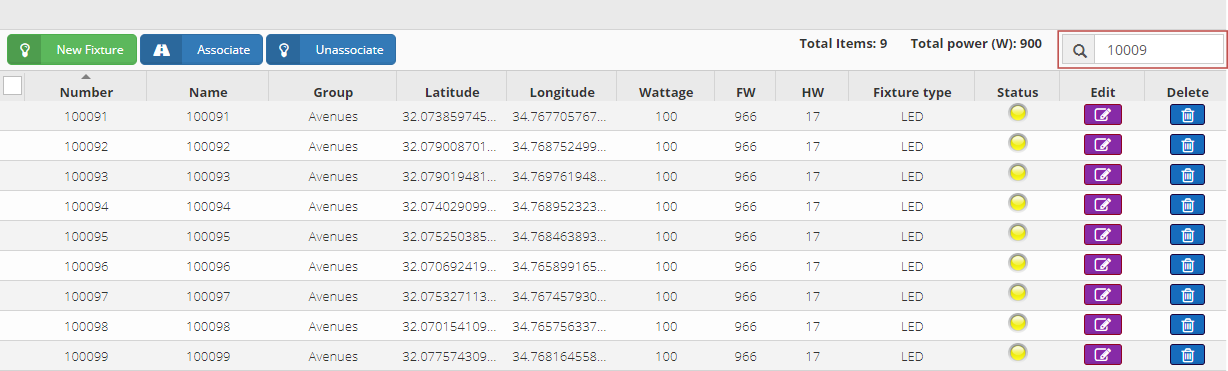
Manages the fixtures of the group selected in the Groups panel. See Groups Panel
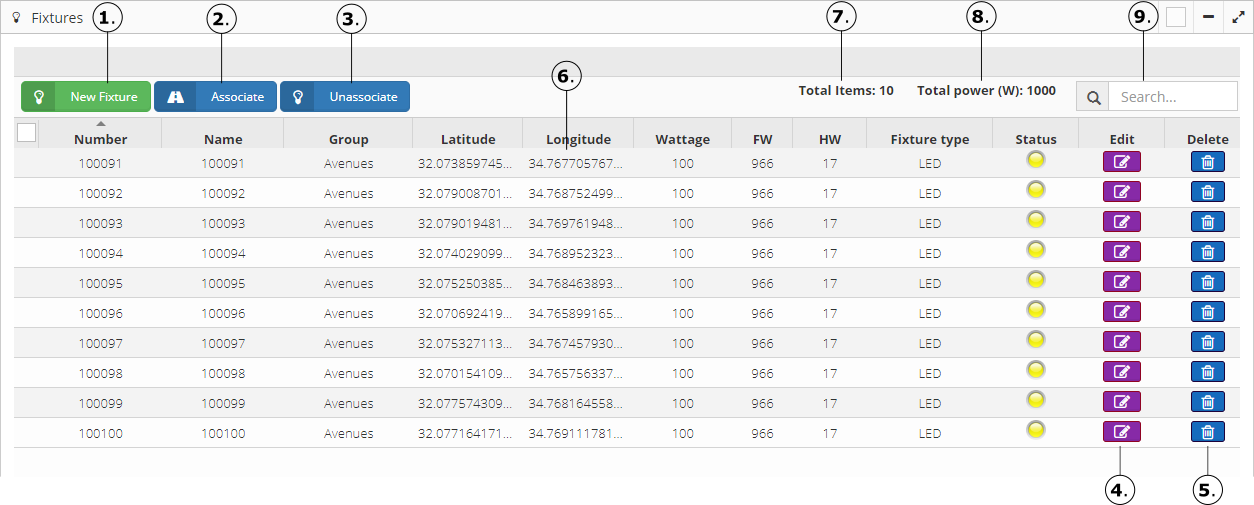
The button to create a new fixture on the site, the data entered is: name (which is used to be name light pole, number light pole or ID), serial number, latitude, and longitude (coordinates), among others. See New Fixture
The button allows assigning fixtures that are in the Main Group (the name is the same as the name of the Site) by associating them with a defined Group. See Associate
The button lets designating the fixtures of a defined Group to be unassociated from the current group. See Unassociate
The button allows editing the selected fixture, modifying the values of name, latitude, and longitude (coordinates), among others according to the need.

NOTE: The number field can not be edited, if the fixture is replaced first the old fixture has to be deleted and as second step the new fixture has to be added.
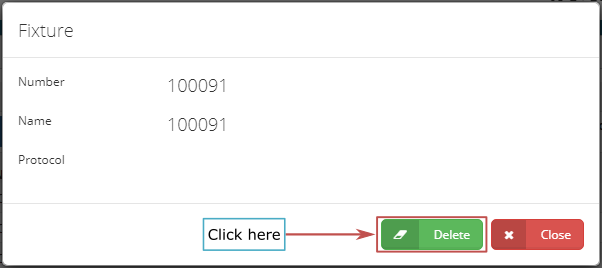
- The button allows deleting the fixture from the site if it is not desired or does not exist.

The table shows the information corresponding to the fixtures assigned to the Group selected in the Groups panel.
The label shows the total number of fixtures that appear on the map, according to the selected Groups.
The label shows the total power (in watts), adding the power per fixture, according to the selected Groups.
Allows a quick search of fixtures to find.
3.2.1 New Fixture
By default, the Fixtures are automatically created in the system, once they have energy and a Gateway is installed in place, but to create a new fixture manually, first select the Main Group (the name is the same as the name of the Site).
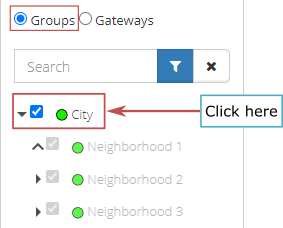
NOTE: If a different group is selected from Main Group, the following message will display:

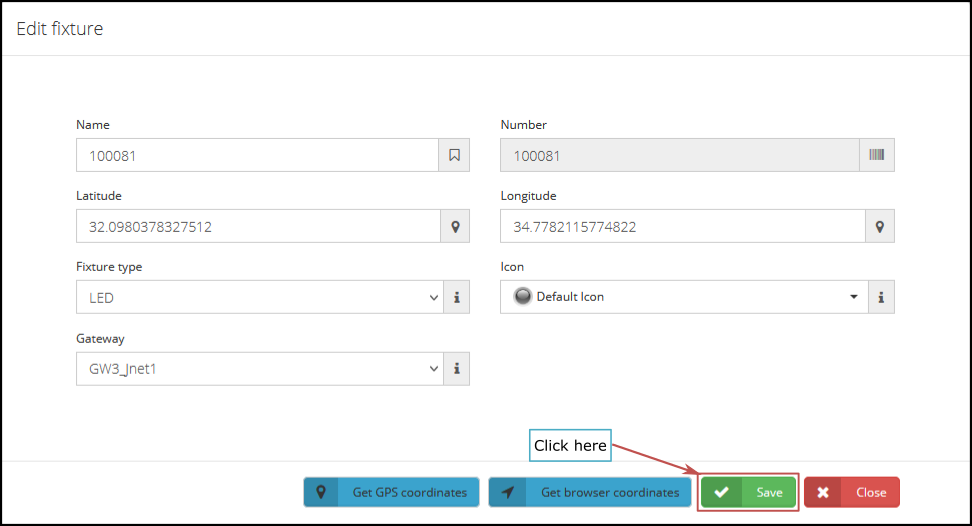
Then click on the button titled New Fixture

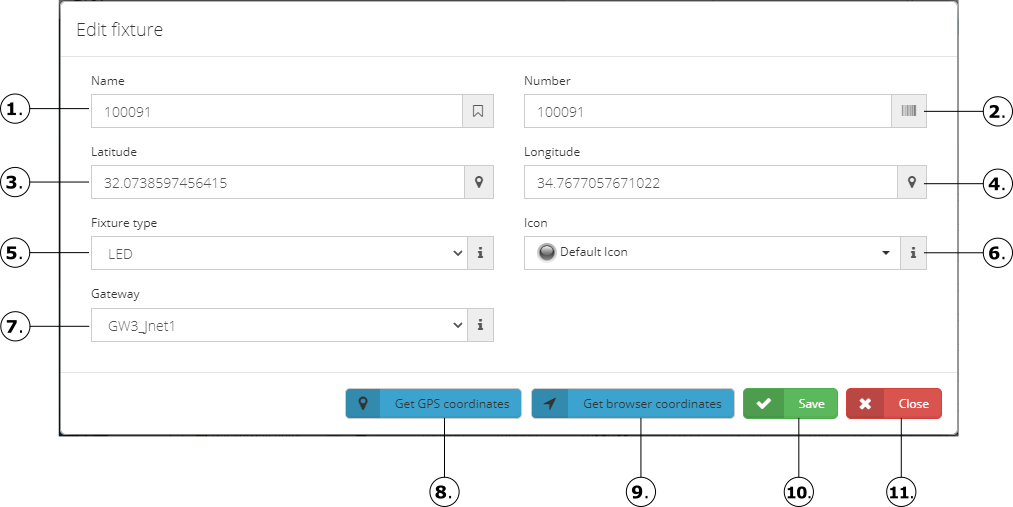
Text box where the name or identification of the fixture is entered.
Text box where the serial number of the fixture is entered.
Text box where the latitude coordinate of the location of the fixture is entered.
Text box where the longitude coordinate of the location of the fixture is entered.
Selection list where the type of fixture is selected, the types of fixtures can be:
LED: Juganu fixture with led controller, allows wireless smart communication.
LED (No Controller): Juganu fixtures without led controller, therefore does not allow wireless smart communication.
Other LED: Not Juganu fixture.
LED (Logic): Juganu fixture with led controller, allows wireless smart communication with predefined dimming parameters.
- This kind of fixtures may include UVA light.
- UVA light
Enables or disables the UVA protection to clean the area of virus and bacteria.
PM/RLY: Juganu Power Meter with led controller, allows wireless smart communication.
Smart with Protection: Juganu fixture with led controller (STAR Technology 915 MHz), allows wireless communication with 2 presets of 5 predefined dimming parameters.
- This kind of fixtures may include UV Protection light.
LED(Wifi): Juganu fixture with led controller (WiFi Technology 2.4 GHz), allows wireless communication.
Smart with UVA: Juganu fixture with led smart controller (STAR Technology 915 MHz), allows wireless communication 2 presets of 10 and 1 predefined dimming parameters.
- This kind of fixtures may include UV light.
Smart: Juganu fixture with led smart controller (STAR Technology 915 or 868 MHz), allows wireless communication 2 presets of 10 and 1 predefined dimming parameters.
Selection list where the icon for the fixture is chosen from a list defined by default.
Selection list where the Gateway name is selected, to send commands
Click on the button to obtain the GPS coordinates, is necessary to enter a valid serial number and that the fixture is powered.
Click on the button to obtain the browser coordinates, is necessary allow the location in the web browser to Juganudigital.com.
Once the fixture information is entered, press the Save button for the process to succeed.


- If do not want to carry out the operation, press the Close button to abort the operation.

3.2.2 Associate
To associate the required fixtures, first select the group where to move the fixtures.
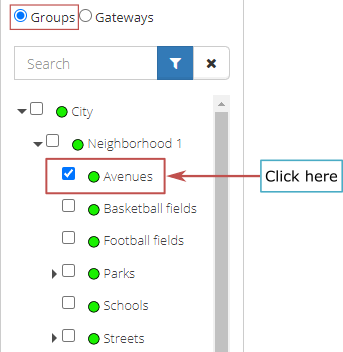
Then click on the button titled Associate

A pop-up window will appear, listing all the fixtures created on the Main Group (the name is the same as the name of the Site).

Indicates the name of the selected Group.
Indicates the network address of the group to link (associate) to the fixture.
The table shows the information corresponding to the fixtures assigned to the Group selected in the Groups panel.
To associate the fixtures, select by clicking on the fixtures.

NOTE: The fixtures that appear marked with the blue background are the ones that will be affected in the process.
- The button allows the association of the selected fixtures in point 3.

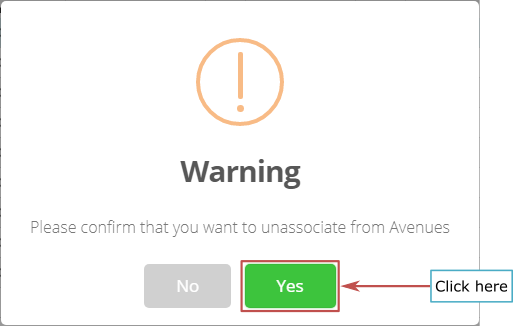
A pop-up window will appear with the message indicating if we are sure to carry out the process.

During the process, a bar will be displayed indicating the percentage of progress until the process is finished.

At the end of the process, a message will be displayed if the process was successful or not, for each of the selected fixtures.

- Allows a quick search of fixtures that are being searched.
- The button allows canceling the operation in case it is no longer wanted.
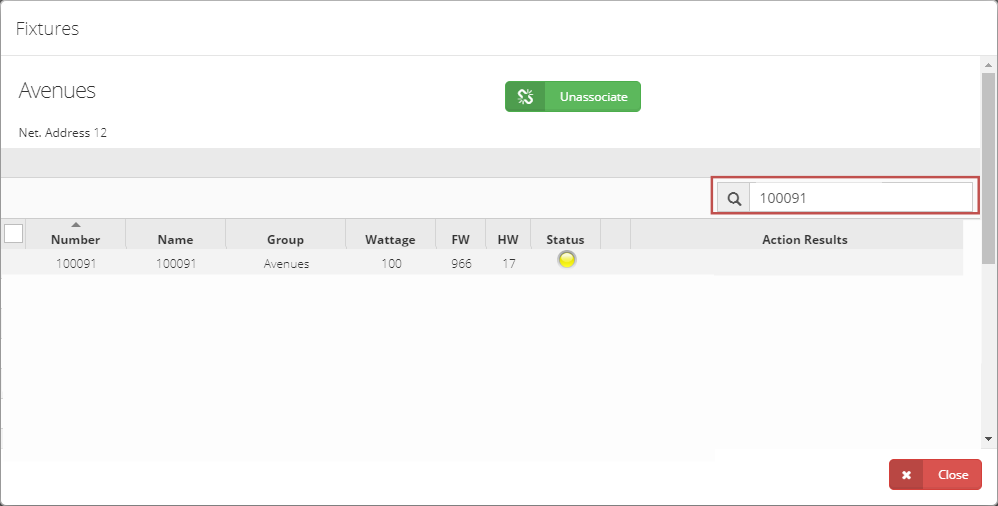
3.2.3 Unassociate
To unassociate the required fixtures, first select the group which contains the fixtures to unassociate. The fixtures will automatically go one LEVEL up. If the fixtures are in Level 2, they will go to Level 1, and so on, until they are placed at the top Level, which the Main Group (the name is the same as the name of the Site).

Then click on the button titled Unassociate

A pop-up window will appear, listing all the fixtures assigned to the selected Group.
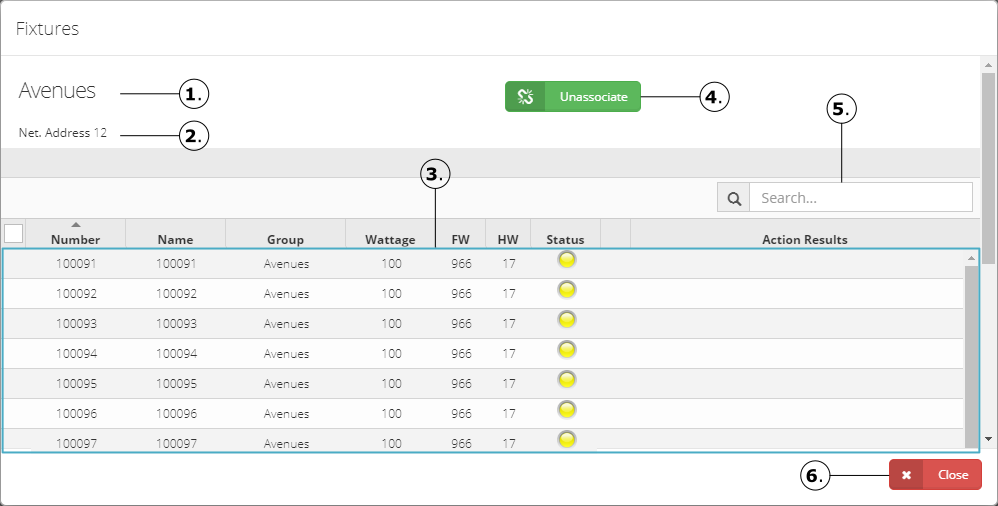
Indicates the name of the selected Group.
Indicates the network address of the group to unlink (unassociate) the fixture, linking it to the main group.
The table shows the information corresponding to the fixtures assigned to the Group selected in the Groups panel.
To unassociate the fixtures, select by clicking on the fixtures that want to unassociate from the selected group.
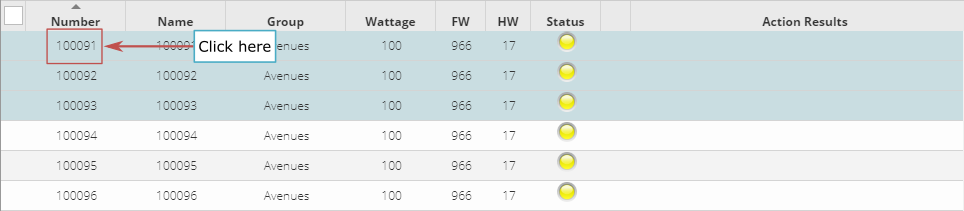
NOTE: The fixtures that appear marked with the blue background are the ones that will be affected in the process.
- The button allows the fixtures selected in point 3 to unassociate.

A pop-up window will appear with the message indicating if we are sure to carry out the process.
During the process, a bar will be displayed indicating the percentage of progress until the process is finished.

At the end of the process, a message will be displayed if the process was successful or not, for each of the selected fixtures.

- Allows a quick search of lamps.
- The button allows canceling the operation.
3.3 Groups
This menu allows the management of the groups in the site.
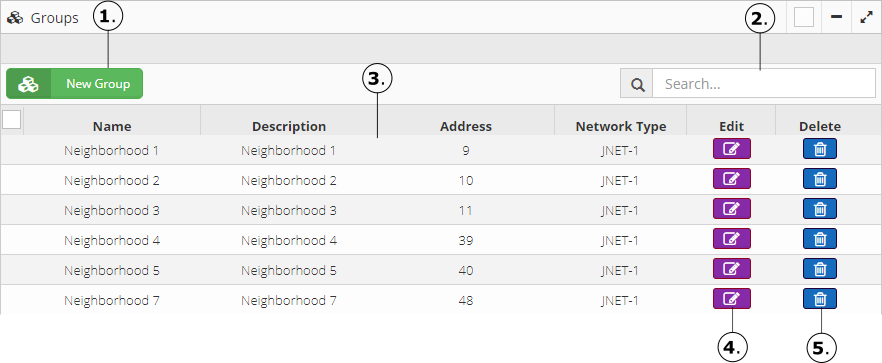
The button allows creating a New Group. See New Group
Allows a quick search of groups.
The table shows the information corresponding to the groups.
The button allows editing the selected group, modifying the values of name and description.

- The button allows deleting the group from the site if it is not necessary.
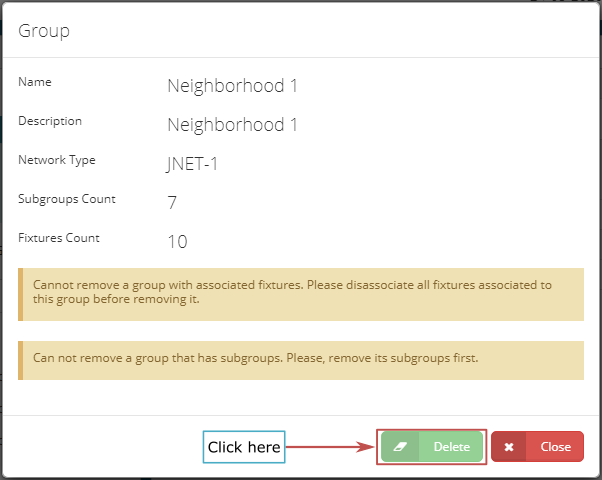

Note: If the group have associated fixtures or child groups created, this button will remain disabled.
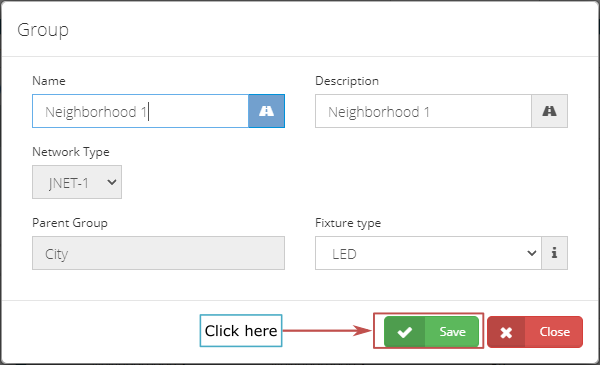
3.3.1 New Group
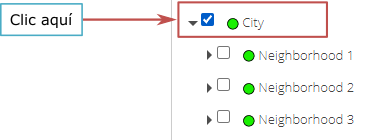
To create a new group, first check the parent group.

Then click on the button titled New Group

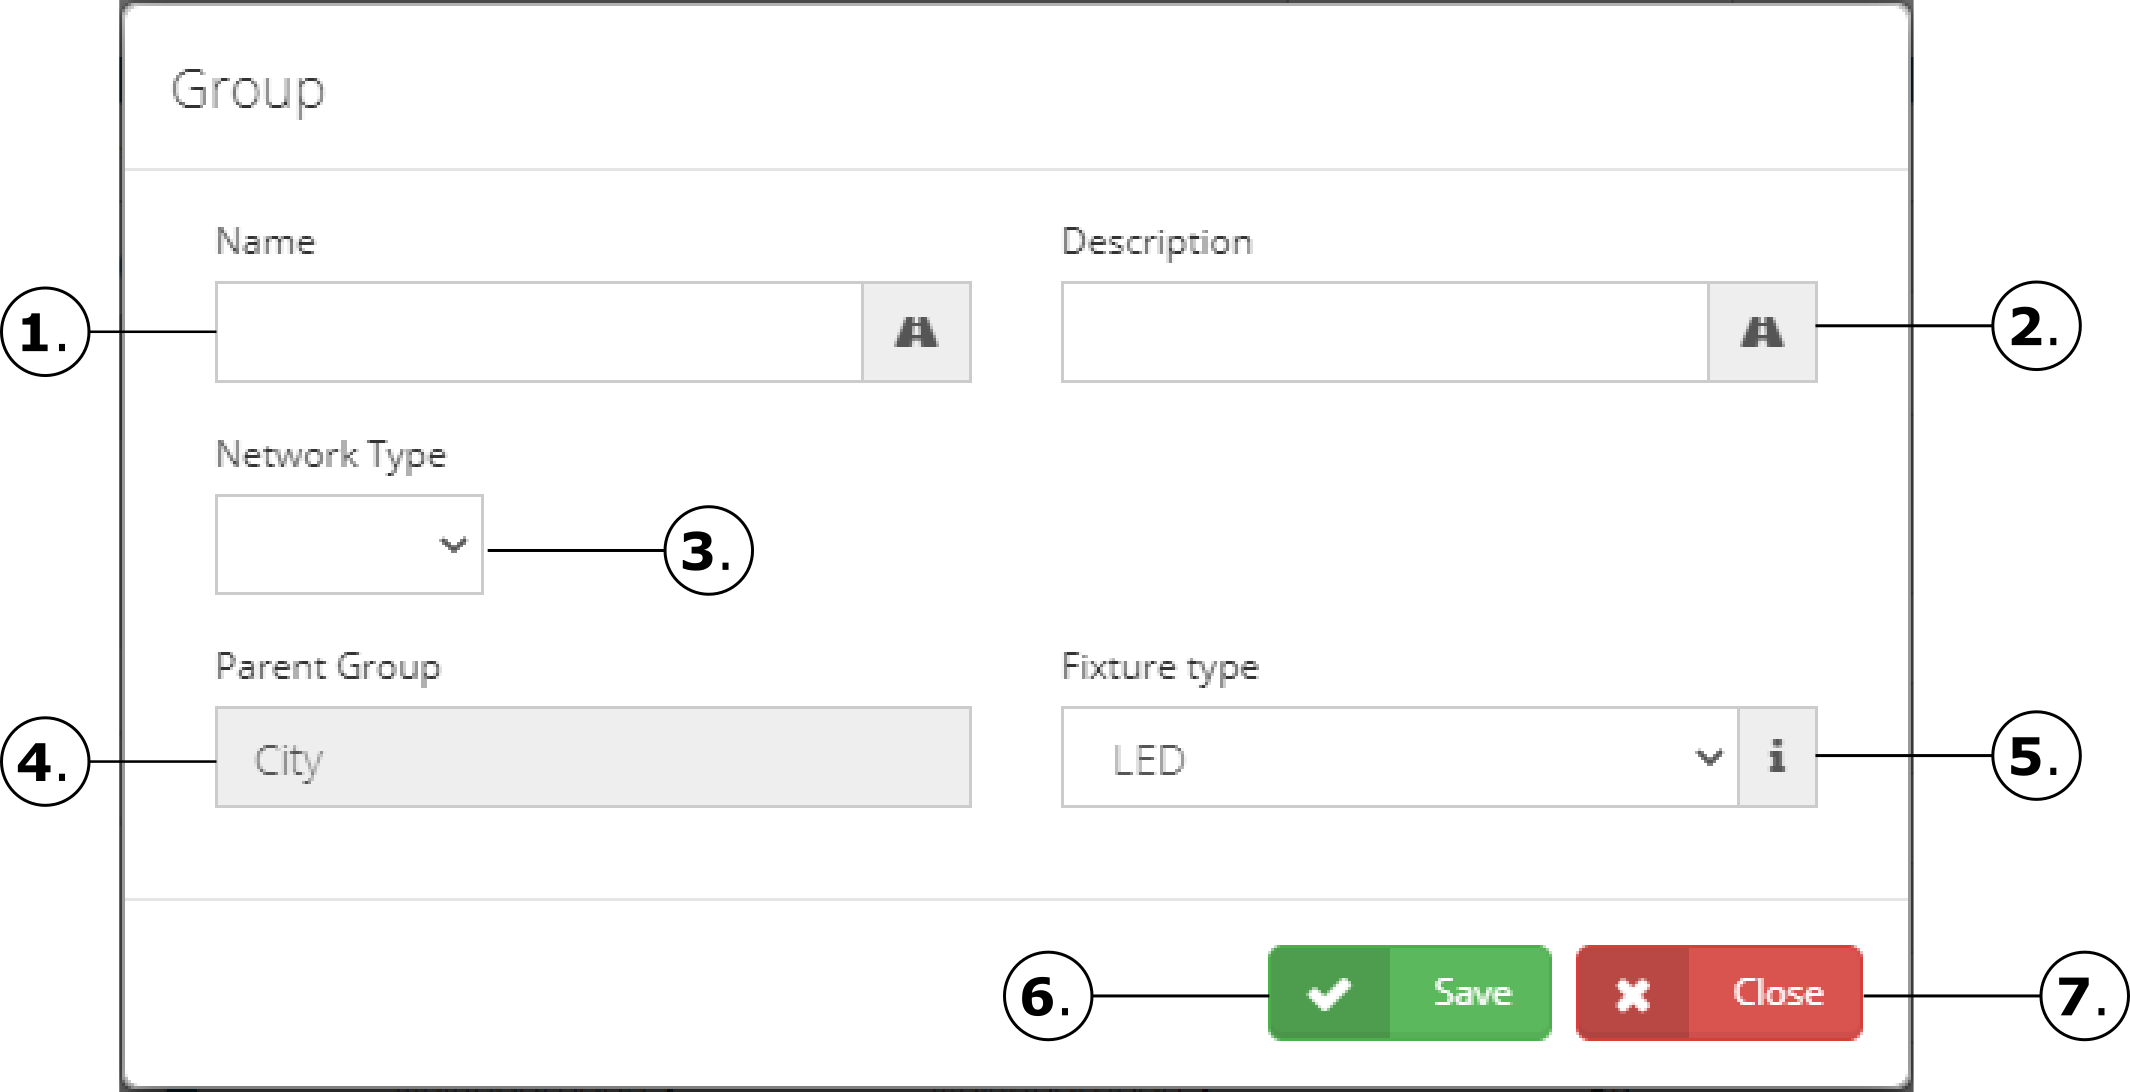
Text box where the name of the group is entered.
Text box where the description of the group is entered.
Select the type of network from the list of networks. The creation of a new SubGroup only allows the JNET-1 network type.
Note: The network type must be the same as the network type defined in the gateways created on the site. See New Gateway
Text box where showing the name of the parent group selected.
Select the type of fixture from the list of fixture types.
Once the group information is entered, press the Save button for the process to succeed.

- If do not want to carry out the operation, press the Close button to abort the operation.
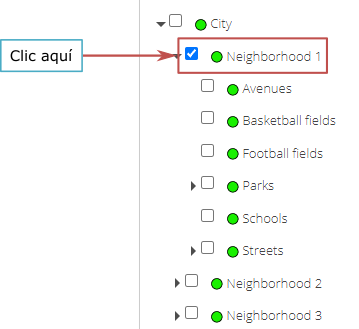
3.3.2 New Group (SubGroup)
To create a new group (subgroup), first select the desired parent Group, in the Groups panel. Subgroup creation is allowed up to 8th level.
- Parent Group selection - 2nd level
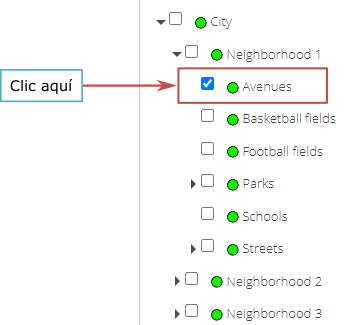
- Parent Group selection - 3rd level
- Parent Group selection - 4th level

Then click on the button titled New Group

Text box where the name of the group is entered.
Text box where the description of the group is entered.
Select the type of network from the list of networks. The creation of a new Group only allows the JNET-1 network type.
Note: The network type must be the same as the network type defined in the gateways created on the site. See New Gateway
Text box showing the name of the parent group.
Select the type of fixture from the list of fixture types.
Once the group information is entered, press the Save button for the process to succeed.
- If do not want to carry out the operation, press the Close button to abort the operation.
3.4 Commands
To send commands to the fixtures, first, choose the Group or Groups in the Groups panel.
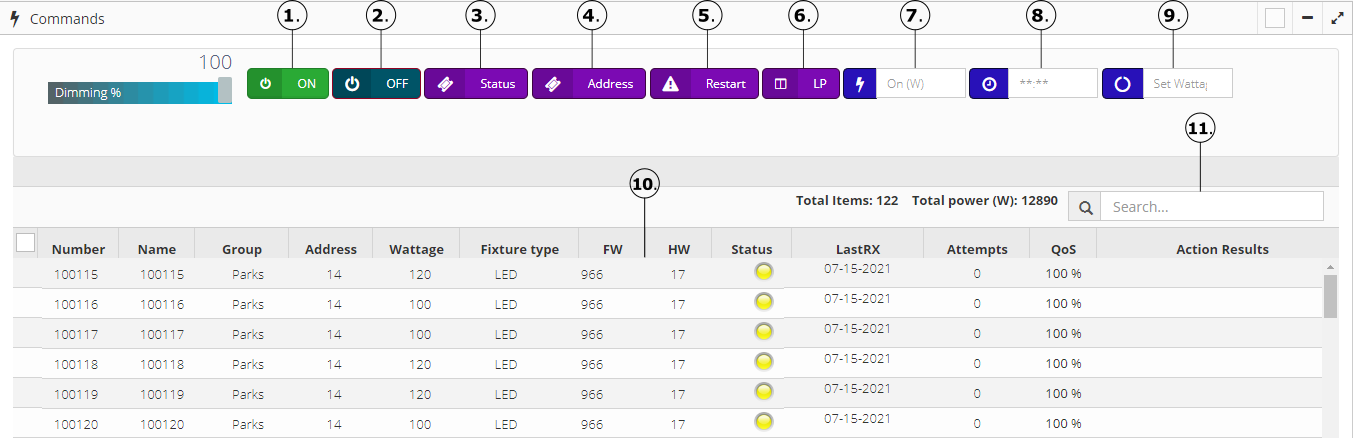
NOTE: The fixtures that are marked with a blue background are the ones that will be affected when sending commands. To perform this operation, click on the serial number of the fixture, in this way the row of the selected fixture will change to the blue background color.

- The button allows turn ON the fixture, indicates the percentage of dimming that will be applied.

- The successful response, when sending this command, will be shown in the column titled Action results of the fixture table, indicating that the fixture is turned ON successfully according to the percentage of dimming set (on(%)).

- NOTE: If the dimming percentage is not indicated, the fixture will not turn ON.
- The button allows turn OFF the fixture.

- The successful response, when sending this command, will be shown in the column titled Action results of the fixture table, indicating that the fixture is turned OFF successfully (off(0%)).

- The button allows obtaining the status of the fixture, such as the current power (PW), the wattage (WATTAGE), the datetime (DATE), the firmware version (FW) and hardware version (HW) respectively.

- The successful response, when sending this command, will be shown in the column titled Action results of the fixture table, indicating that the fixture obtained information of its status successfully.

- The button allows obtaining the network address of the fixture, this network address is the value assigned to the Group to which the fixture belongs. This address is used to send group commands.

- The successful response, when sending this command, will be shown in the column titled Action results of the fixture table, indicating that the fixture obtained the network address id successfully (PA: Public Address).

- The button allows resetting the fixture, this function emulates the disconnection and electrical connection in the fixture.

- The successful response, when sending this command, will be shown in the column titled Action results of the fixture table, indicating that the fixture was successfully restarted (-).

- The button shows in a pop-up window, a comparison between the Read LP (LP saved in the memory of the fixture) and the Associated LP (LP in the system) of the selected fixture.


- The button allows turn ON the fixture with the number of watts entered in the text area of this button.
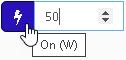
- The successful response, when sending this command, will be shown in the column titled Action results of the fixture table, indicating that the fixture is successfully turned ON according to the watts entered.

- The button allows sending the time entered in the text area (24hrs format). The current date is also included in sending this command.
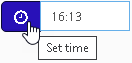
- The successful response, when sending this command, will be shown in the column titled Action results of the fixture table, indicating that the fixture set the time successfully according to the time entered.

- The button allows sending the maximum wattage in watts to which the fixture can be turned ON. The desired power should be entered in the text area.
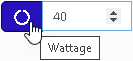
- The successful response, when sending this command, will be shown in the column titled Action results of the fixture table, indicating that the fixture was successfully set to wattage according to the input wattage in watts.

- NOTE: It is important to know the maximum wattage of each fixture, if a wattage greater than its maximum wattage is entered, the fixture will stop working.
The Table shows the selected fixtures, shows the serial number, the name of the Gateway and the Group to which it belongs, as well as a results box where indicates if the operation of the command that was sent was successful.
Allows a quick search of fixtures.

NOTE
When sending a command (commands described in points 1 to 9) and there was no response, then the Communication error message will be displayed in the column titled Action results of the fixture table, the error result will be displayed for each of the selected fixtures that do not respond to the command.

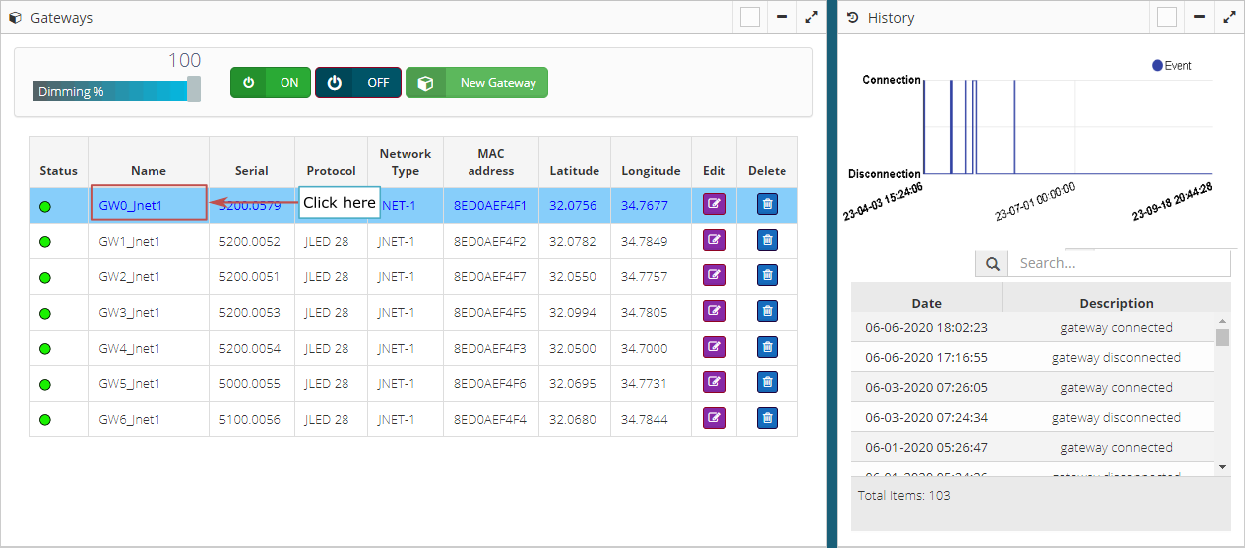
3.5 Gateways
The Gateway is the equipment used to connect wirelessly to the luminaries. This menu allows to manage the gateway used in the site.
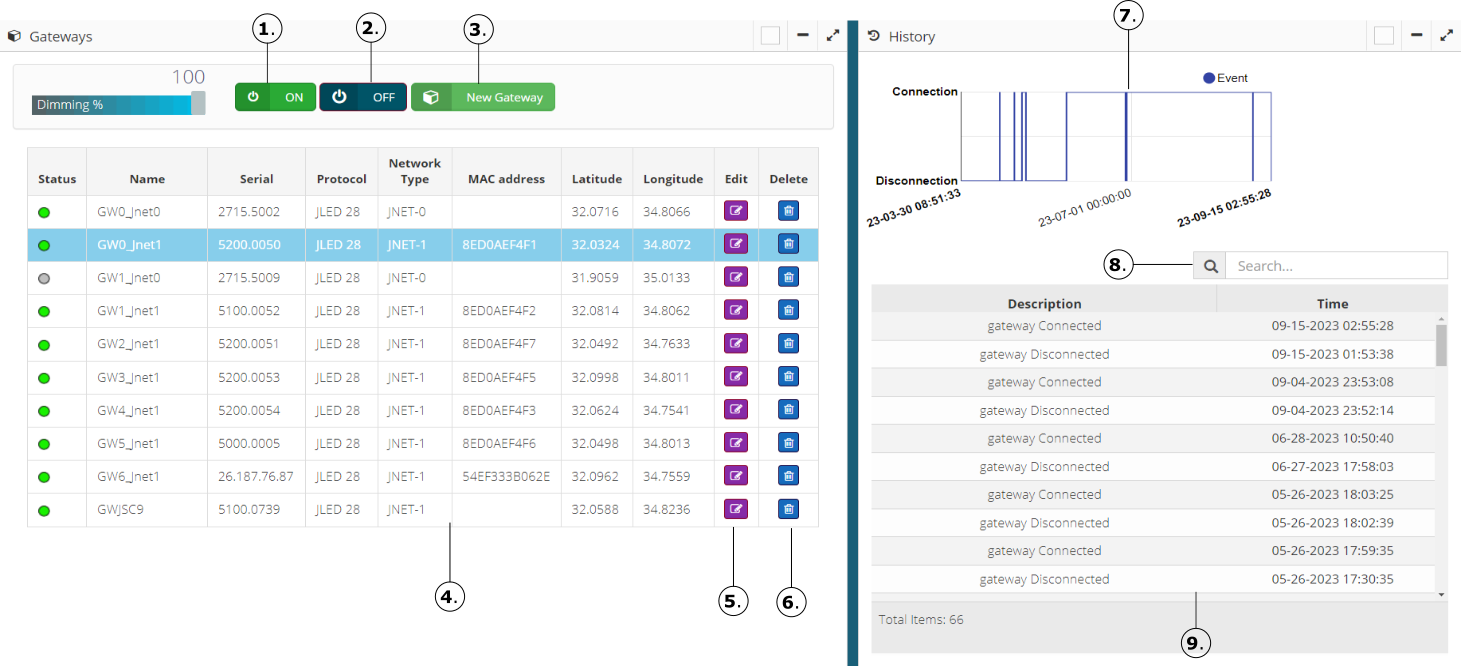
- The button allows turn ON all the fixtures connected to the Gateway, indicates the percentage of dimming that will be applied.
NOTE
If the dimming percentage is not indicated, the fixture will not turn ON.
- The Button allows turn OFF the fixture.
The button allows creating a New Gateway. See New Gateway
The table shows the Gateways entered on the site. When clicking a Gateway in the list, the information of point 7, 8 and 9 can be seen.
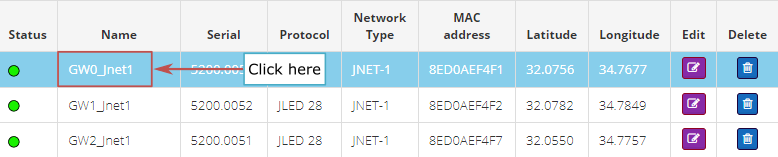
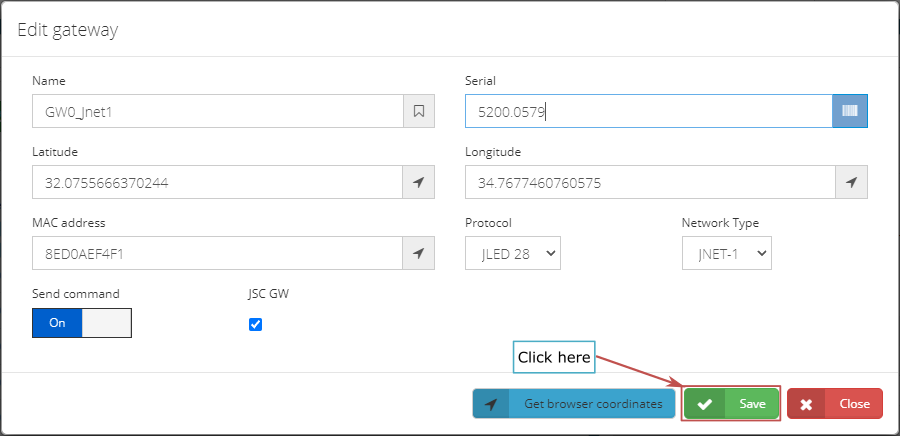
- The button allows editing the information of the Gateway, the information that can be edited is the name that is displayed throughout the site, the serial number and the type of protocol used.

- The button allows removing a Gateway from the site.
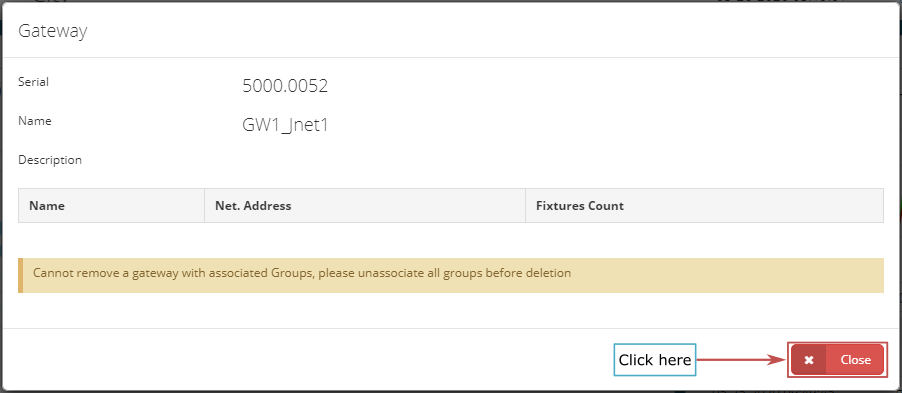

NOTE
If the Gateway has information or connections of luminaries, it cannot be deleted.
Box that displays a graphical history of connections and disconnections per day the Gateway has had in the course of the time.
The text box allows searching the connection and disconnection history of the selected Gateway. Just type the date to see the information.
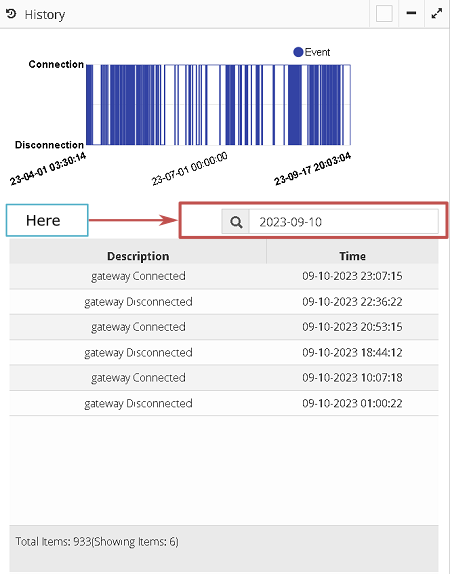
- The history table shows connections and disconnections from the Gateway to the system.
3.5.1 New Gateway
Click on the button titled New Gateway, to create a new Gateway.

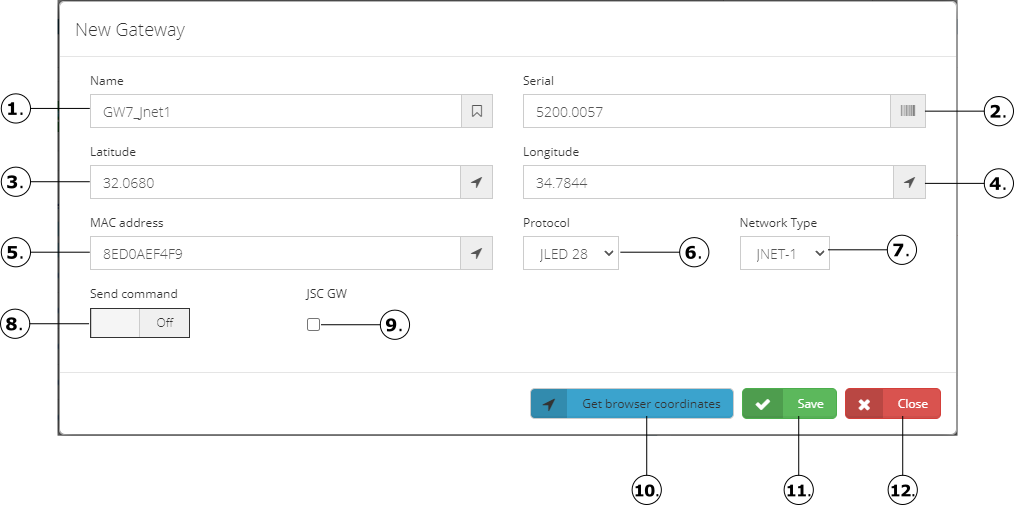
Text box where the name or identification of the gateway is entered.
Text box where the Gateway ID of the gateway is entered.
Text box where the latitude coordinate of the location of the gateway is entered.
Text box where the longitude coordinate of the location of the gateway is entered.
Text box where the gateway MAC address is entered.
Selection list where the type of protocol is selected, the types of protocols can be:
JLED 28
JLED 14
NOTE: The default is JLED 28.
Selection list where the type of network is selected, the types of networks can be:
JNET-0
JNET-1
JNET-2
The switch allows activating or deactivating the sending of commands to the gateway.
The checkbox allows to assigns the main gateway Jnet1 for the JSC.
Click on the button to obtain the browser coordinates, is necessary allow the location in the web browser to Juganudigital.com.
Once the gateway information is entered, press the Save button for the process to succeed.

- If do not want to carry out the operation, press the Close button to abort the operation.