2 Dashboard
2.1 Access map features by Role
| Functionality | SuperAdmin | Admin | Operator | Reader |
|---|---|---|---|---|
| Dashboard |  Yes Yes |
Yes |
Yes |
Yes |
| Map | Yes |
Yes |
Yes |
Yes |
| Total access | Yes |
Yes |
 No No |
No |
| Associate Fixtures to Groups | Yes |
Yes |
No |
No |
| Sending Commands to Fixtures, both on Broadcast and Unicast | Yes |
Yes |
Yes |
No |
| Groups, Gateways and Fixtures status display | Yes |
Yes |
Yes |
Yes |
| Commands (CSV) | Yes |
Yes |
Yes |
No |
| Notification | Yes |
Yes |
Yes |
Yes |
| Tree Explorer | Yes |
Yes |
Yes |
Yes |
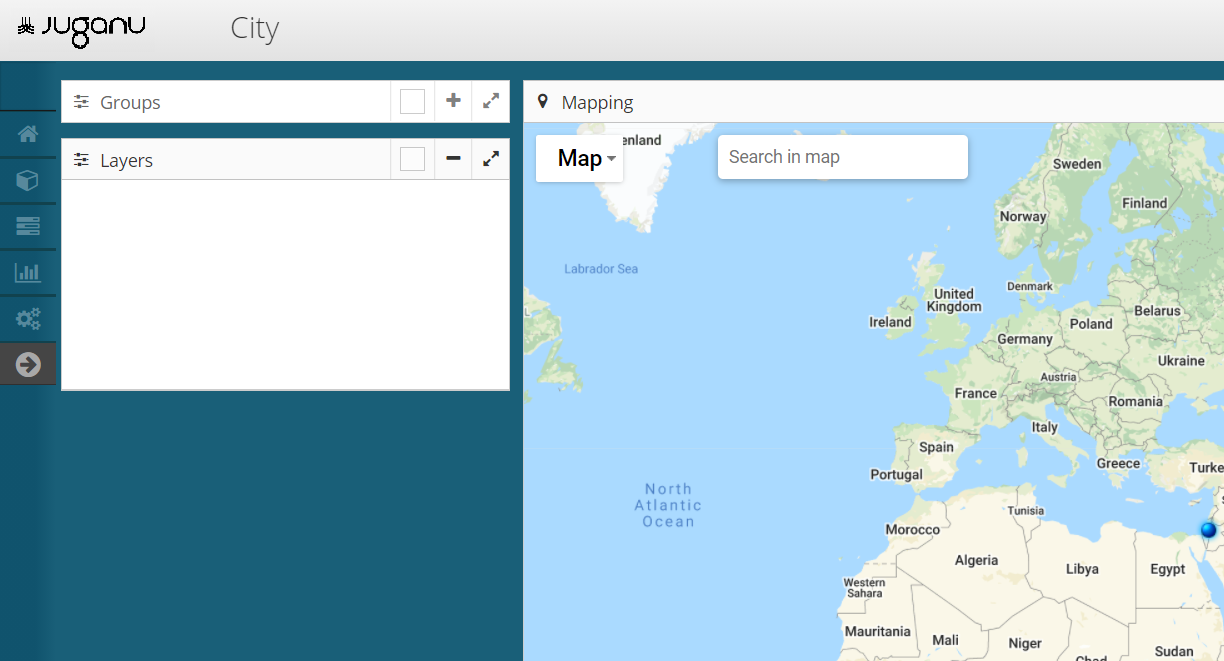
2.2 Groups
The option allows visualizing a group of fixtures on the map, indicating an approximation of the physical location of each fixture, based on the Latitude and Longitude coordinates, as well as allowing interaction with each group, group of groups, or each of the fixtures by sending them different commands such as On or OFF.
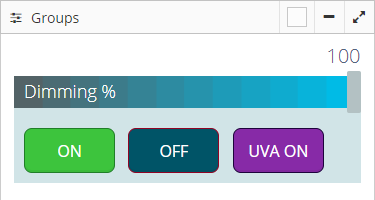
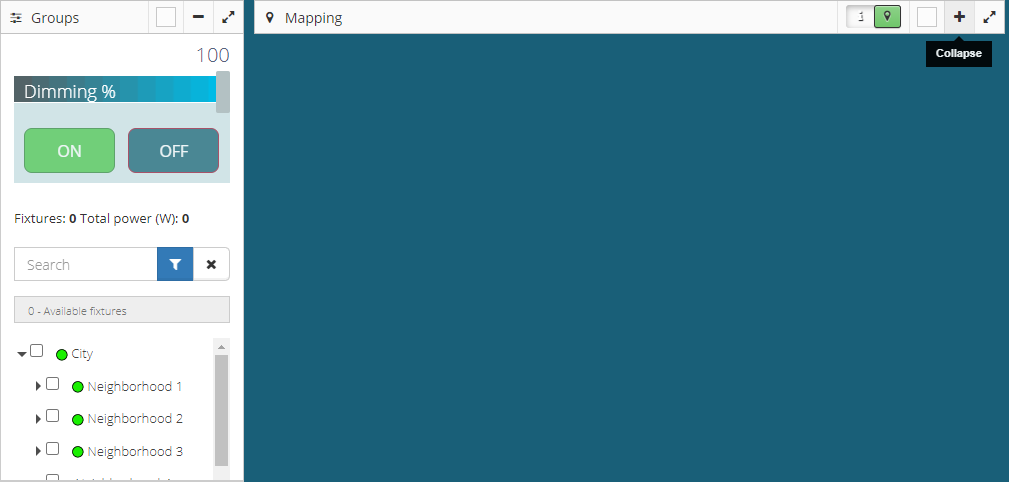
2.2.1 Groups Panel
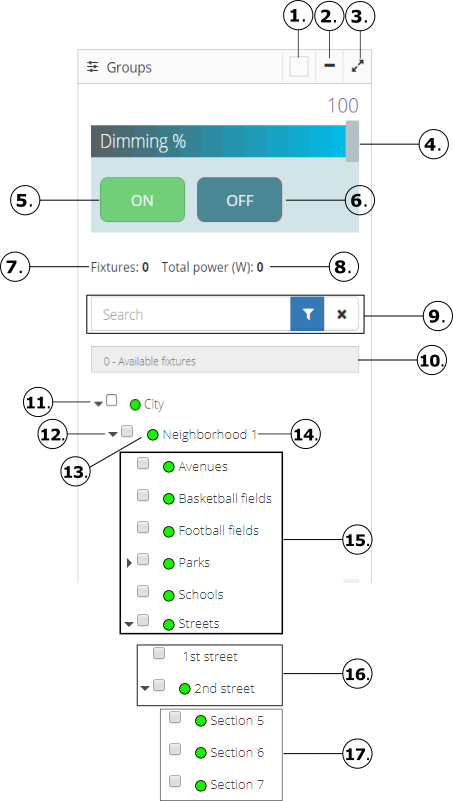
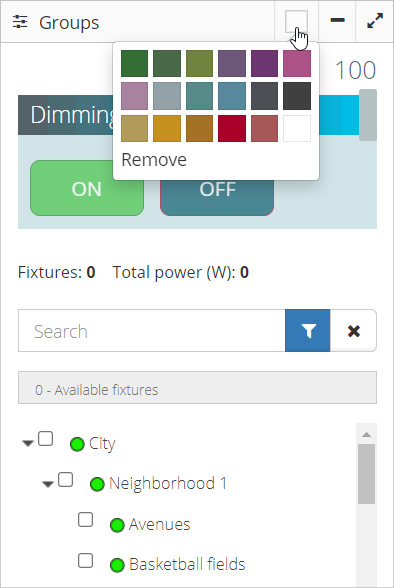
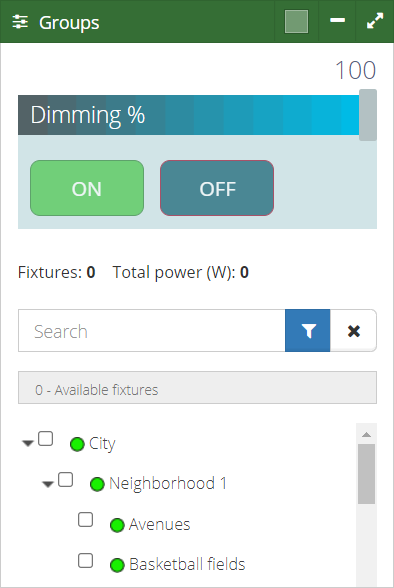
- Change the color of the window frame with different colors.
- Shows or hides the Groups panel.
- Displays the Groups panel in full screen.
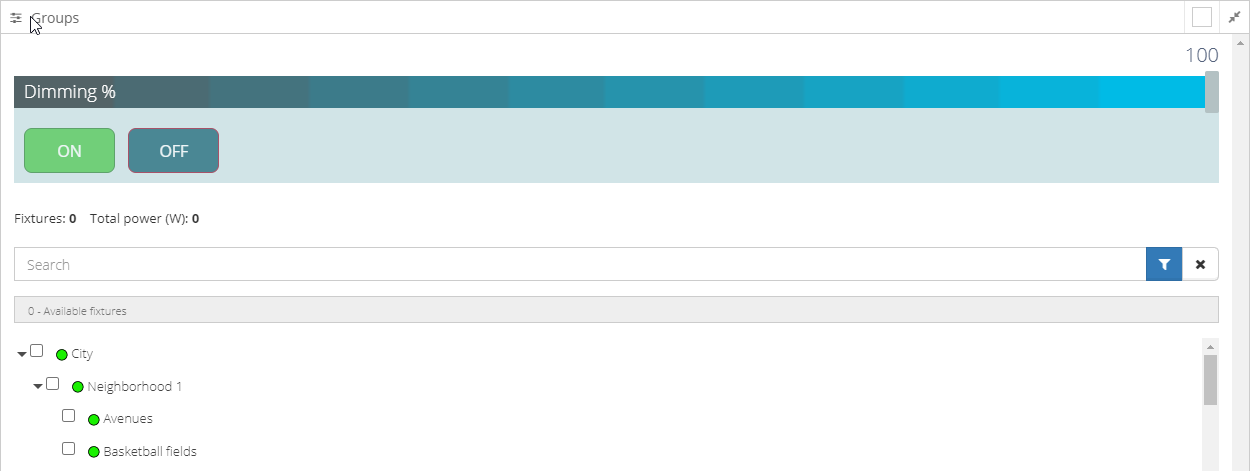
- The bar allows determining the dimming of a fixtures group, it can start from 0 (indicates OFF) to 100 (indicates the maximum power). These values are given as a percentage (%).

- The ON button allows turning ON all the fixtures of a set of selected Groups, the intensity applied is the one chosen in the bar of point 4.
- First, select a set of Groups (one or more)
- Then press the button, which allows confirming the instruction, the following message will be displayed.
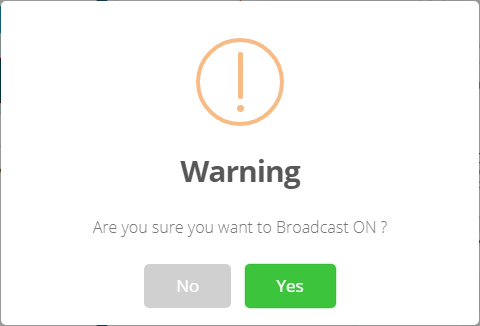
If press YES, the instruction is executed, if press NO, the instruction will not be executed.
NOTE:
- If a Group of Logic or smart with UVA type is selected, then a special UVA ON button will be enabled. The button allows turning ON a UVA light to all fixtures that have this light, associated to the selected Logic or smart with UVA Group.
- This kind of fixtures may include UVA light.
- UVA light
Enables or disables the UVA protection to clean the area of virus and bacteria.
- NOTE:
- If a Group of protection type is selected, then a special UV button will be enabled. The button allows turning ON a UV light to all fixtures that have this light, associated to the selected protection Group.
- This kind of fixtures may include UV light.
- UV protection light
Enables or disables the UV protection to clean the area of virus and bacteria.
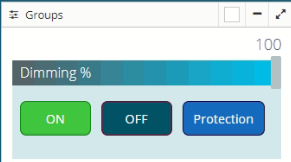
- The OFF button allows turning OFF all the fixtures of a set of selected Groups.
- First, select a set of Groups (one or more)
- Then press the button, which allows confirming the instruction, the following message will be displayed.

- If press YES, the instruction is executed, if press NO, the instruction will not be executed.
The label shows the total number of Fixtures that appears on the map, according to the selected Groups.
The label shows the total power (in watts), adding the power per fixture, according to the selected Groups.
Search box, which allows finding a Group, consisting of two buttons, one to perform the filter and the other to cancel the filter. See Group search
Search box allows quick search for a fixture, simply enter the serial number/identification or name of the fixture. See Fixture search
Main Group for creating new fixtures. The name of the Group is the same as the name of the Site.

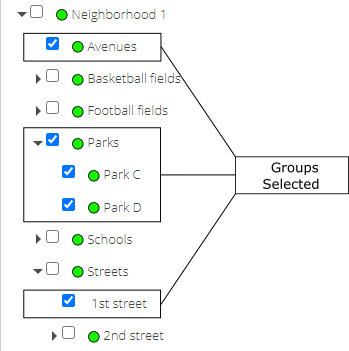
- Collapsed and expand a Group.
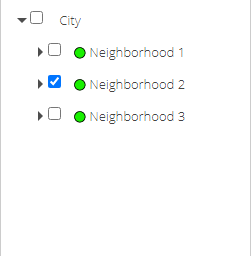
- Displays the status of the Group, the status can be:
connected -

disconnected -

connection pending -

Indicates the name of each Group, assigned to the Site.
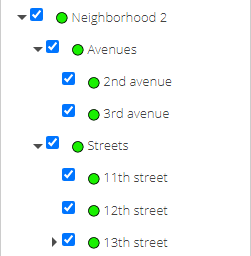
Indicates the name of the Child Groups that belong to the Parent Group (Level 1), assigned to the Site.
Indicates the name of the Child Groups that belong to the Parent Group (Level 2), assigned to the Site.
Indicates the name of the Child Groups that belong to the Parent Group (Level 3), assigned to the Site.
NOTE: Groups can be created up to Level 8.
2.2.1.1 Group search
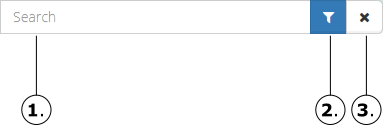
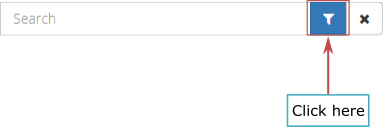
Text box allows typing the name of a Group to search.
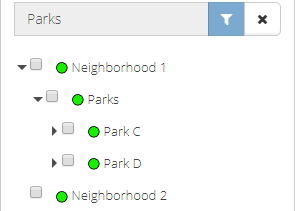
The button allows performing the search or filter entered in point 1, displaying all possible results according to the search criteria.
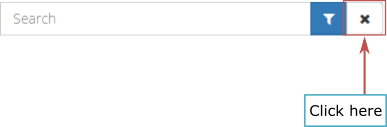
- The button allows canceling the search or filter entered in point 1, contracts all trees leaving the selections made before performing the search or during the search.
2.2.1.2 Fixture search
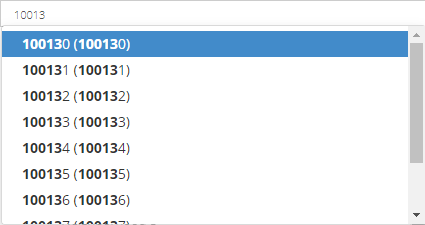
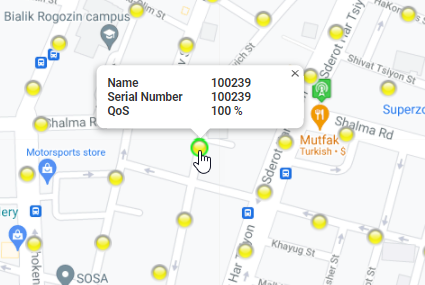
Search box allows quick search for a fixture, simply enter the serial number/identification or name of the fixture. As shown in the following example, writing the number 10013 shows more than 5 possible options.
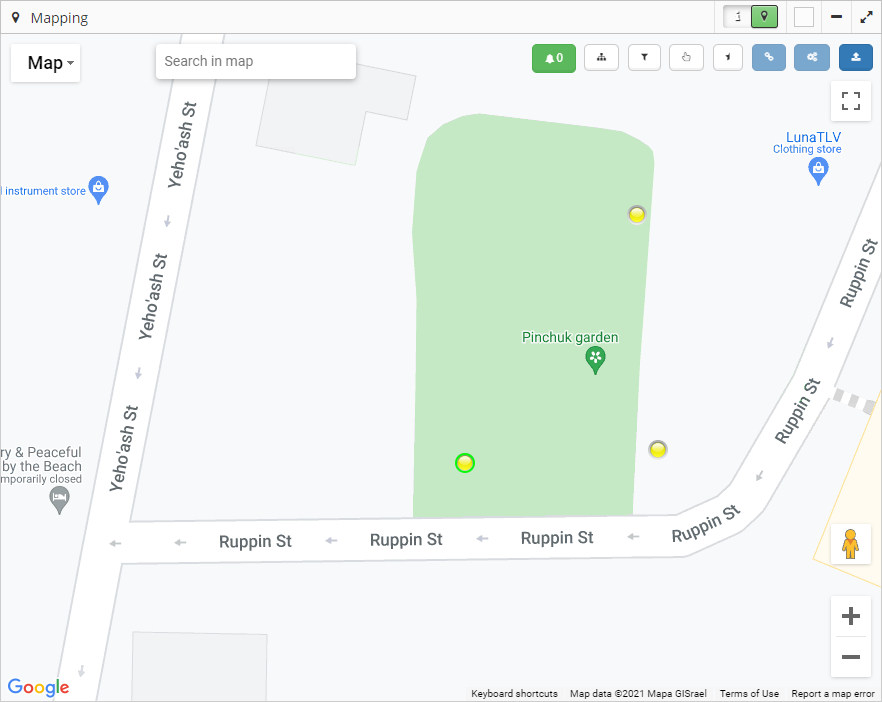
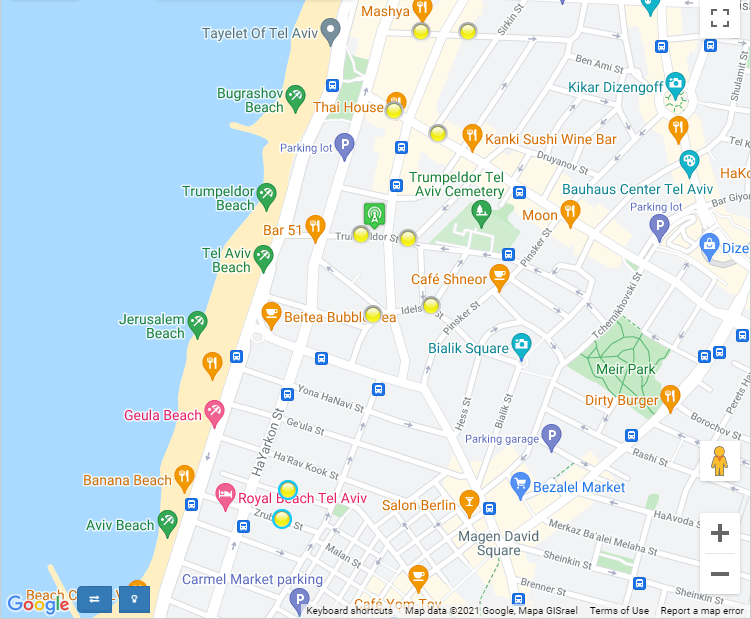
When selecting the number to search, press Enter and the site will search for the fixture on the map with the indicated number, zooming in and with a green circle as shown below.
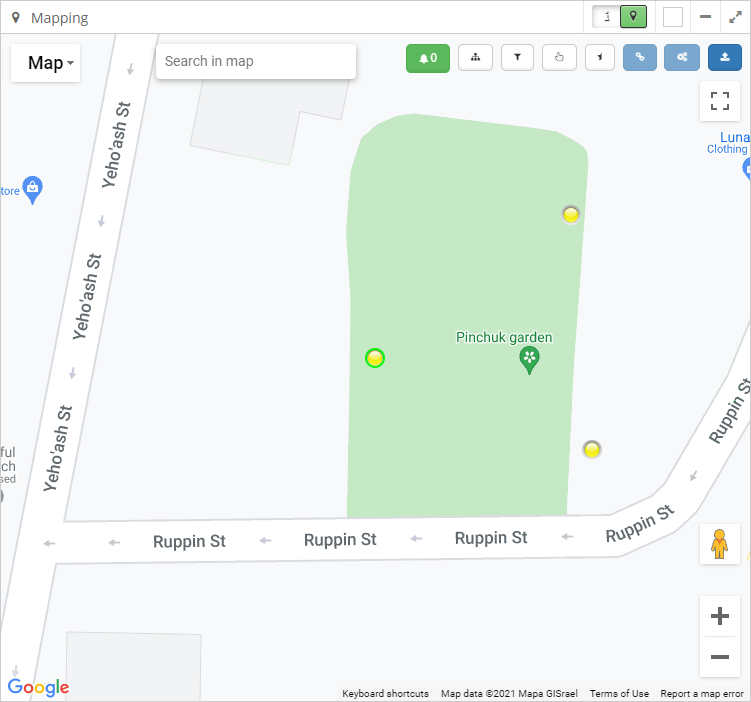
NOTE
To remove the selection, press Ctrl + left click, or enter another serial number, the previous selection will lose the green circle and the new search will have the green circle.
If the number entered in the search box does not appear automatically, or if the green circle is not placed in any fixture, the fixture does not exist in the selected Group. In case no fixture appears, then the fixture has not been entered into the site.
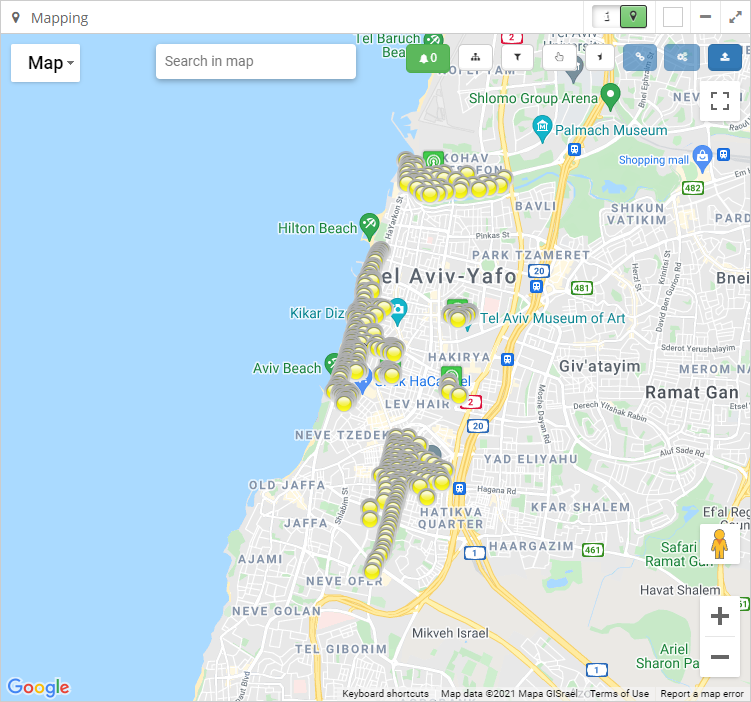
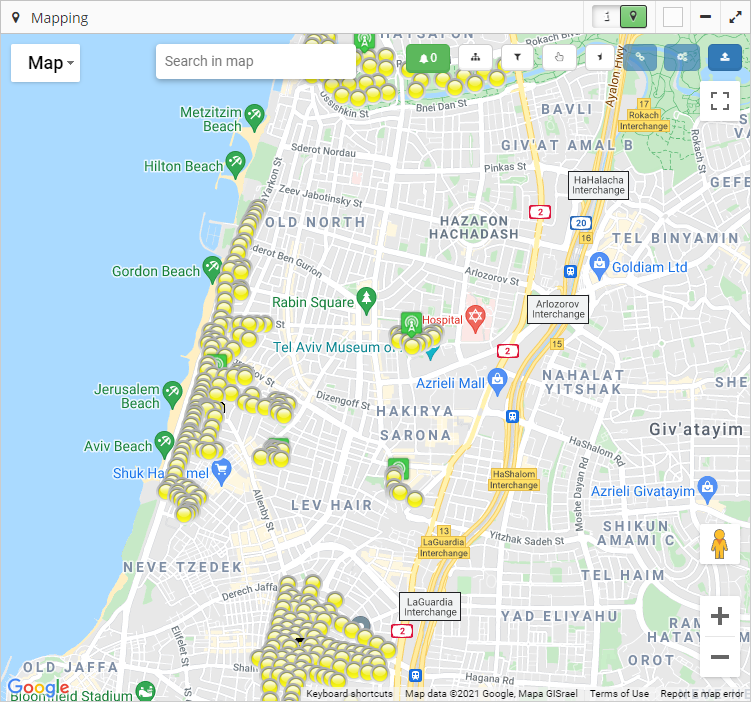
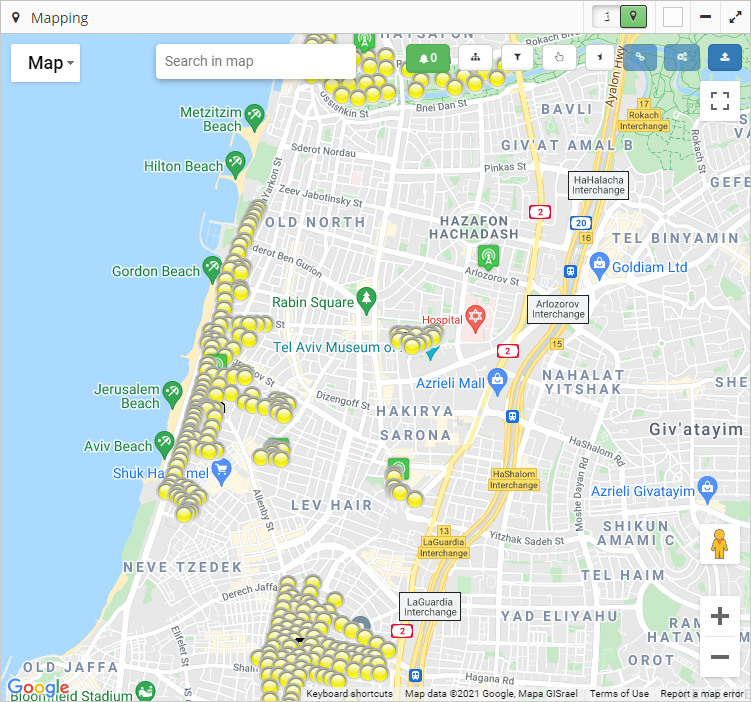
2.2.2 Mapping Panel
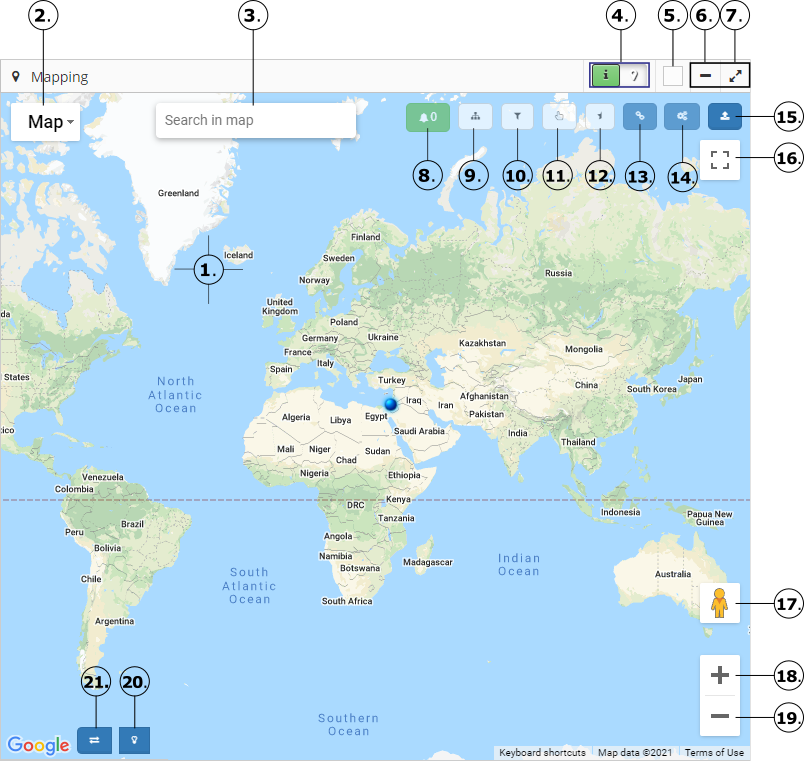
The site map allows seeing the location of the fixtures; allows visualizing how they are distributed in each Group; and it also allows seeing the status of the fixtures See Map fixture review, these states can be:
ON

OFF

ERROR

Option allows you to change the map style, the styles are:
Map: Show street map.
Satellite: Show satellite imagery.
Terrain: Show street map with terrain.

- Search box allows quick search for a location, simply enter the name or address. As shown in the following example, writing the name lev shows 5 possible options.
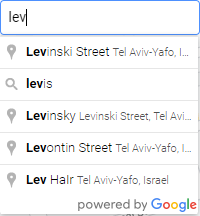
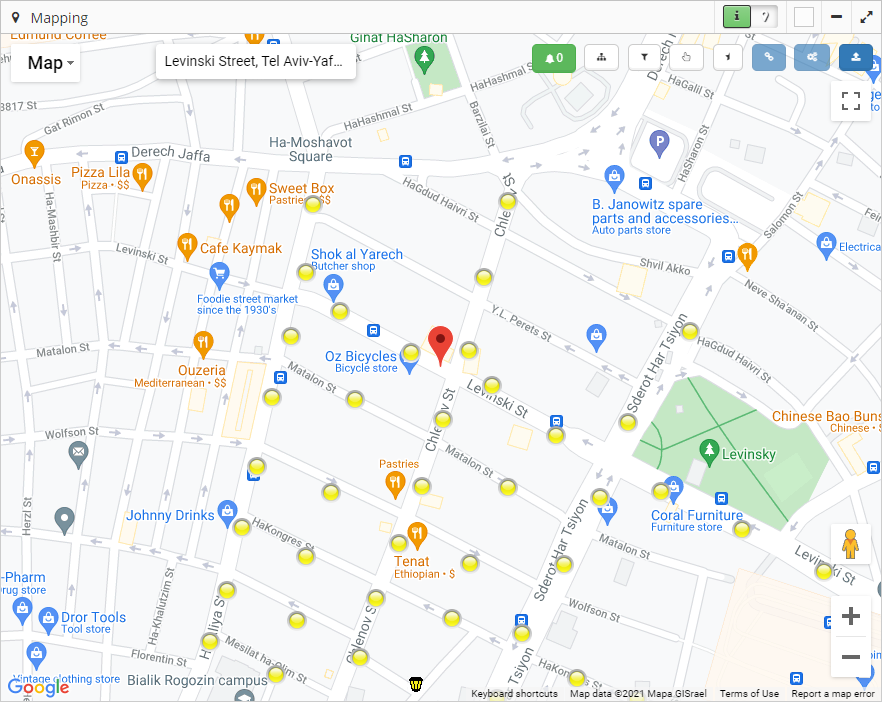
When selecting the name or address of the location, press Enter and the site will search for the location on the map with the indicated name or address, zooming in and it will be shown with a red marker.
- By selecting this icon, it can be perform an automatic relocation of a fixture or Gateway, just click (without releasing) the fixture or Gateway to move and drag it to the new location.

- Relocation of a fixture.

- Relocation of a Gateway
NOTE
- To deactivate automatic relocation, click on the button of multiple options, to set default functionality.

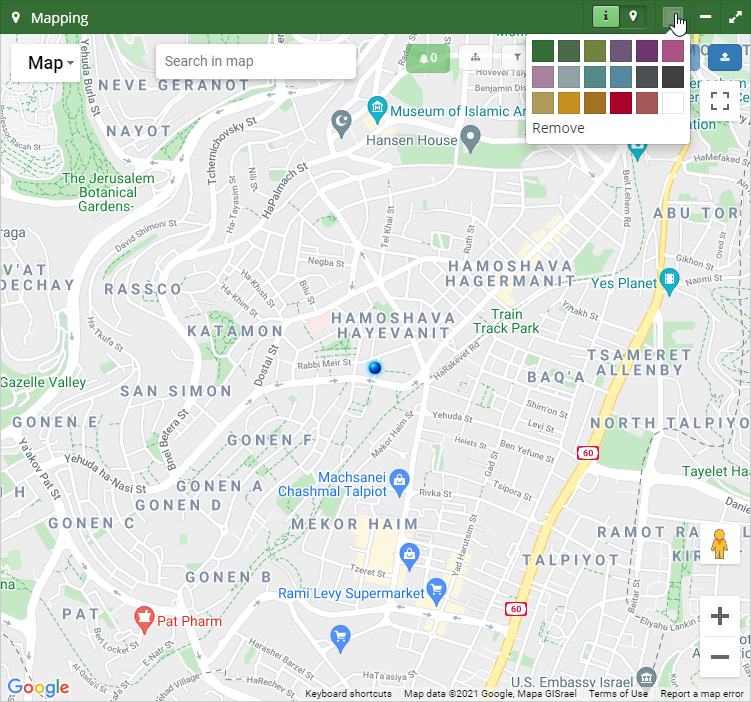
- Change the color of the window frame with different colors.
- Shows or hides the Mapping panel.
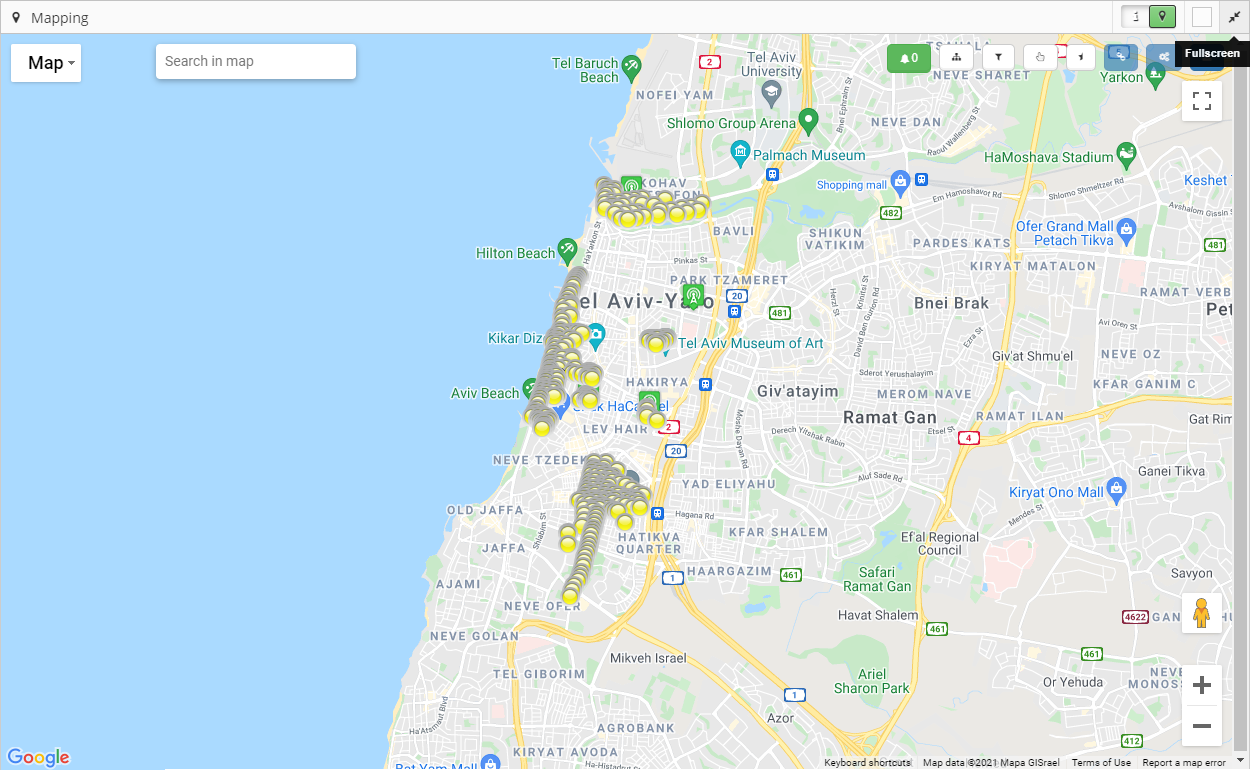
- Displays the Mapping panel in full screen.
- The button shows an alert with the number of fixtures that have a problem on the map.
- The green button with zero quantity indicates that there are no problem fixtures on the map.

- The red button with a quantity greater than zero indicates that there are fixtures with a problem, when clicking on the button it will display the list of fixtures with a problem

- The Notifications tab shows the list of fixtures with a failure on the map, these fixtures have a red status and attempts greater than those assigned in the site configuration.
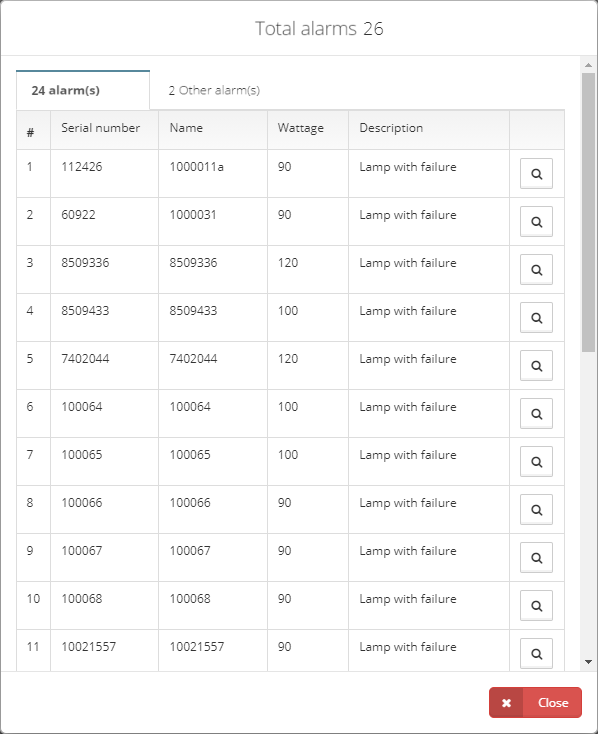
- The Other notifications tab shows the list of fixtures with a power problem on the map, these fixtures have an incorrect status, OFF should be ON or ON should be OFF.

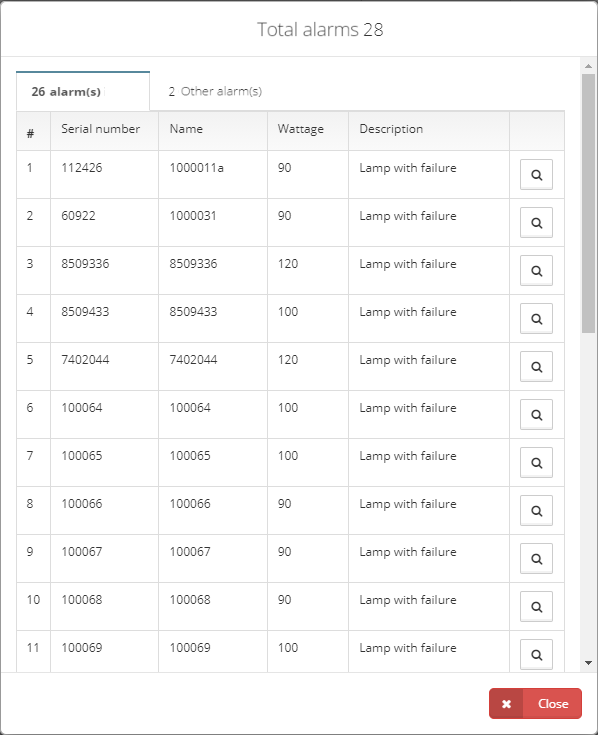
NOTE
- If new fixtures appear with a problem on the map, a message will be displayed indicating the number of new fixtures, and they will be added to the alerts button indicating the new quantity of fixtures with problem.


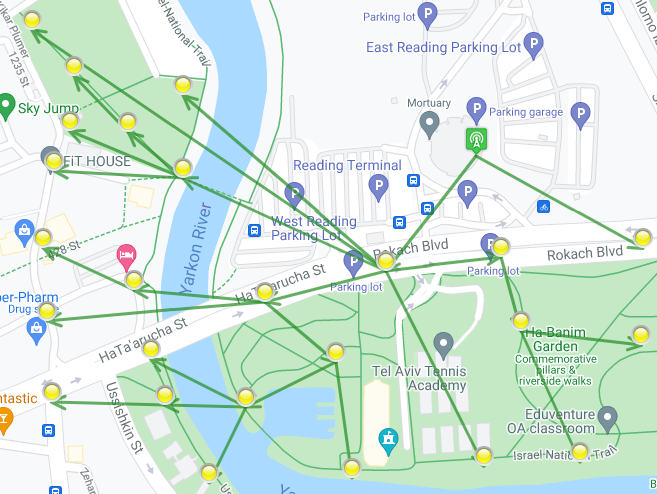
- The button allows see the tree explorer on the map, The tree explorer shows how the luminaries are connected via wireless, it helps to identify paths and connection state. It also displays the signal strength between each parent node and child node.

NOTE
When activating the tree explorer button, the filters will be changed.See Filtering of fixtures on map
- When activating the tree explorer button, the map fixture review will be changed.See Map fixture review
- The selection field allows to filter according to the power of the fixtures that are active on the map. See Filtering of fixtures on map
- The button allows multiple fixtures to be selected in the map region (one by one), to perform the following actions:

- Associate selected fixtures to Groups. See Associate in Dashboard
- Send commands to selected fixtures. See Commands on the Dashboard
- Change the icon to selected fixtures. See point 20.
- Change the fixture type to selected fixtures. See point 21.
- The button allows multiple fixtures to be selected in the map region, enclosing the fixtures through the polygon that is carried out (See Graphing polygon on map), to perform the following actions:

- Associate selected fixtures to Groups. See Associate in Dashboard
- Send commands to selected fixtures. See Commands on the Dashboard
- Change the icon to selected fixtures. See point 20.
- Change the fixture type to selected fixtures. See point 21.
- The button allows associate fixtures from the Dashboard, moving fixtures from one Group to another Group; it also allows making a new partnership by selecting the same Group. See Associate in Dashboard

- The button allows accessing to Commands on the Dashboard, allowing the fixtures to operate for better control and management. See Commands on the Dashboard

- The button allows accessing to Commands (CSV) on the Dashboard, loading the fixtures from CSV file to send commands. See Commands (CSV)

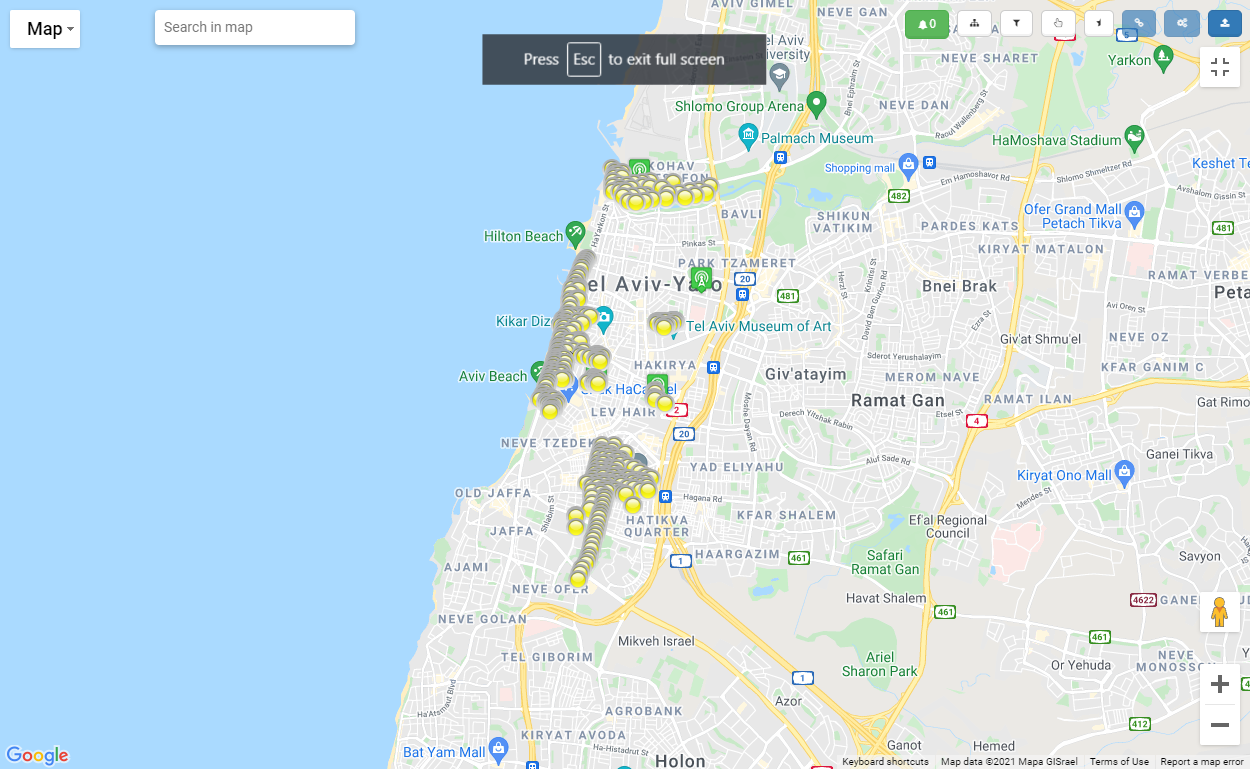
- Displays the only region of the Map in full screen.
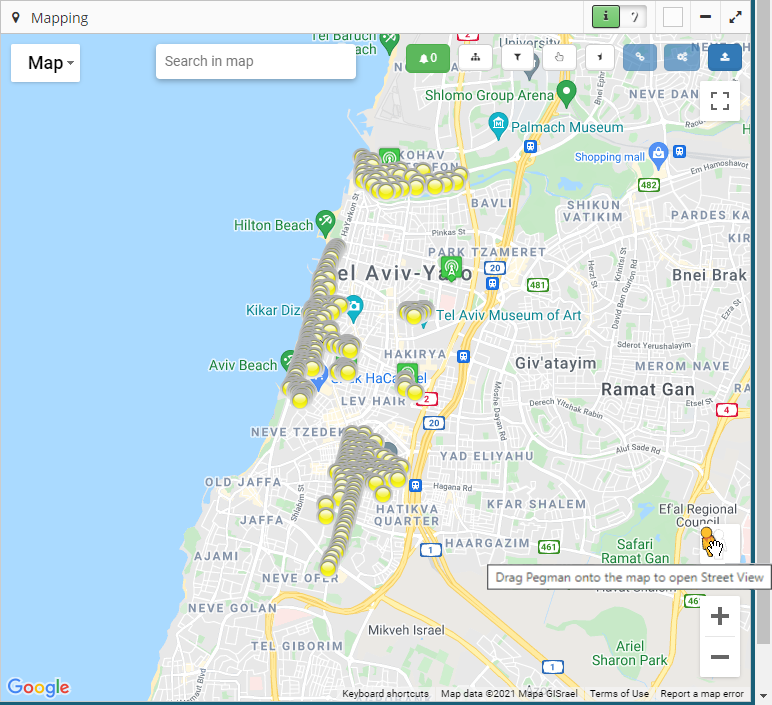
- Shows Street View, drag Pegman onto the map to open Street View.
- Zoom in to a specific region on the map.
Shortcuts
Double click on the region of the map to zoom in.
Ctrl + Scroll bar mouse in the region of the map to zoom in.
- Zoom out to view a larger region on the map.
Shortcuts
Double right click on the region of the map to zoom out.
Ctrl + Scroll bar mouse in the region of the map to zoom out.
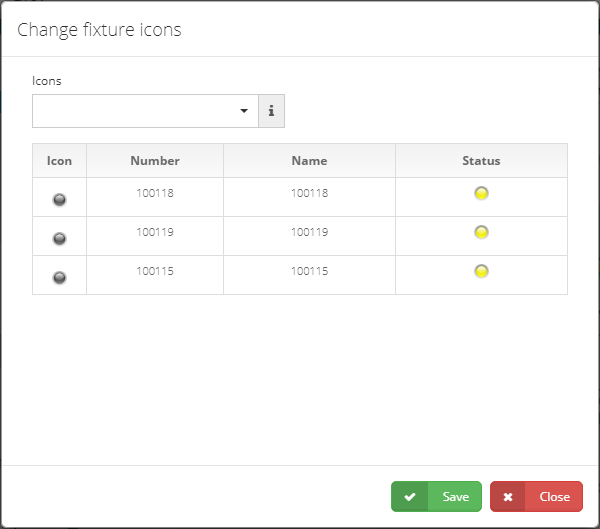
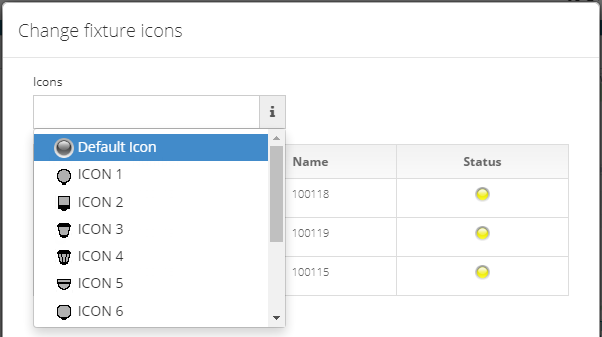
- The button allows changing the fixtures icon, of one or more selected fixtures on the map from a list of available icons.
- The button allows changing the type of fixtures, of one or more fixtures selected on the map.
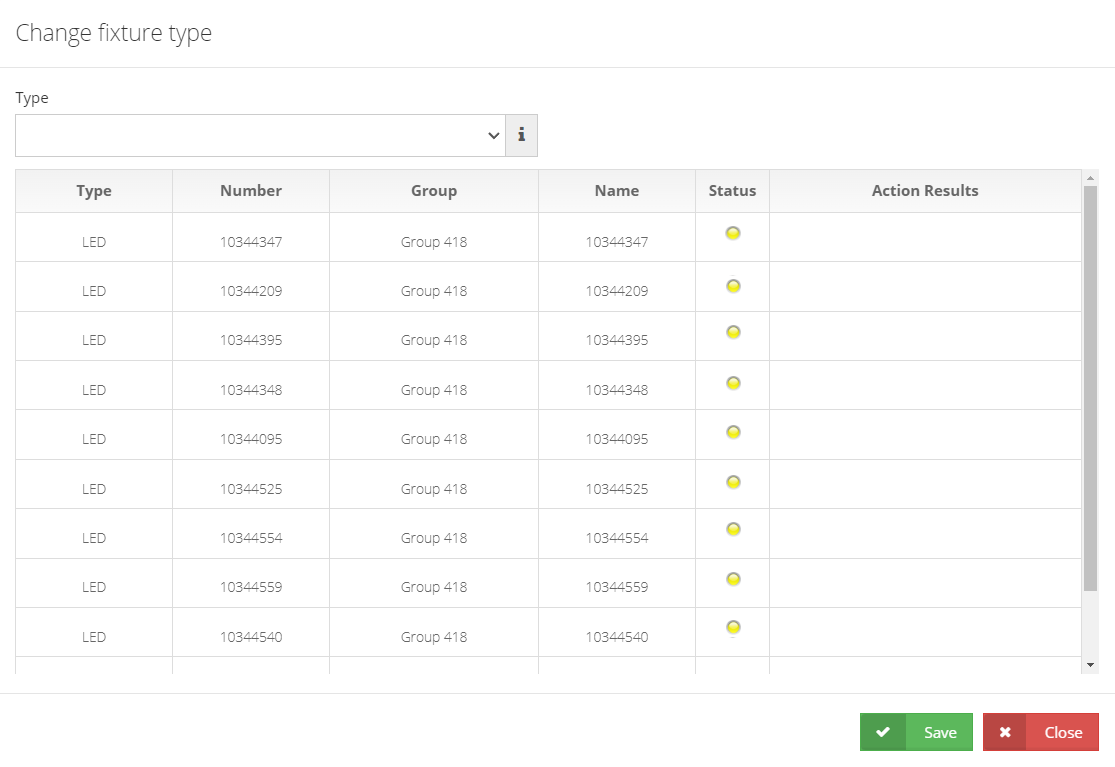
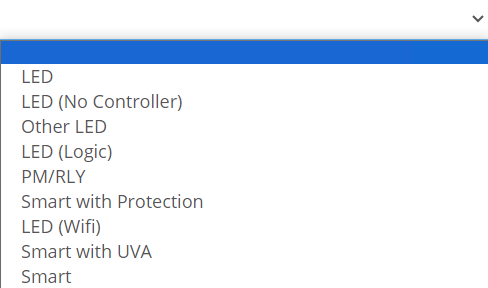
The types of fixtures can be
LED: Juganu fixture with led controller (STAR technology 915 MHz), allows wireless smart communication.
LED (No Controller): Juganu fixtures without led controller, therefore does not allow wireless communication.
Other LED: Not Juganu fixture.
LED (Logic): Juganu fixture with led controller (STAR Technology 915 MHz), allows wireless smart communication with nine predefined dimming parameters.
- This kind of fixtures may include UVA light.
- UVA light
Enables or disables the UVA protection to clean the area of virus and bacteria.
PM/RLY: Juganu Power Meter with led controller, allows wireless smart communication.
Smart with Protection: Juganu fixture with led controller (STAR Technology 915 MHz), allows wireless communication with 2 presets of 5 predefined dimming parameters.
- his kind of fixtures may include UV Protection light.
LED(Wifi): Juganu fixture with led controller (WiFi Technology 2.4 GHz), allows wireless communication.
Smart with UVA: Juganu fixture with led smart controller (STAR Technology 915 MHz), allows wireless communication 2 presets of 10 and 1 predefined dimming parameters.
- This kind of fixtures may include UVA light.
Smart: Juganu fixture with led smart controller (STAR Technology 915 or 868 MHz), allows wireless communication 2 presets of 10 and 1 predefined dimming parameters.
2.2.2.1 Map fixture review
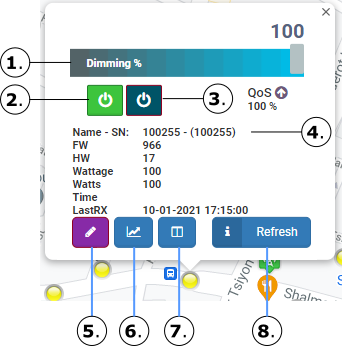
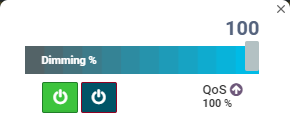
The bar allows determining the dimming of the fixture, it can start from 0 (indicates OFF) to 100 (indicates the maximum power). These values are given as a percentage (%).
The button allows turning ON the light, indicates the percentage of dimming that will be applied.
NOTE
Select the desired dimming percentage to turn ON the fixture and then press the ON button.
If select a fixture of type Logic or Smart with UVA then is will enable a special the UVA ON button. The button allows turn ON a UVA light.
This kind of fixtures may include UVA light.
UVA light
Enables or disables the UVA protection to clean the area of virus and bacteria.
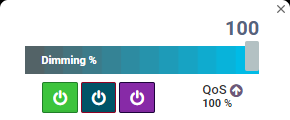
NOTE:
- If a Group of protection type is selected, then a special UV button will be enabled. The button allows turning ON a UV light to all fixtures that have this light, associated to the selected protection Group.
- This kind of fixtures may include UV light.
- UV protection light
Enables or disables the UV protection to clean the area of virus and bacteria.
- The button allows turning OFF the fixture

Indicates the serial number corresponding to the selected fixture.
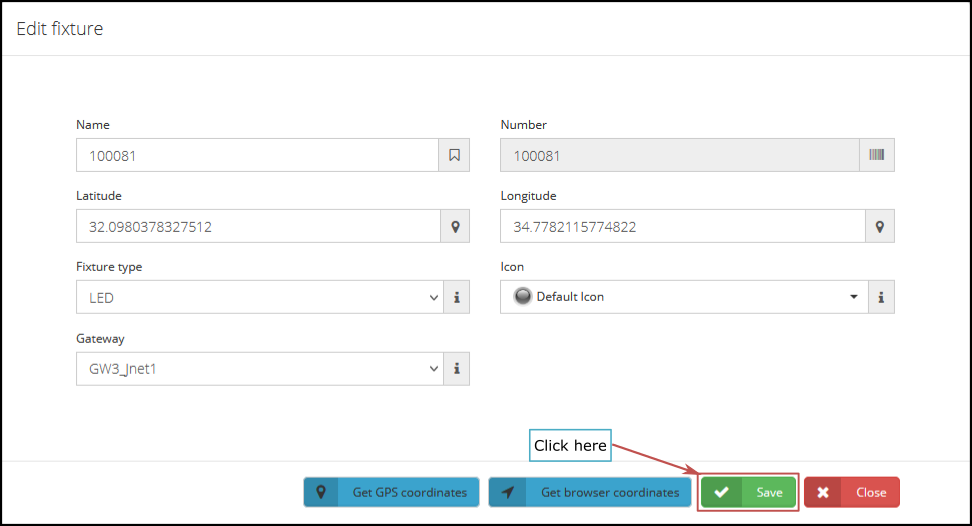
The button shows in a popup window the fixture data to be edited.
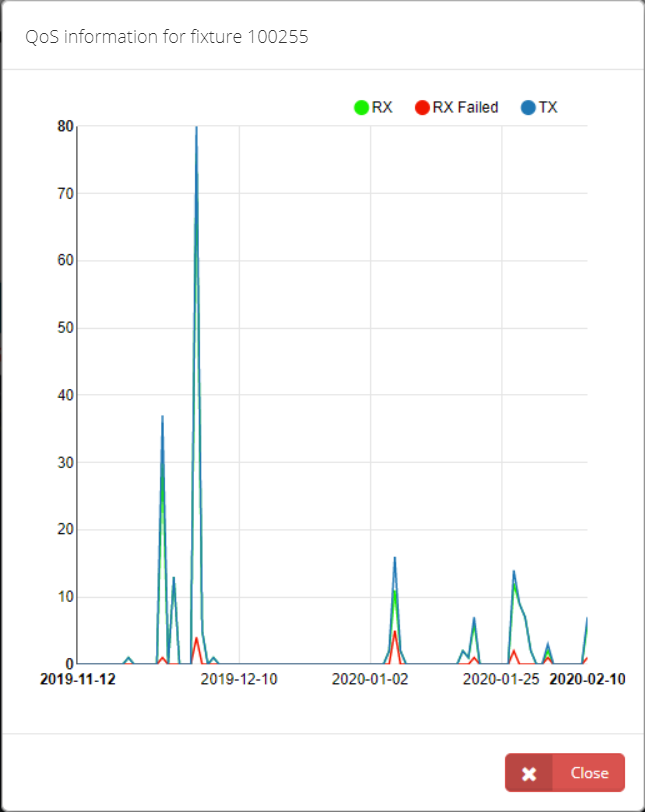
- The button shows in a pop-up window the report with the information of the quality service of the selected fixture.
- The button shows in a pop-up window, a comparison between the Read LP (LP saved in the memory of the fixture) and the Associated LP (LP in the system) of the selected fixture.

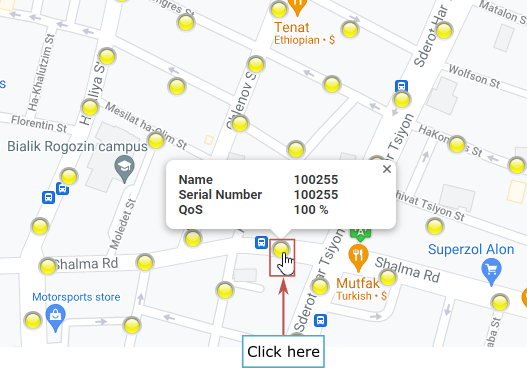
- The button allows verifying the information of the selected fixture. To select the fixture, simply click on it, if the fixture responds successfully, the corresponding information will be displayed.
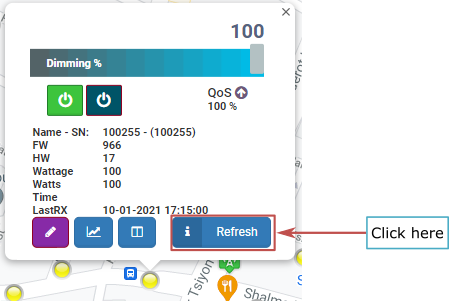
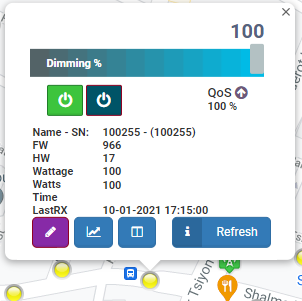
2.2.2.1.1 Read status
When reading the status for a selected fixture, the status of the fixture will be displayed in real time.
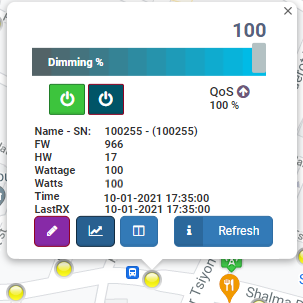
The data returned by the read status are:
FW: Displays the version of the firmware that the fixture currently has.
HW: Displays the version of the hardware that brings the fixture with the factory default setting.
Wattage: Displays the wattage (in watts) that brings the fixture with the default factory.
Watts: Shows the current watts of the fixture, related to the intensity set for that fixture.
Time: Displays the date and time the read status was made.
NOTE
If the read status for a selected fixture does not display any information when clicking on the Refresh button, then this indicates that the fixture is not responding correctly.
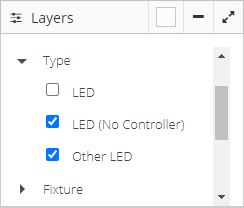
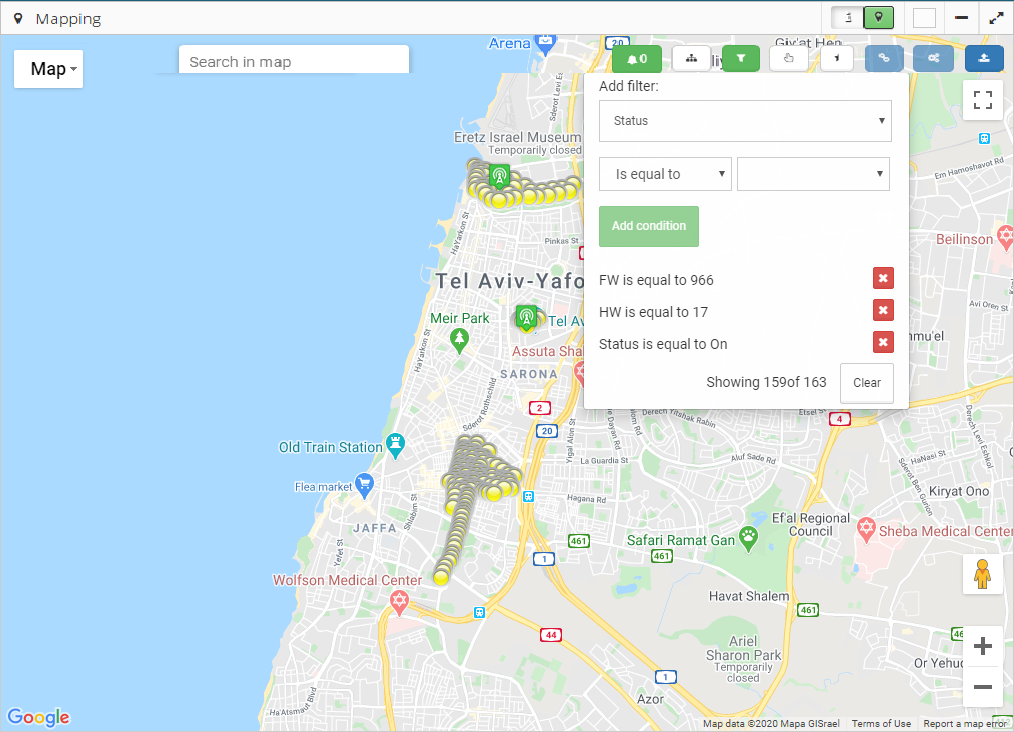
2.2.2.2 Filtering and Layers of fixtures on map
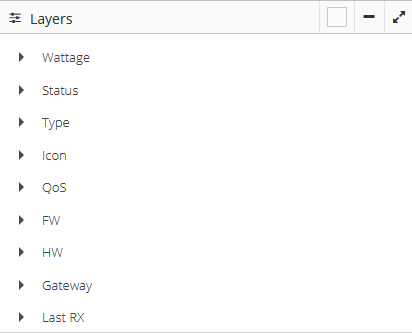
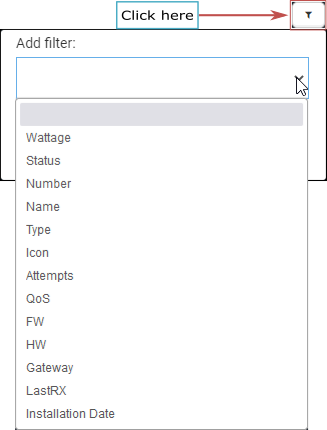
The button allows defining one or several types of filters to search for a specific number of lamps, according to the list of predefined filters.
The diverse types of filters that can be applied are the following items:
- Wattage
- Status
- Number
- Name
- Type
- Icon
- Attempts
- QoS
- FW
- HW
- Gateway
- Last RX
- Installation Date
NOTE
When selecting several filters with the same classification, the search will be carried out with the different defined values of that classification (Logic Condition OR)
When selecting several classifications, the search will be carried out with the data that specifically match the defined classifications (Logic Condition AND)


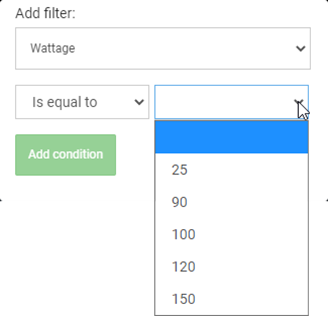
The types of conditions that can be applied are:
- Is equal to
- Is not equal to
- Is less than
- Is greater than
- Starts with
- Contains
- Does not contain
- Ends with
NOTE
Depending on the type of classification, the filters to displayed may vary.
Depending on the type of classification, the list of values may vary, whether a list of predefined values is displayed or the necessary values entered.
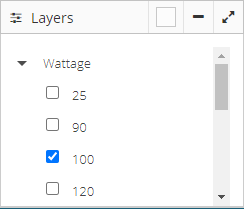
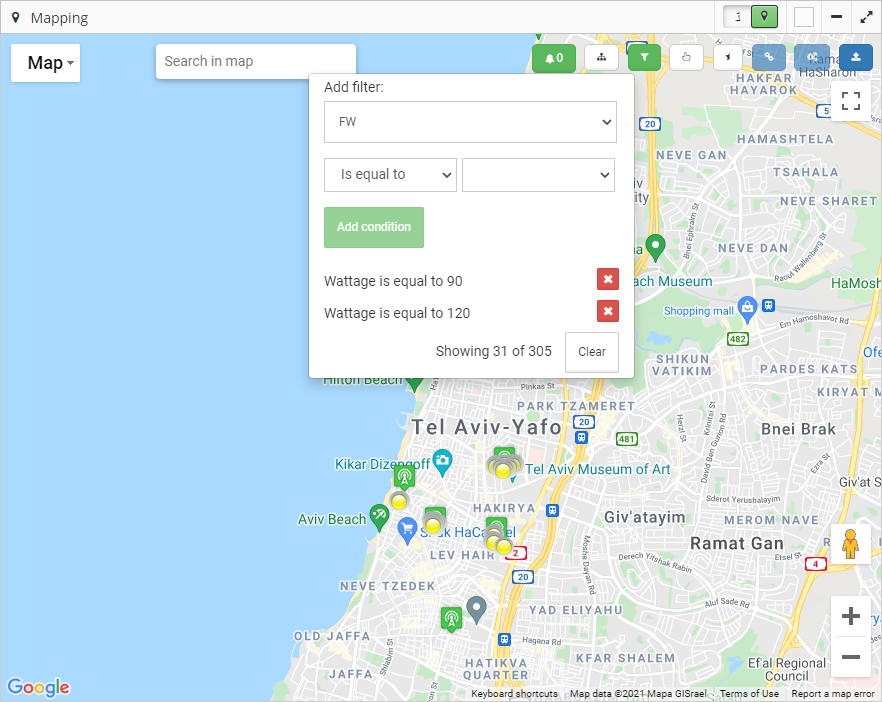
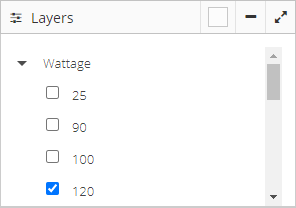
2.2.2.2.1 Filtering fixtures by Wattage
When applying the filtering by wattage, a search will be made of all the wattages of the fixtures that are displayed on the map (according to the selected Groups), making a grouping by the types of wattage found.
The wattage of each fixture is defined according to the factory established Watts.
Example of filtering by Wattage Equal to 90 or Equal to 120 Watts

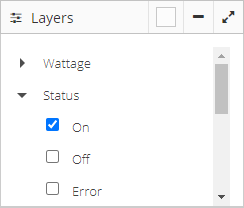
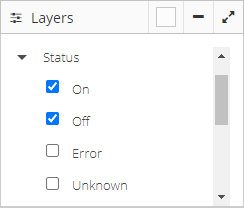
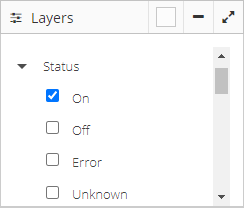
2.2.2.2.2 Filtering fixtures by Status
When applying filtering by status, fixtures with status are shown:
ON: shows fixtures that are turned ON.
OFF: shows fixtures that are turned OFF.
Error: shows fixtures with error (without responding to the number of attempts configured)
Unknown: displays fixtures that do not have a defined status.
Example of filtering by Status Equal to ON or OFF and Power Equal to 120 Watts

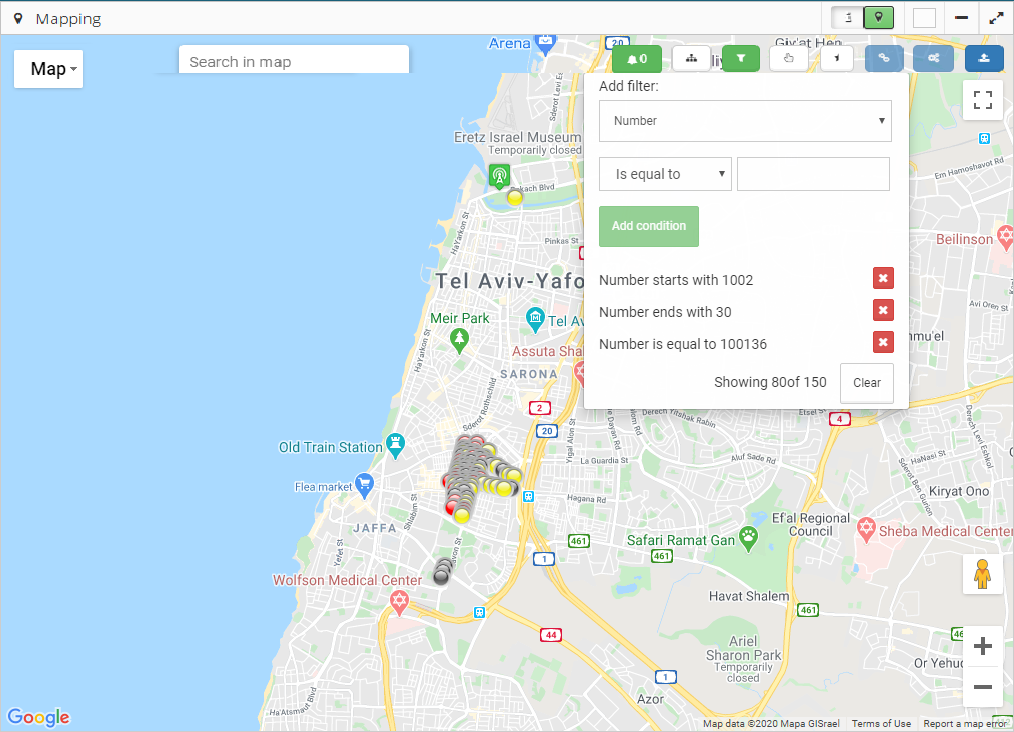
2.2.2.2.3 Filtering fixtures by Number
Filtering by fixture number allows advanced searches of fixtures displayed on the map.
Example of filtering by fixture number Equal to 100136 or Starts with 1002 or Ends with 30
2.2.2.2.4 Filtering fixtures by Name
Filtering by fixture name allows advanced searches of fixtures displayed on the map.
Example of filtering by fixture name Starts with the name 100-1 or Contains the name 200-.

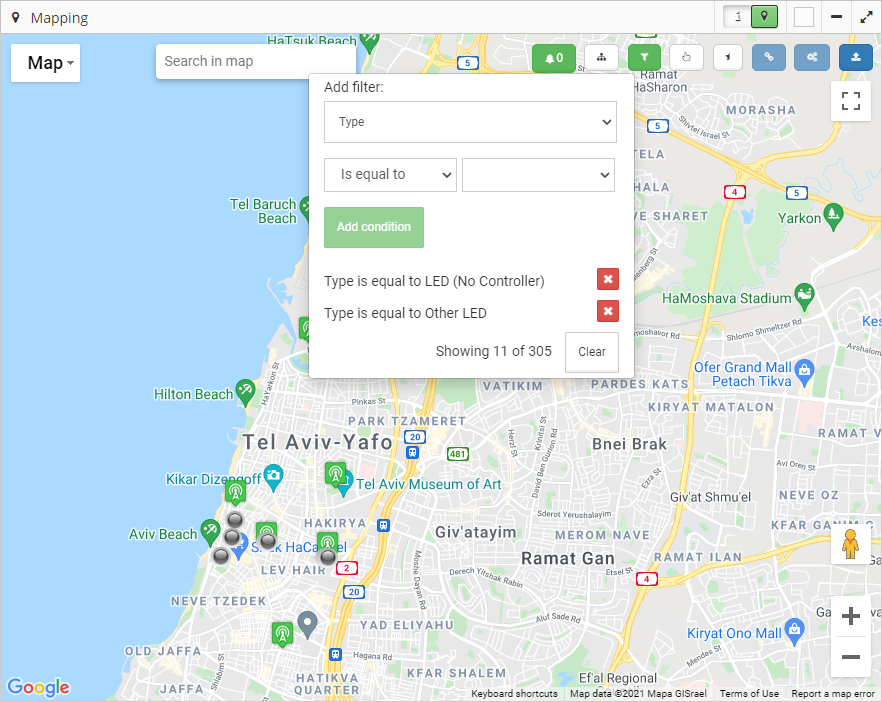
2.2.2.2.5 Filtering fixtures by Type
When applying the filtering by type, the fixtures will be shown with the types:
LED: Juganu fixture with led controller, allows wireless smart communication.
LED (No Controller): Juganu fixtures without led controller, therefore does not allow wireless smart communication.
Other LED: Not Juganu fixture.
LED (Logic): Juganu fixture with led controller, allows wireless smart communication with predefined dimming parameters.
- This kind of fixtures may include UVA light.
- UVA light
Enables or disables the UVA protection to clean the area of virus and bacteria.
PM/RLY: Juganu Power Meter with led controller, allows wireless smart communication.
Smart with Protection: Juganu fixture with led controller (STAR Technology 915 MHz), allows wireless communication with 2 presets of 5 predefined dimming parameters.
- his kind of fixtures may include UV Protection light.
LED(Wifi): Juganu fixture with led controller (WiFi Technology 2.4 GHz), allows wireless communication.
Smart with UVA: Juganu fixture with led smart controller (STAR Technology 915 MHz), allows wireless communication 2 presets of 10 and 1 predefined dimming parameters.
- This kind of fixtures may include UVA light.
Smart: Juganu fixture with led smart controller (STAR Technology 915 or 868 MHz), allows wireless communication 2 presets of 10 and 1 predefined dimming parameters.
Example of filtering by fixture type Equal to LED (No Controller) and type Equal to Other LED.
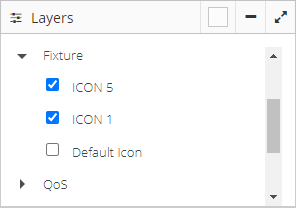
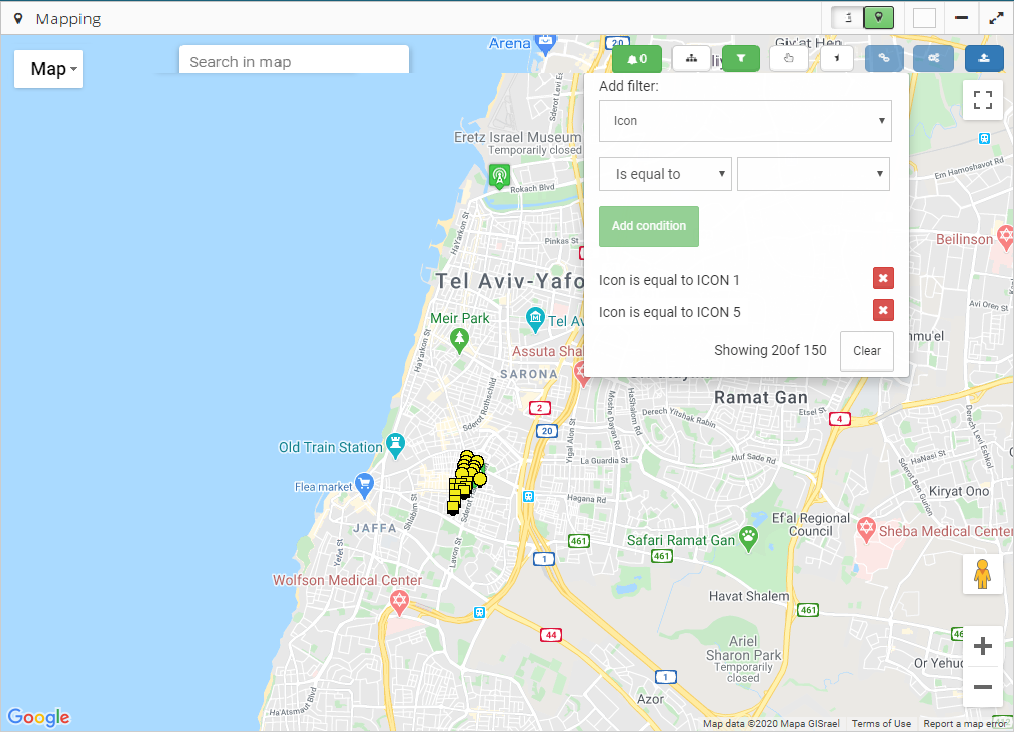
2.2.2.2.6 Filtering fixtures by Icon
When applying the filter by icon, a search will be made of all the icons of the fixtures that are displayed on the map (according to the selected Groups), making a grouping by the types of icons found
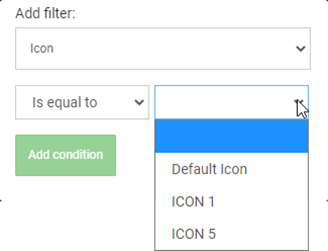
Example of filtering by icon Equal to ICON 1 or Equal to ICON 5.
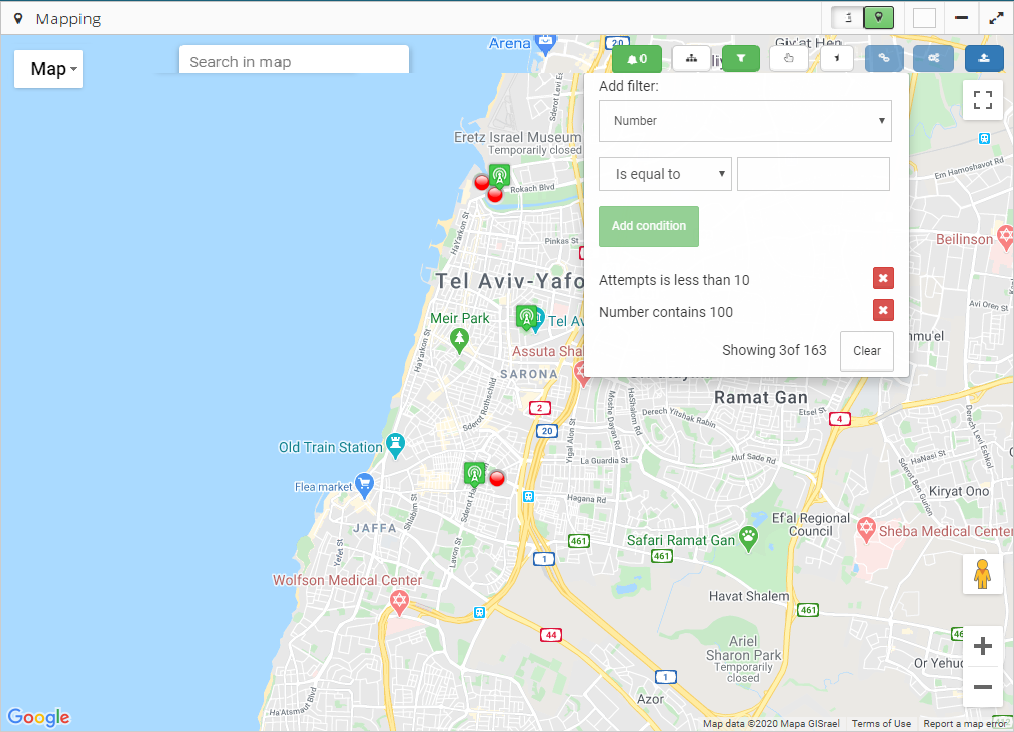
2.2.2.2.7 Filtering fixtures by Attempts
The number of attempts sets the number of times that a fixture has not responded. After a certain number of attempts, the fixture status changes to Red, that it is identified as Error.
Example of filtering by number of Attempts Less than 10 and with fixture number Contains the number 100.
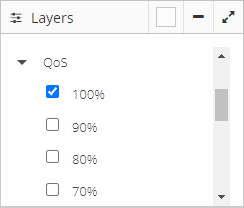
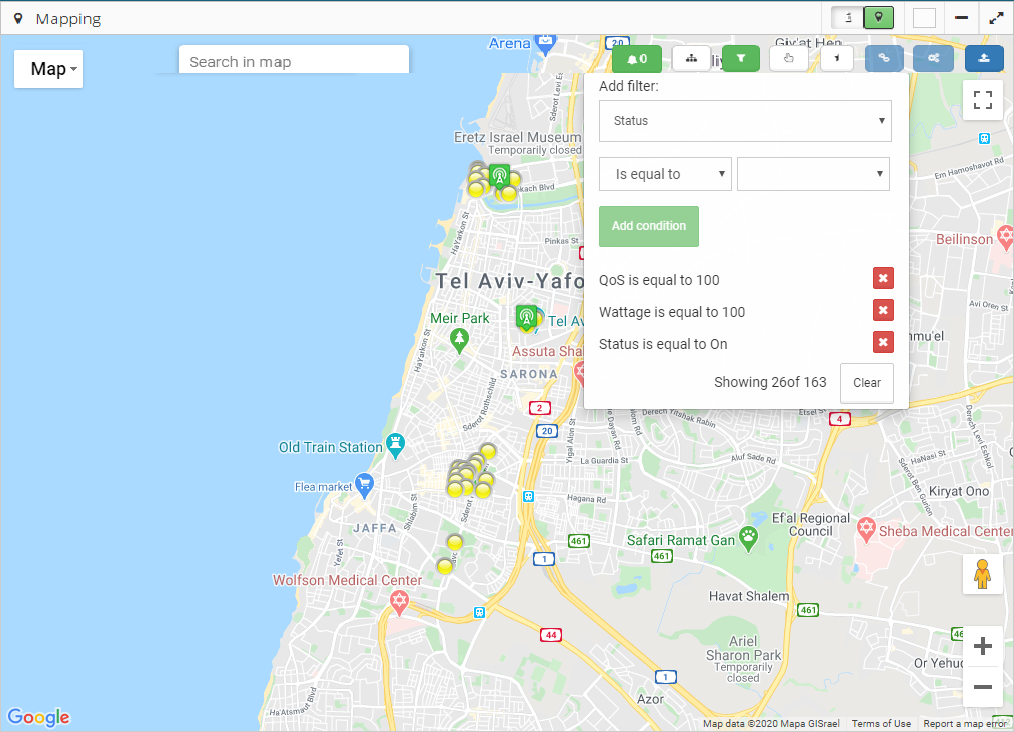
2.2.2.2.8 Filtering fixtures by Quality of Service
Quality of Service (QoS) in fixtures determines Network Quality rate (wireless) of a fixture when sending or receiving commands.
For example, for a fixture that has had 8 successful responses (Rx) from 10 commands sent (Tx), from the moment it was installed to date, the percentage of Quality of Service would be = (8/10) = 0.8 which is equivalent to 80%.
Example of filtering by Quality of Service Equal to 100% and Wattage Equal to 100 Watts and Status ON.
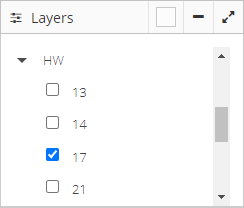
2.2.2.2.9 Filtering fixtures by Firmware and Hardware
Filtering by Firmware and Hardware, establishes the values that the fixtures bring by default from the factory or shows the new values, after performing an update in the Firmware of each fixture.
Example of filtering by Firmware Equal to 966 and Hardware Equal to 17 and Status ON.
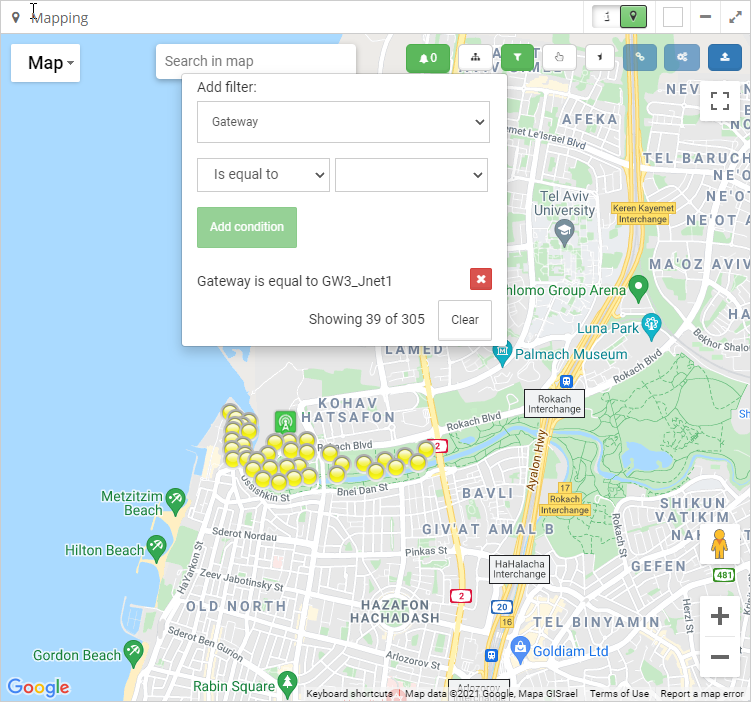
2.2.2.2.10 Filtering fixtures by Gateway
When applying the filter by Gateway, a search will be made of all the Gateways of the fixtures that are displayed on the map (according to the selected Groups), making a grouping by the types of Gateways found.
Example of filtering by Gateway Equal to GW3_Jnet1.

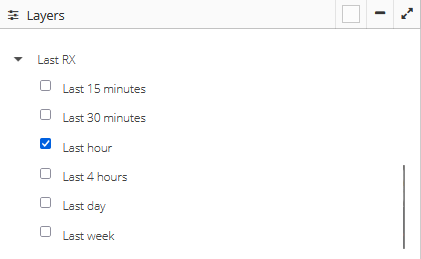
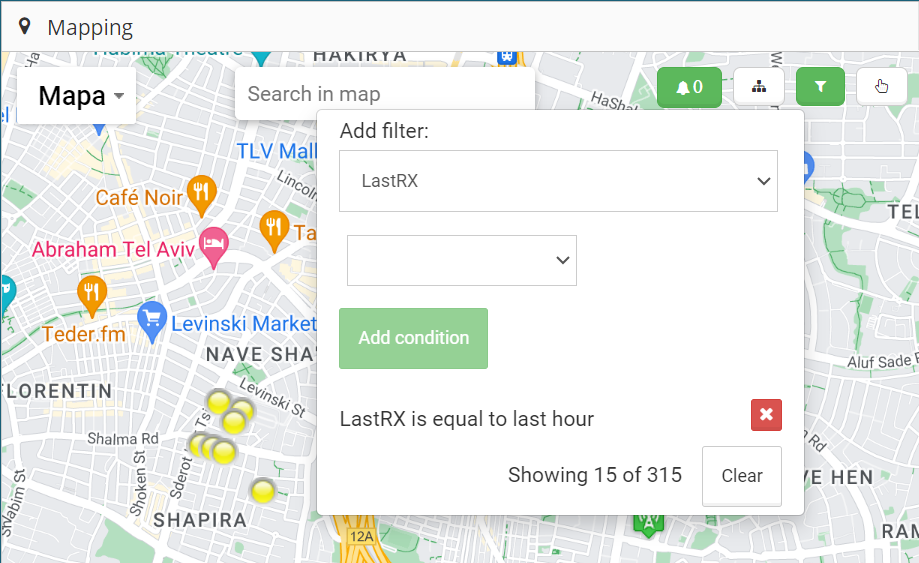
2.2.2.2.11 Filtering fixtures by Last RX
Last RX in fixtures determines when was the last time that it responded to a status command.
Example of filtering by Last RX Equal to Last Hour.
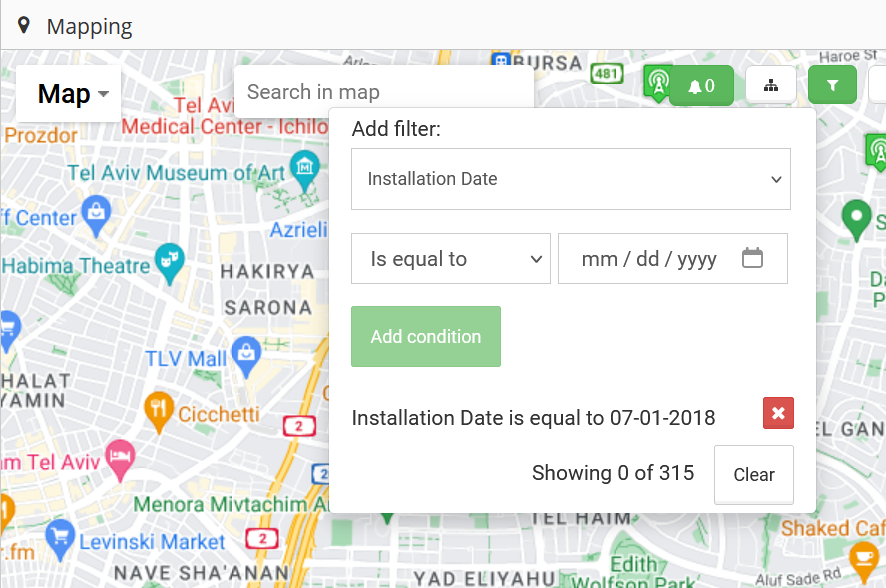
2.2.2.2.12 Filtering fixtures by Installation Date
Allows to filter according the date when the fixture was installed.
Example of filtering by Installation Date Less than specific date.
2.2.2.2.13 Filtering tree explorer on map
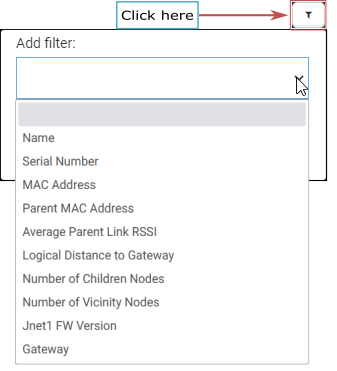
The button allows defining one or several types of filters to search for a specific number of lamps, according to the list of predefined filters.
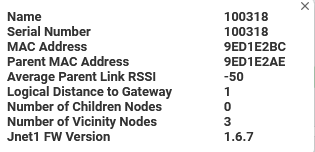
The diverse types of filters that can be applied are the following items:
Name
Serial Number
MAC Address
Parent MAC Address
Average Parent Link RSSI
Logical Distance to Gateway
Number of Children Nodes
Number of Vicinity Nodes
Jnet1 FW version
Gateway
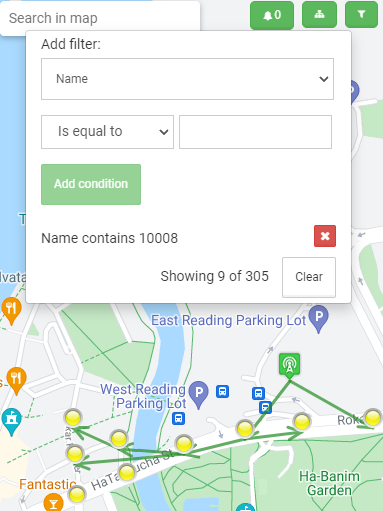
2.2.2.2.13.1 Filtering fixtures by Name
Filtering by fixture name allows advanced searches of fixtures displayed on the map.
Example of filtering by fixture name Contains the name 10008.
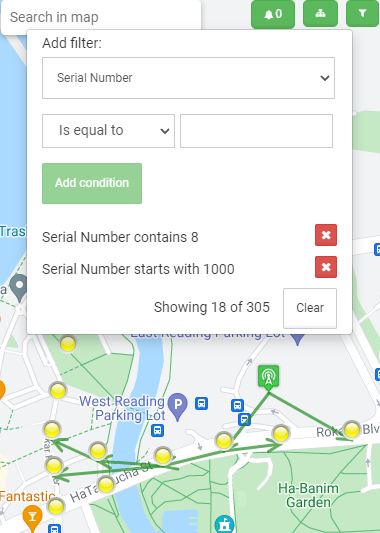
2.2.2.2.13.2 Filtering fixtures by Serial Number
Filtering by fixture number allows advanced searches of fixtures displayed on the map.
Example of filtering by fixture serial number Contains 8 or Starts with 1000.
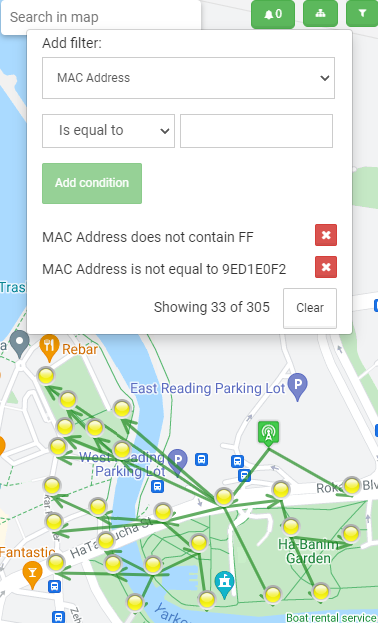
2.2.2.2.13.3 Filtering fixtures by MAC Address
Filtering by fixture Mac Address allows advanced searches of fixtures displayed on the map.
Example of filtering by fixture mac address does not Contains FF or Equal to 9ED1E0F2
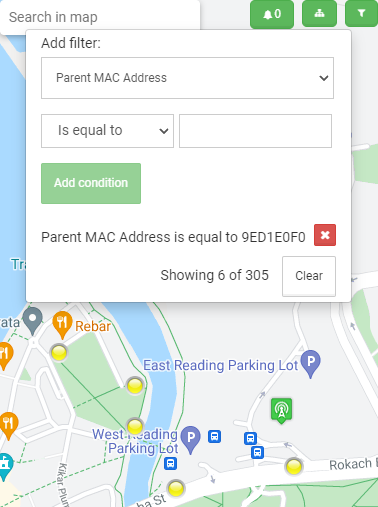
2.2.2.2.13.4 Filtering fixtures by Parent MAC Address
When filtering by fixture parent mac address, a search will be made of all the child nodes that match with the parent Mac Address.
Example of filtering by fixture parent mac address Equal 9ED1E0F0
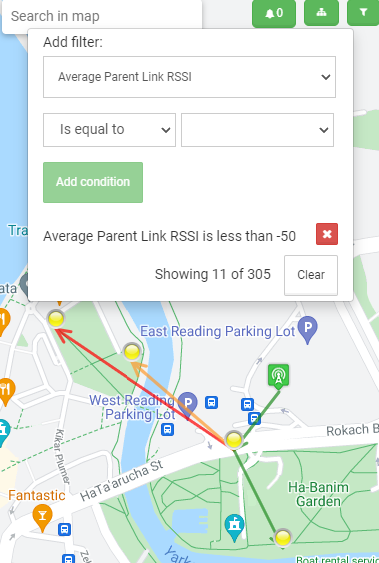
2.2.2.2.13.5 Filtering fixtures by Average Parent Link RSSI
The Average Parent Link RSSI in fixtures determines how strong or weak the communication is between a parent node and a child node.
The green line (between 0 and -84) determines a strong communication.
The orange line (between -85 and -94) determines a regular communication.
The red line (between -95 and -100) determines a weak communication.
Example of filtering by Average Parent Link RSSI Less than -50
2.2.2.2.13.6 Filtering fixtures by Logical Distance to Gateway
The Logical Distance to Gateway, determines how many nodes of distances exist between the gateway and the child node.
The filter displays a list with the quantity of distance nodes that exist in the map (dynamic filter).
Example of filtering by logic distance to gateway Equal 3

2.2.2.2.13.7 Filtering fixtures by Children Nodes
Children nodes, allow showing the parent nodes that have a determined quantity of child node of communication (dynamic filter).
In the filter, a list is displayed with the quantity of child nodes, that have the parent nodes on the map (dynamic filter).
Example of filtering by children nodes Equal 3 and 2

2.2.2.2.13.8 Filtering fixtures by Number of Vicinity Nodes
Number of Vicinity Nodes, allow showing the nodes that have a determined quantity of vicinity node around.
In the filter, a list is displayed with the quantity of vicinity nodes, that have the nodes on the map (dynamic filter).
Example of filtering by number of vicinity Equal 15 and 11

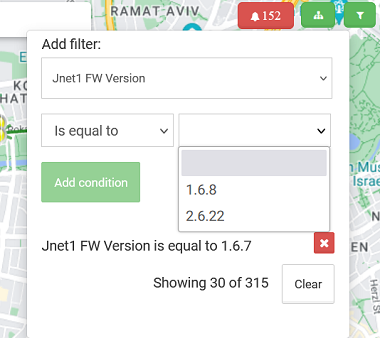
2.2.2.2.13.9 Filtering fixtures by Jnet1 FW version
Filtering allows grouping by Jnet1 fixtures FW version
Example of filtering by Jnet1 FW version Is Equal to 1.6.7
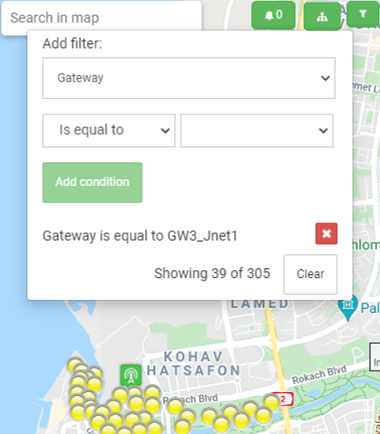
2.2.2.2.13.10 Filtering fixtures by Gateway
Filtering by Gateway allows advanced searches of the fixtures that are associated and being reported to the selected Gateway.
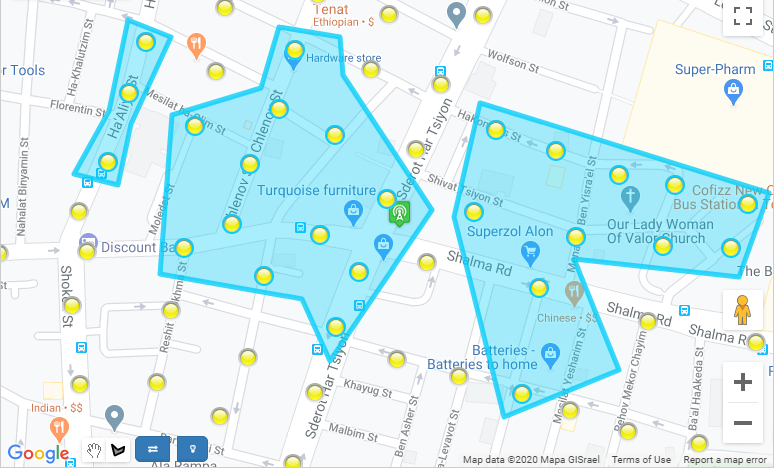
Example of filtering by Gateway Equal to GW3_Jnet1.
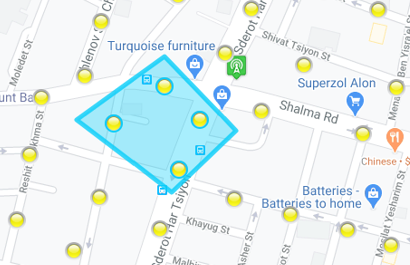
2.2.2.3 Graphing polygon on map
The steps to follow for creating a polygon on the map are described below:
- Activate the button to start creating the polygon on the map.

- Locate the region on the map to create in the polygon
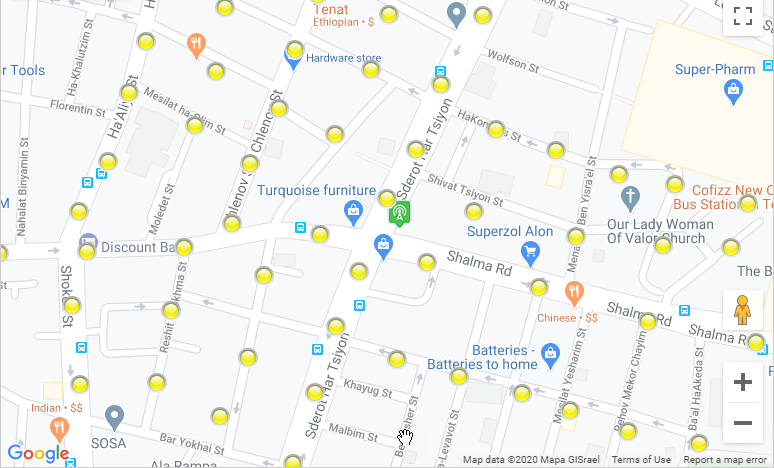
- Click on the map to start the polygon creation

- Then make another click on the map to draw the first line on the map
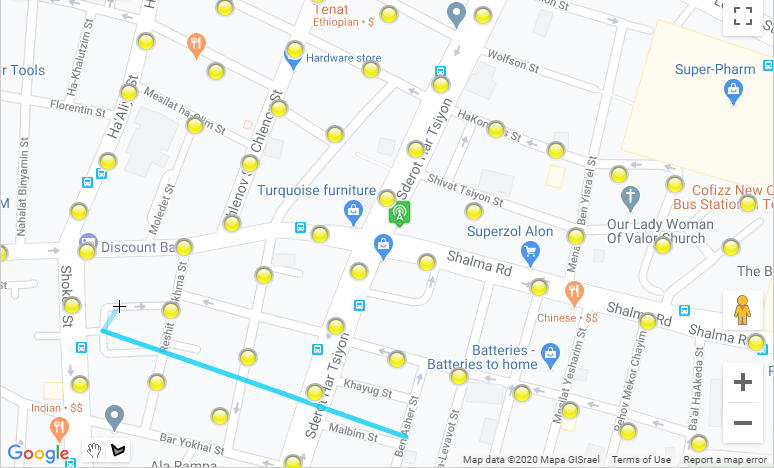
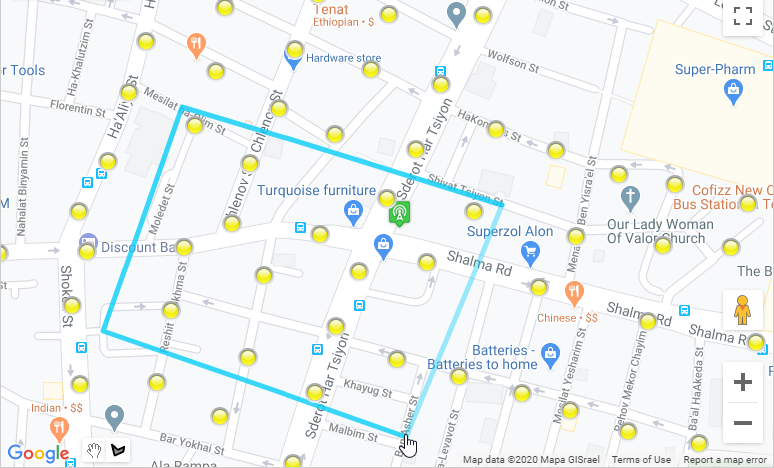
- Continue to click on the map, to draw the necessary lines to graph the desired polygon
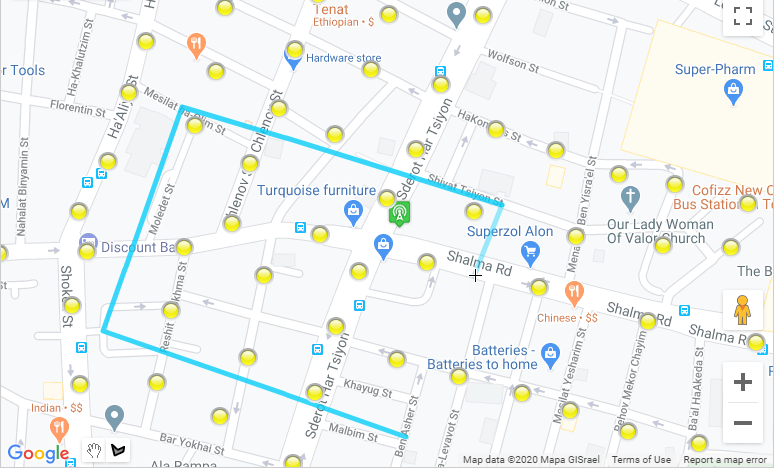
- To conclude with the creation of the polygon, click on the original position
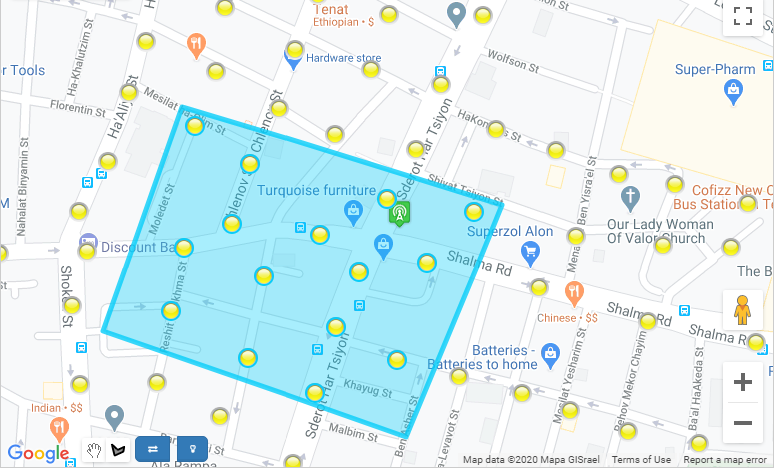
NOTE
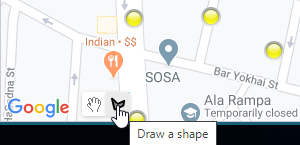
- When the polygon is plotting, it may be necessary to move the region of the map to plot a new polygon. To make this option, it is necessary to select the Stop drawing button in the lower right corner:
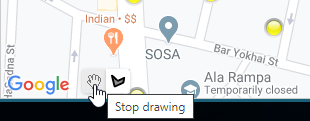
- To continue graphing a new polygon on the map, select the Draw a shape button in the lower right corner:
2.2.2.4 Associate in Dashboard
2.2.2.4.1 Associate
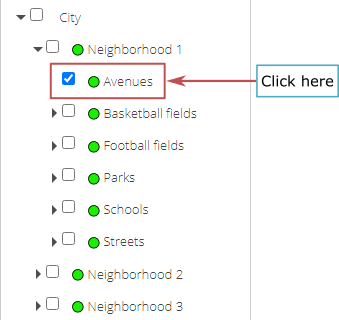
- This option allows associating fixtures from one group to another group. First select the group where the fixtures are currently located, in the following example, fixtures from “City” Group will be associated to “Avenues” Group.

- Then select the fixtures that will be associated, with the Ctrl + left click key, or by activating the button to select multiple fixtures in the map region (
 or
or  ), when performing this action on each selected fixture a blue circle will be placed
  .
.
- Then deselect the Group that was previously selected and select the new Group to associate the fixtures, only have to select the new Group.
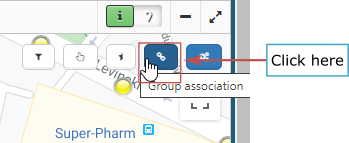
- Press the association button that appears on the map.
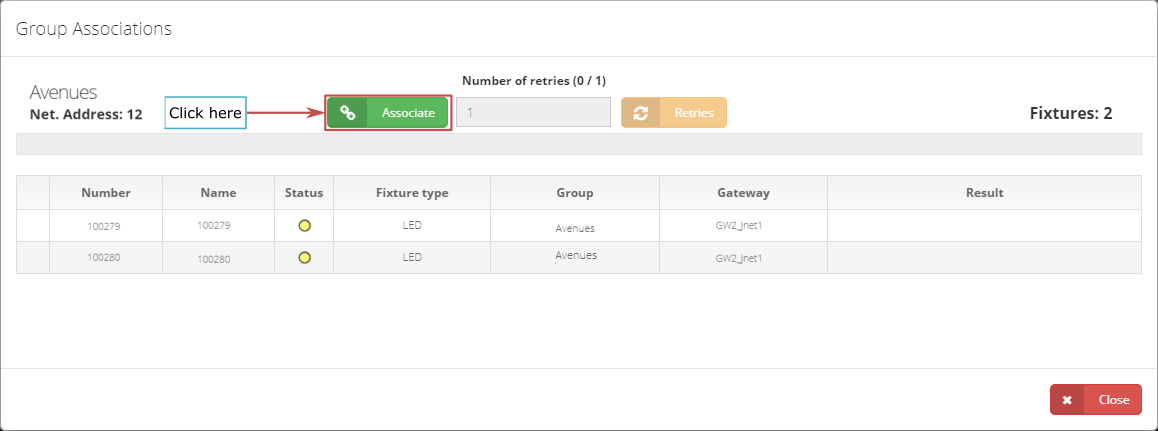
- Previously selected fixtures will be listed in a pop-up window, then press the Associate button to perform that action.
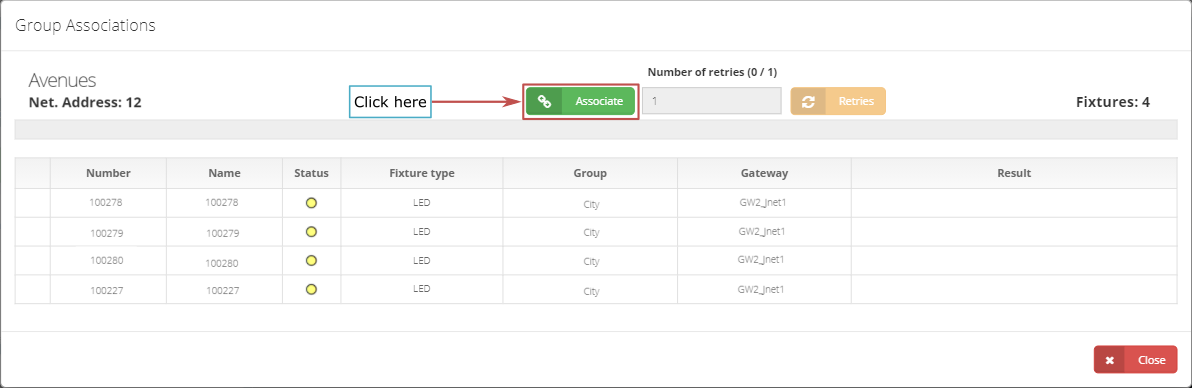
- A progress bar will be displayed, with the progress percentage of the action in progress and also notifications when the fixture has been associated successfully.
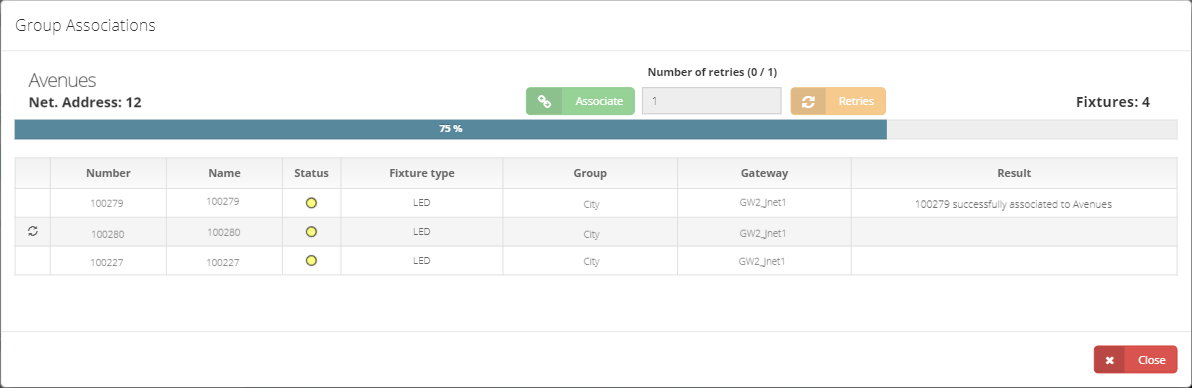
- After completing the process, if the action was successful, in the result column, see the message: Successfully Associated or if there was a problem, an Error message will be displayed. To exit the pop-up window, click on the Close button.
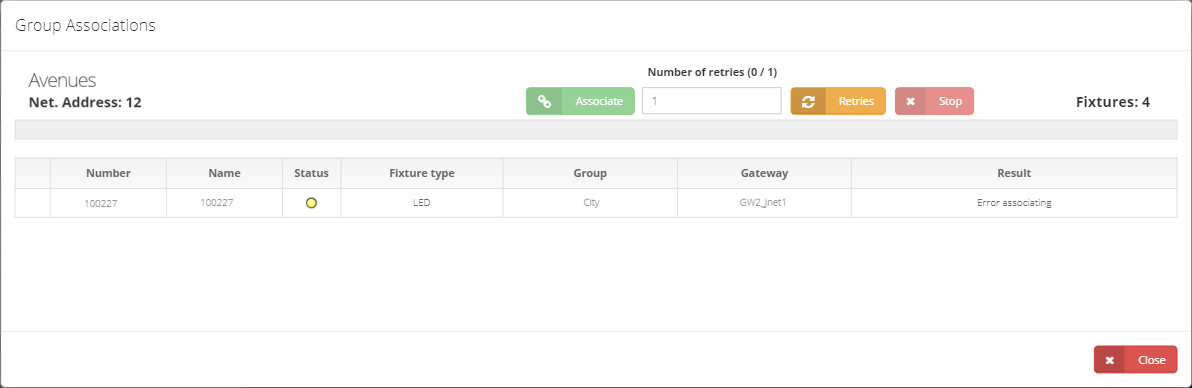
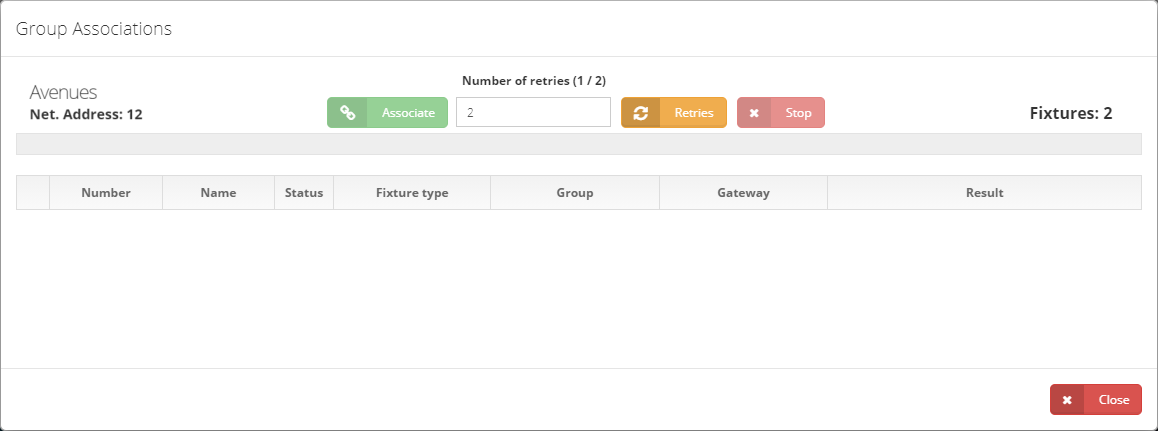
- NOTE: If there was a problem with any fixture in the association process, try to set the number of retries and click on the Retries button to try the association successfully.
2.2.2.4.2 Reassociate
- First, select the Group where the fixtures that are desired to associate again are located. Then select the fixtures to be re-associated to the select Group
- The fixtures to be associated are selected with the Ctrl + left click key, or by activating the button to select multiple fixtures in the map region ( or ), when performing this action on each selected fixture a blue circle will be placed. Then press the Associate button that appears in the Map panel.
- The previously selected fixture will appear in the list, press the associated button in the new window.
- It will display a message in each record of the status of the operation, whether successful or wrong.

- If there was a problem with any fixture in the association process, try to set the number of retries and click on the Retries button to try the association successfully. To exit the pop-up window, click on the Close button.
2.2.2.5 Commands on the Dashboard
- Select the set of Groups

- Select the fixtures with the Ctrl + left click key, or by activating the button to select multiple fixtures in the map region ( or ). Then press the command button that appears on the map panel.

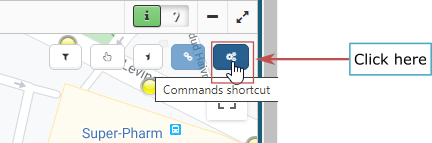
- The pop-up commands window will appear and the selected fixtures will be listed.
2.2.2.5.1 Command window
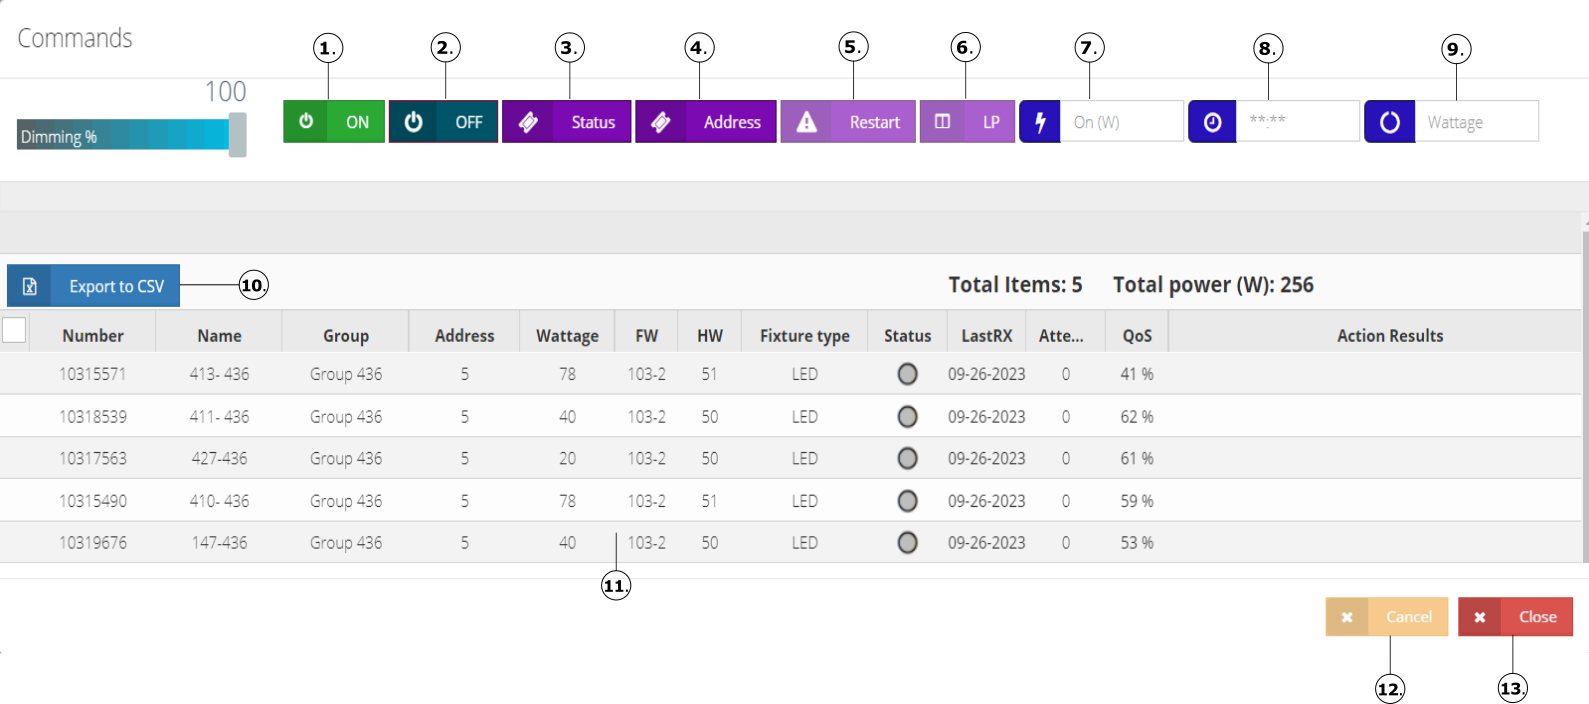
- The button allows turning ON the fixture, indicating the percentage of dimming to be applied.

- The successful response when sending this command will be shown in the column titled Action results of the fixture table, indicating that the fixture is turned ON successfully according to the percentage of dimming set (on(%)).

NOTE: If do not indicates the dimming percentage, the fixture will not turn ON.
NOTE
Select the desired dimming percentage to turn ON the fixture and then press the ON button.
If select a fixture of type Logic or Smart with UVA then is will enable a special the UVA ON button. The button allows turn ON a UVA light.
This kind of fixtures may include UVA light.
UVA light
Enables or disables the UVA protection to clean the area of virus and bacteria.
NOTE:
- If a Group of protection type is selected, then a special UV button will be enabled. The button allows turning ON a UV light to all fixtures that have this light, associated to the selected protection Group.
- This kind of fixtures may include UV light.
- UV protection light
Enables or disables the UV protection to clean the area of virus and bacteria.
- The button allows turn OFF the fixture.

- The successful response when sending this command will be shown in the column titled Action results of the fixture table, indicating that the fixture is turned OFF successfully (off(0%)).

- The button allows obtaining the status of the fixture, such as the current power (PW), the wattage (WATTAGE), the datetime (DATE), the firmware version (FW) and hardware version (HW) respectively.

- The successful response when sending this command will be shown in the column titled Action result of the fixture table, indicating that the fixture obtained information of its status successfully.

- The button allows obtaining the network address of the fixture, this network address is the value assigned to the Group to which the fixture belongs. This address is used to send group commands.

- The successful response when sending this command will be shown in the column titled Action results of the fixture table, indicating that the fixture obtained the network address id successfully (PA: Public Address).

- The button allows reset the fixture, this function emulates the disconnection and electrical connection in the fixture.

- The successful response when sending this command will be shown in the column titled Action results of the fixture table, indicating that the fixture was successfully restarted (-).

- The button shows in a pop-up window, a comparison between the Read LP (LP saved in the memory of the fixture) and the Associated LP (LP in the system) of the selected fixture.

- The button allows turn ON the fixture with the number of watts entered in the text area of this button.
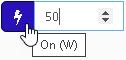
- The successful response when sending this command will be shown in the column titled Action results of the fixture table, indicating that the fixture is successfully turned ON according to the watts entered.

- The button allows sending the time entered in the text area (24hrs format). The current date is also included in sending this command.
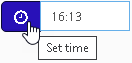
- The successful response when sending this command will be shown in the column titled Action result of the fixture table, indicating that the fixture set the time successfully according to the time entered.

- The button allows sending the maximum wattage in watts to which the fixture can be turned ON. The desired power should be entered in the text area.
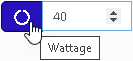
- The successful response when sending this command will be shown in the column titled Action results of the fixture table, indicating that the fixture was successfully set to wattage according to the input wattage in watts.

- NOTE: It is important to know the maximum wattage of each fixture, if a wattage greater than its maximum wattage is entered, the fixture will stop working.
- The button allows exporting the results to CSV File for the fixtures that were load to send of the commands.

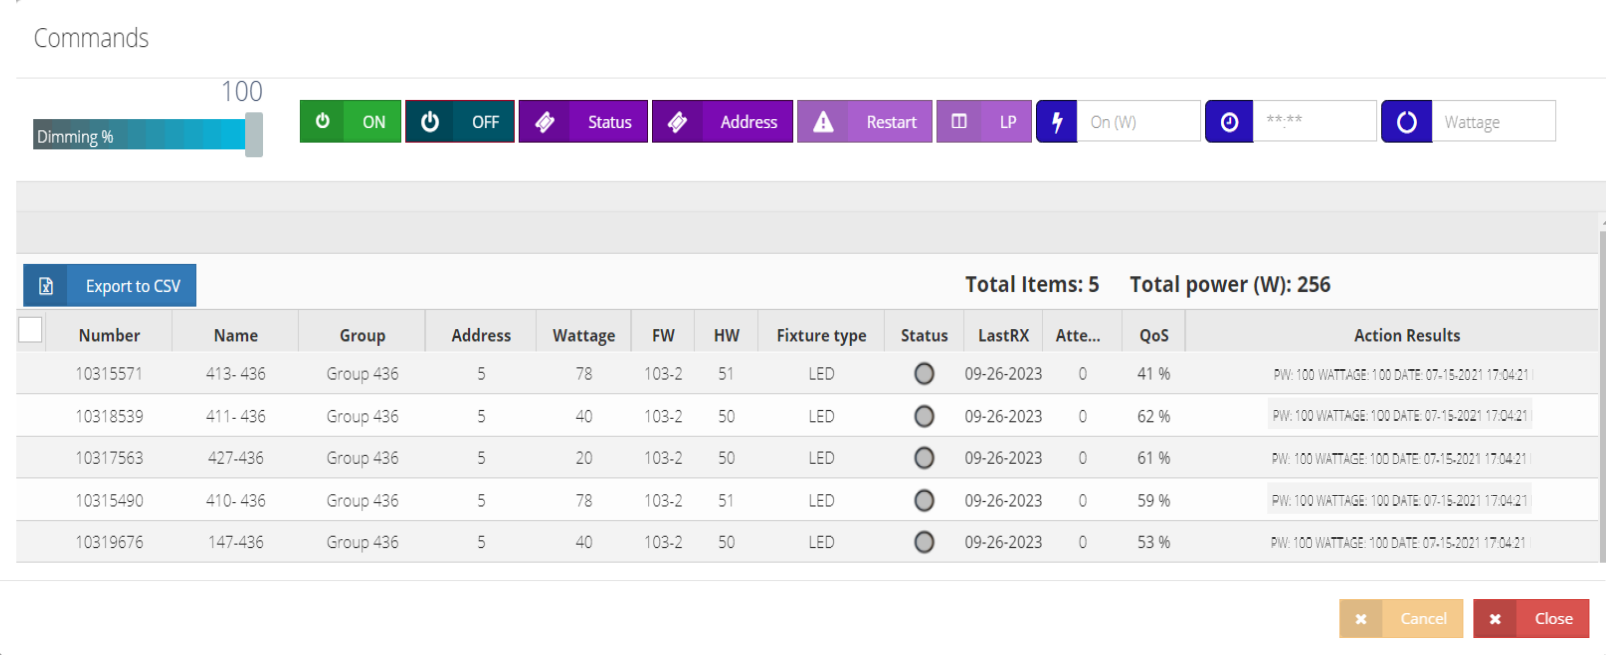
The table allows seeing the selected fixtures, shows the serial number, the name of the Gateway and the Group to which it belongs, as well as a results box where indicates if the operation of the command that was sent successfully.
The button allows closing the command window when it is no longer desired.

- The button allows to cancel sending commands in case it is no longer wanted.

NOTE
If a command is sent (commands described in points 1 to 9) and there is no response, then the Communication error message will be displayed in the column titled Action results of the fixture table, the error result will be displayed for each of the selected fixtures that do not respond to the sent command.

2.2.2.6 Commands (CSV)
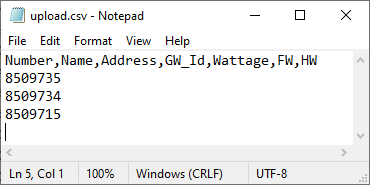
This option allows uploading several fixtures at once to send commands. This option requires a CSV file (separated by comma), the file must contain the following fields: *Number, Name, Address, GW_Id, Wattage, FW, and HW. The fields have to be in the mentioned order.

The description of each of the above-mentioned fields is described below:
*Number: Enter the serial number of the fixture to send commands. The field is of numerical type; therefore, it does not accept letters or special symbols.
Name: Enter the name of the fixture. This is not a required field then the value can be empty. The field is of text type; therefore, it does not accept special symbols.
Address: Enter the address associated of the fixture on the site. This is not a required field then the value can be empty. The field is of numerical type; therefore, it does not accept special letters or symbols.
GW_Id: Enter the Gateway ID of each fixture. This is not a required field then the value can be empty. See Manage - Gateways for more information of the Gateway IDs.
Wattage: Enter the maximum wattage in watts of each fixture This is not a required field then the value can be empty. The field is of numerical type; therefore, it does not accept special letters or symbols.
FW: Enter the firmware version that has the fixture installed This is not a required field then the value can be empty. The field is of numerical type; therefore, it does not accept special letters or symbols.
HW: Enter the hardware version of the fixture. This is not a required field then the value can be empty. The field is of numerical type; therefore, it does not accept special letters or symbols.
The fields containing an asterisk (*) are required fields. Preview the contents of the CSV file with the name “Upload.csv”
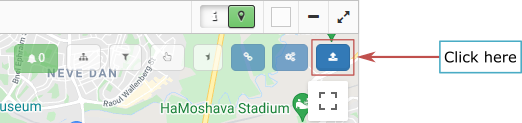
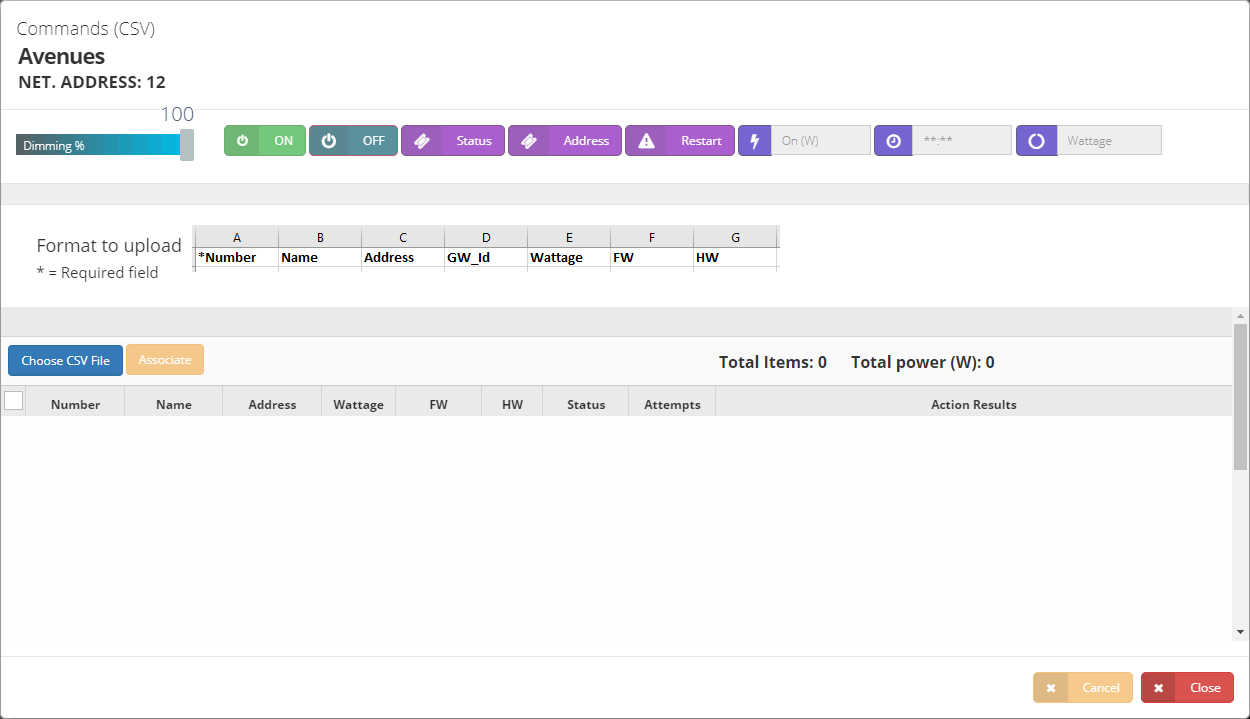
2.2.2.6.1 Sending Commands
To send commands, click the Commands (CSV) button. The button will show a pop-up window with the commands to be sent to the fixtures previously uploaded from the CSV file.
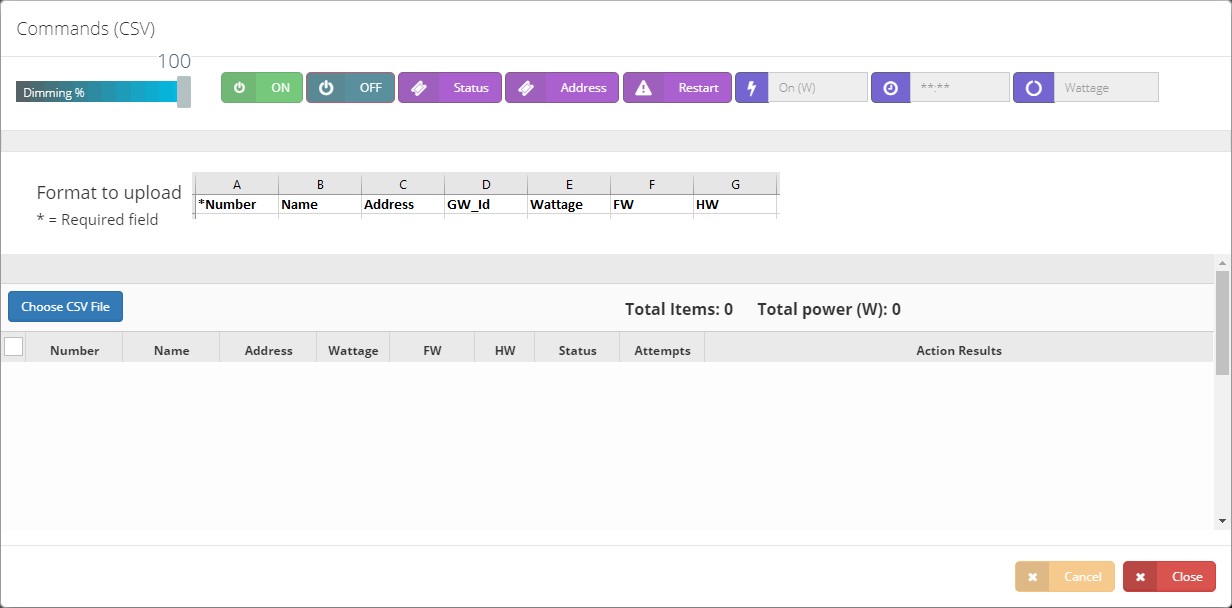
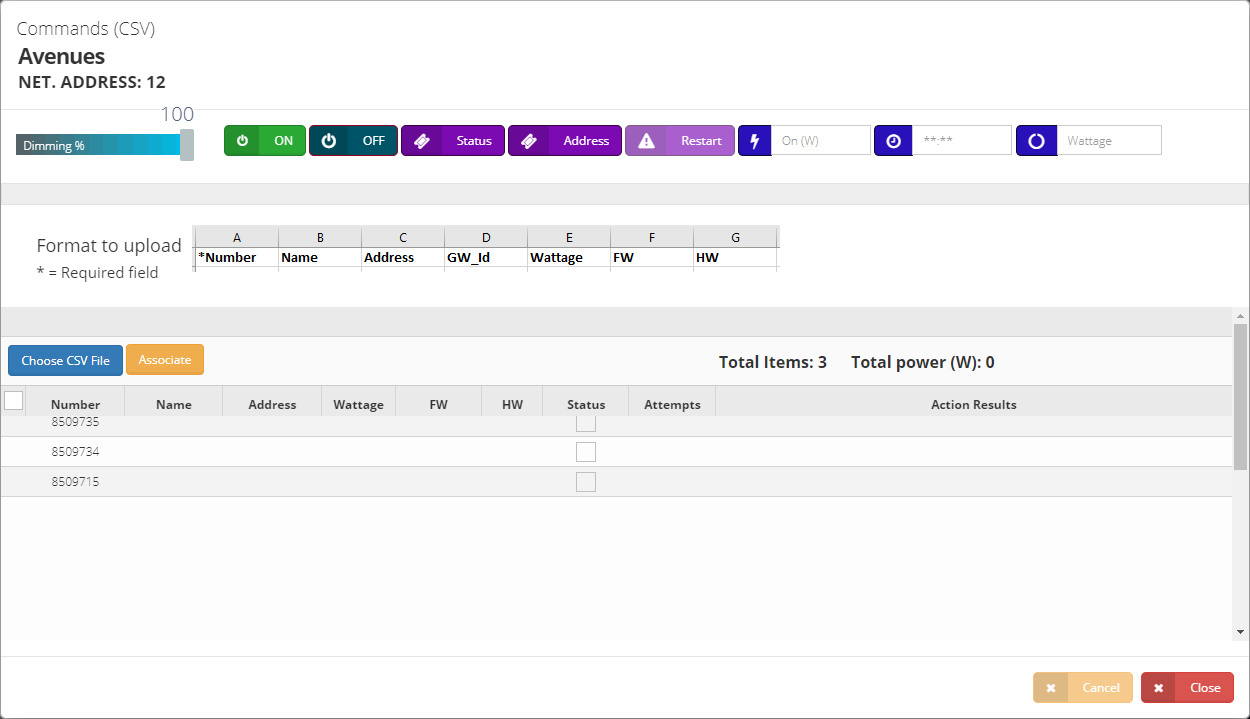
To load the content of a CSV file, click on the Choose CSV File button, after selecting a file, the contents of the file will be displayed in the table with the corresponding fields of the fixture.

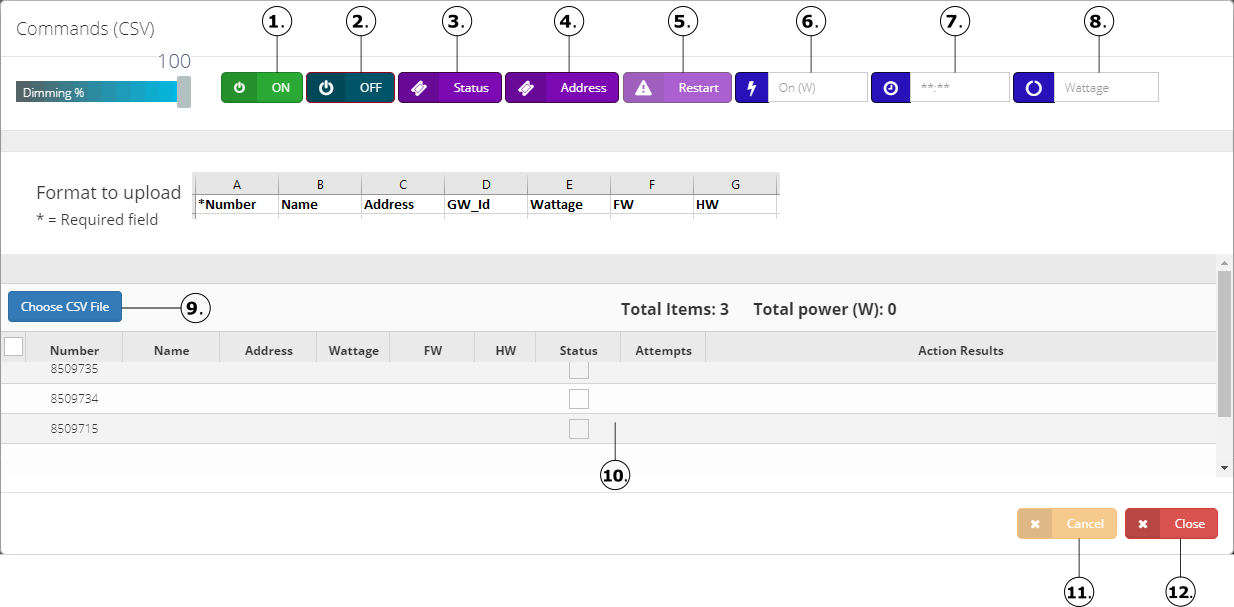
- The button allows turn ON the fixture, indicates the percentage of dimming to be applied.
- The successful response when sending this command will be shown in the column titled Action results of the fixture table, indicating that the fixture is turned ON successfully according to the percentage of dimming set (on(%)).
- NOTE: If the dimming percentage is not indicated, the fixture will not turn ON.
- The button allows turn OFF the fixture.
- The successful response when sending this command will be shown in the column titled Action results of the fixture table, indicating that the fixture is turned OFF successfully (off(0%)).
- The button allows obtaining the status of the fixture, such as the current power (PW), the wattage (WATTAGE), the datetime (DATE), the firmware version (FW) and hardware version (HW) respectively.
- The successful response when sending this command will be shown in the column titled Action result of the fixture table, indicating that the fixture obtained information of its status successfully.
- The button allows obtaining the network address of the fixture, this network address is the value assigned to the Group to which the fixture belongs. This address is used to send group commands.
- The successful response when sending this command will be shown in the column titled Action results of the fixture table, indicating that the fixture obtained the network address id successfully (PA: Public Address).
- The button allows resetting the fixture; this function emulates the disconnection and electrical connection in the fixture.
- The successful response when sending this command will be shown in the column titled Action results of the fixture table, indicating that the fixture was successfully restarted (-).
- The button allows turn ON the fixture with the number of watts entered in the text area of this button.
- The successful response when sending this command will be shown in the column titled Action results of the fixture table, indicating that the fixture is successfully turned ON according to the watts entered.
- The button allows sending the time entered in the text area (24hrs format). The current date is also included in sending this command.
- The successful response when sending this command will be shown in the column titled Action result of the fixture table, indicating that the fixture set the time successfully according to the time entered.
- The button allows sending the maximum wattage in watts to which the fixture can be turned ON. The desired power should be entered in the text area.
- The successful response when sending this command will be shown in the column titled Action results of the fixture table, indicating that the fixture was successfully set to wattage according to the input wattage in watts.
- NOTE: It is important to know the maximum wattage of each fixture, if a wattage greater than its maximum wattage is entered, the fixture will stop working.
- The button allows to reload the content of a CSV file.
The table allows seeing the selected fixtures, shows the serial number, the name of the Gateway and the Group to which it belongs, as well as a results box where indicates if the operation of the command that was sent was successful.
The button allows cancel sending commands in case is no longer wanted.
- The button allows closing the command window when it is no longer desired.
NOTE
If a command is sent (commands described in points 1 to 8) and there is no response, then the Communication error message will be displayed in the column titled Action results of the fixture table, the error result will be displayed for each of the selected fixtures that do not respond to the sent command.
2.2.2.6.2 Associate/Reassociate
This option allows to associate fixtures from the CSV File to a group.
- Select the Group that is desired to associate.
- Click on the Commands (CSV) button. The button will be show a pop-up window with the allowed commands to send and the associate button option to associate the fixtures previously uploaded from the CSV file.
- Click on the Commands (CSV) button. The button will show a pop-up window with the associate button option that will allow associating to the selected group the fixtures previously uploaded from the CSV file.
- Click on the Associate button that appears on the pop-up window.

- The fixtures previously selected will be listed in a pop-up window, then press the Associate button to perform that action.

- A progress bar will be displayed, with the percentage progress of the action in progress when the fixture has associated successfully.
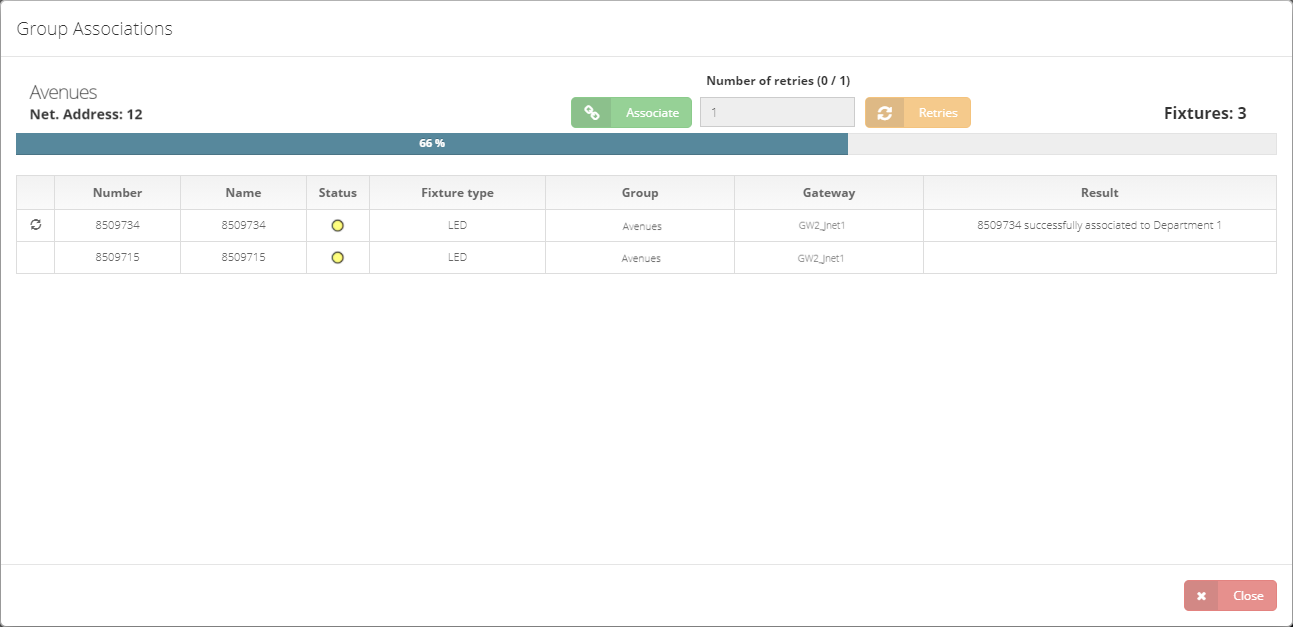
- After completing the process, if the action was successful, in the results column see the message: Successfully Associated or if there was a problem, an Error message will be displayed. To exit the pop-up window, click on the Close button.
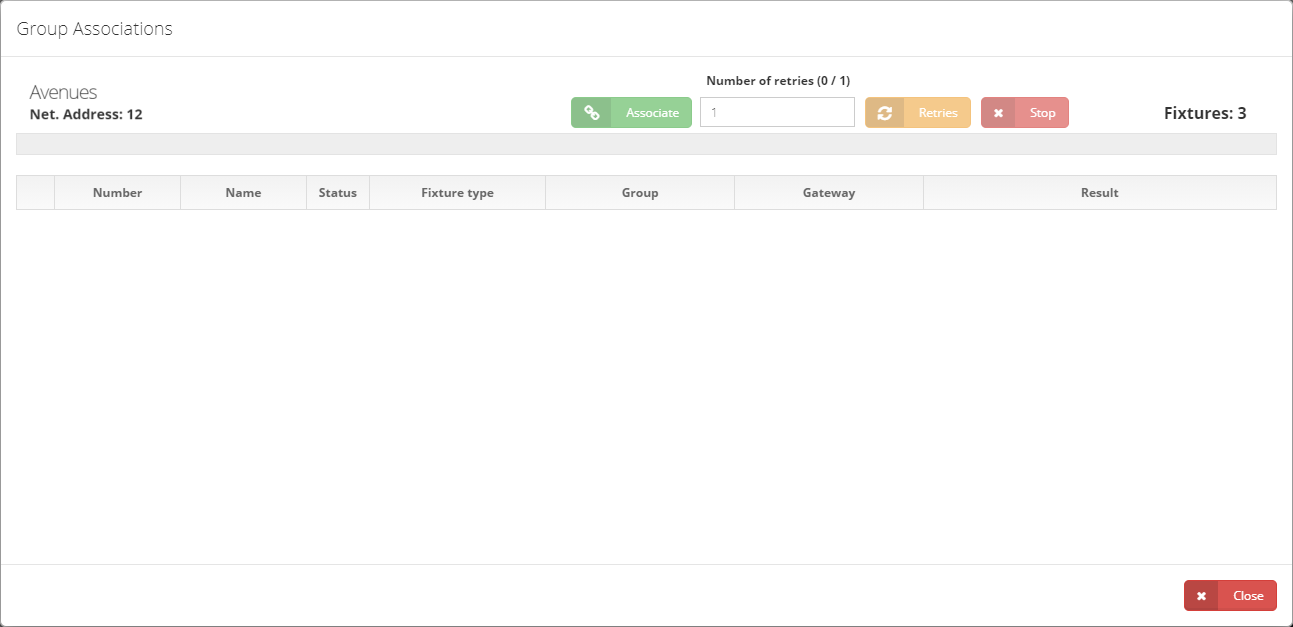
- NOTE: If there was a problem with any fixture in the association process, try to set the number of retries and click on the Retries button for try the association successfully.
- To exit the pop-up window, click on the Close button.